I am surrounded by lists associated with the build project.
Decisions to be made. Materials to purchase. Issues to resolve. Process checklists. To do lists. Items for team discussion.
Action oriented, forward-looking lists. All helpful to manage the project, which is now moving at lightning speed on many fronts.
The pace also means it is easy to let the progress go unnoticed.
Or, for some blog posts to go unwritten.
So one more list, reflecting on some of the key happenings since midwinter, now that we’re solidly in midsummer.
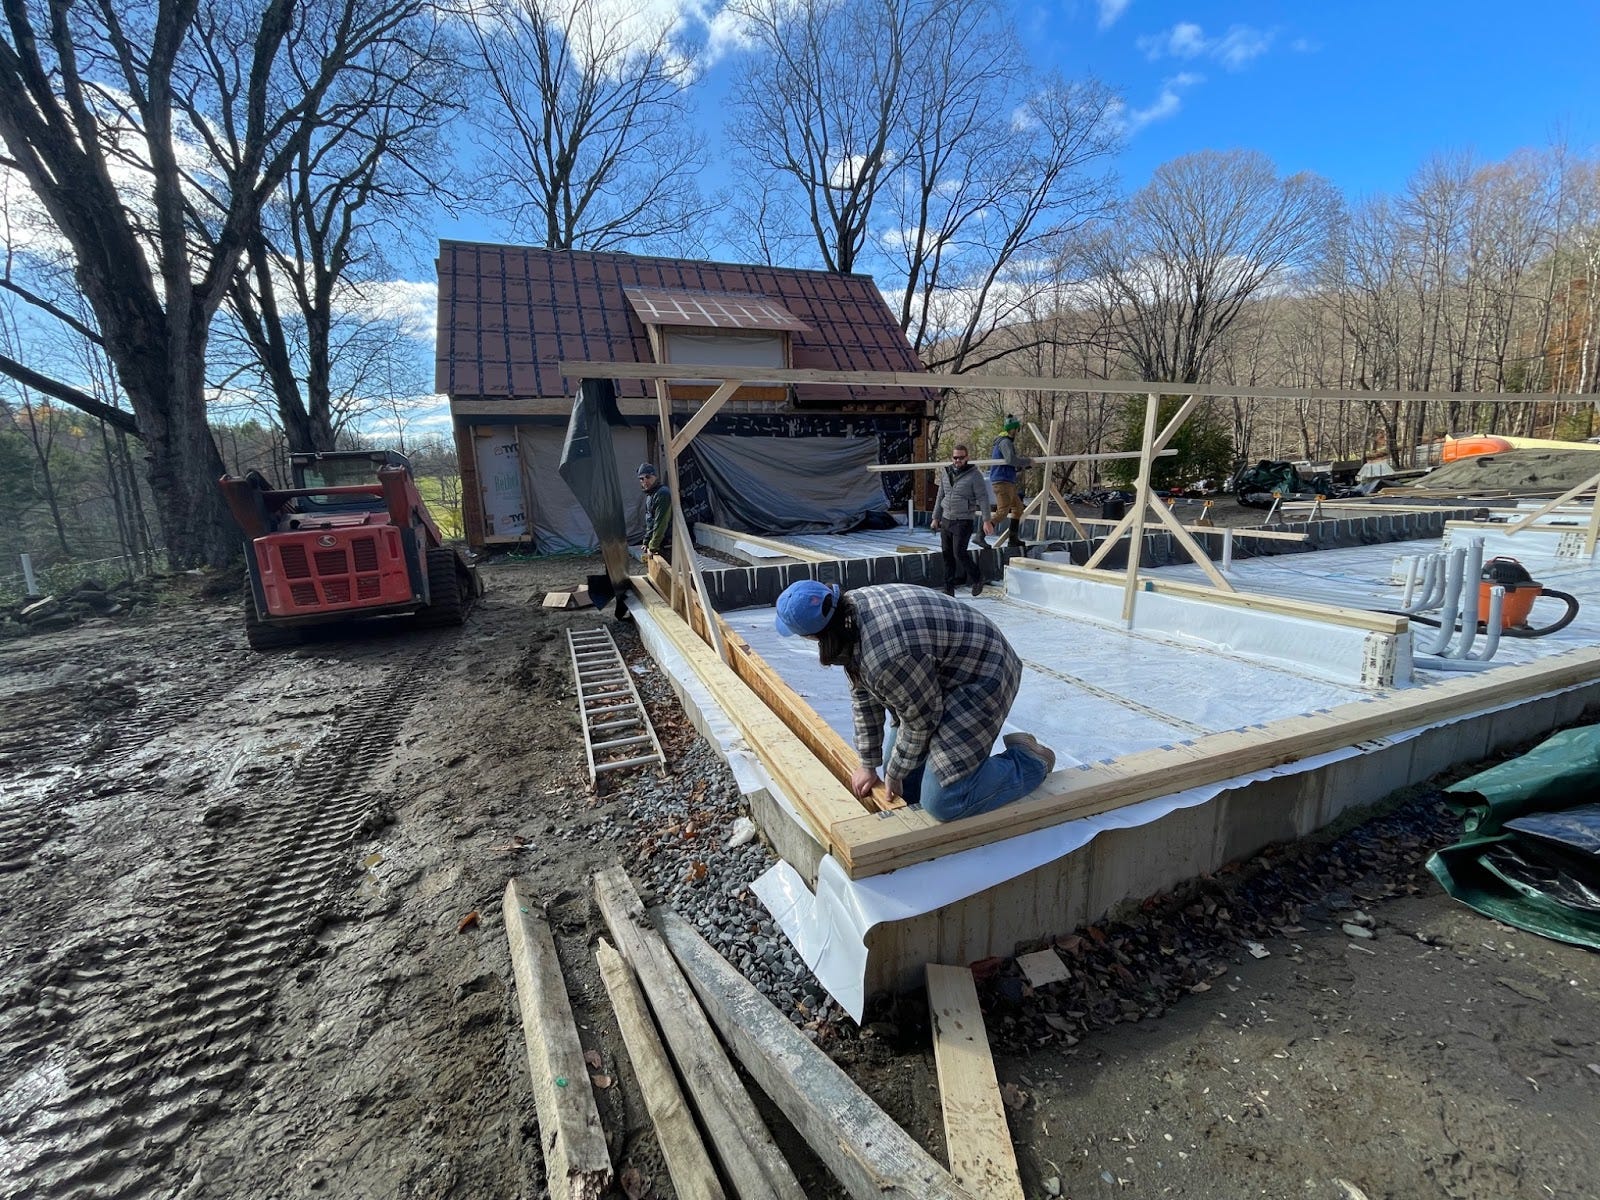
Drying everything out after the addition went up. The addition went up when there was a lot of snow coming down. So, the first order of business was drying out the inside. Three industrial sized dehumidifiers and three industrial electric heaters/fans with hoses extending like elephant trunks around the inside, plus a month of time, and we were good to go! First electric bill we paid in a long time (our solar array production usually more than covers for electric use of the current house, though we should get much closer to actual usage when the house is fully operational).
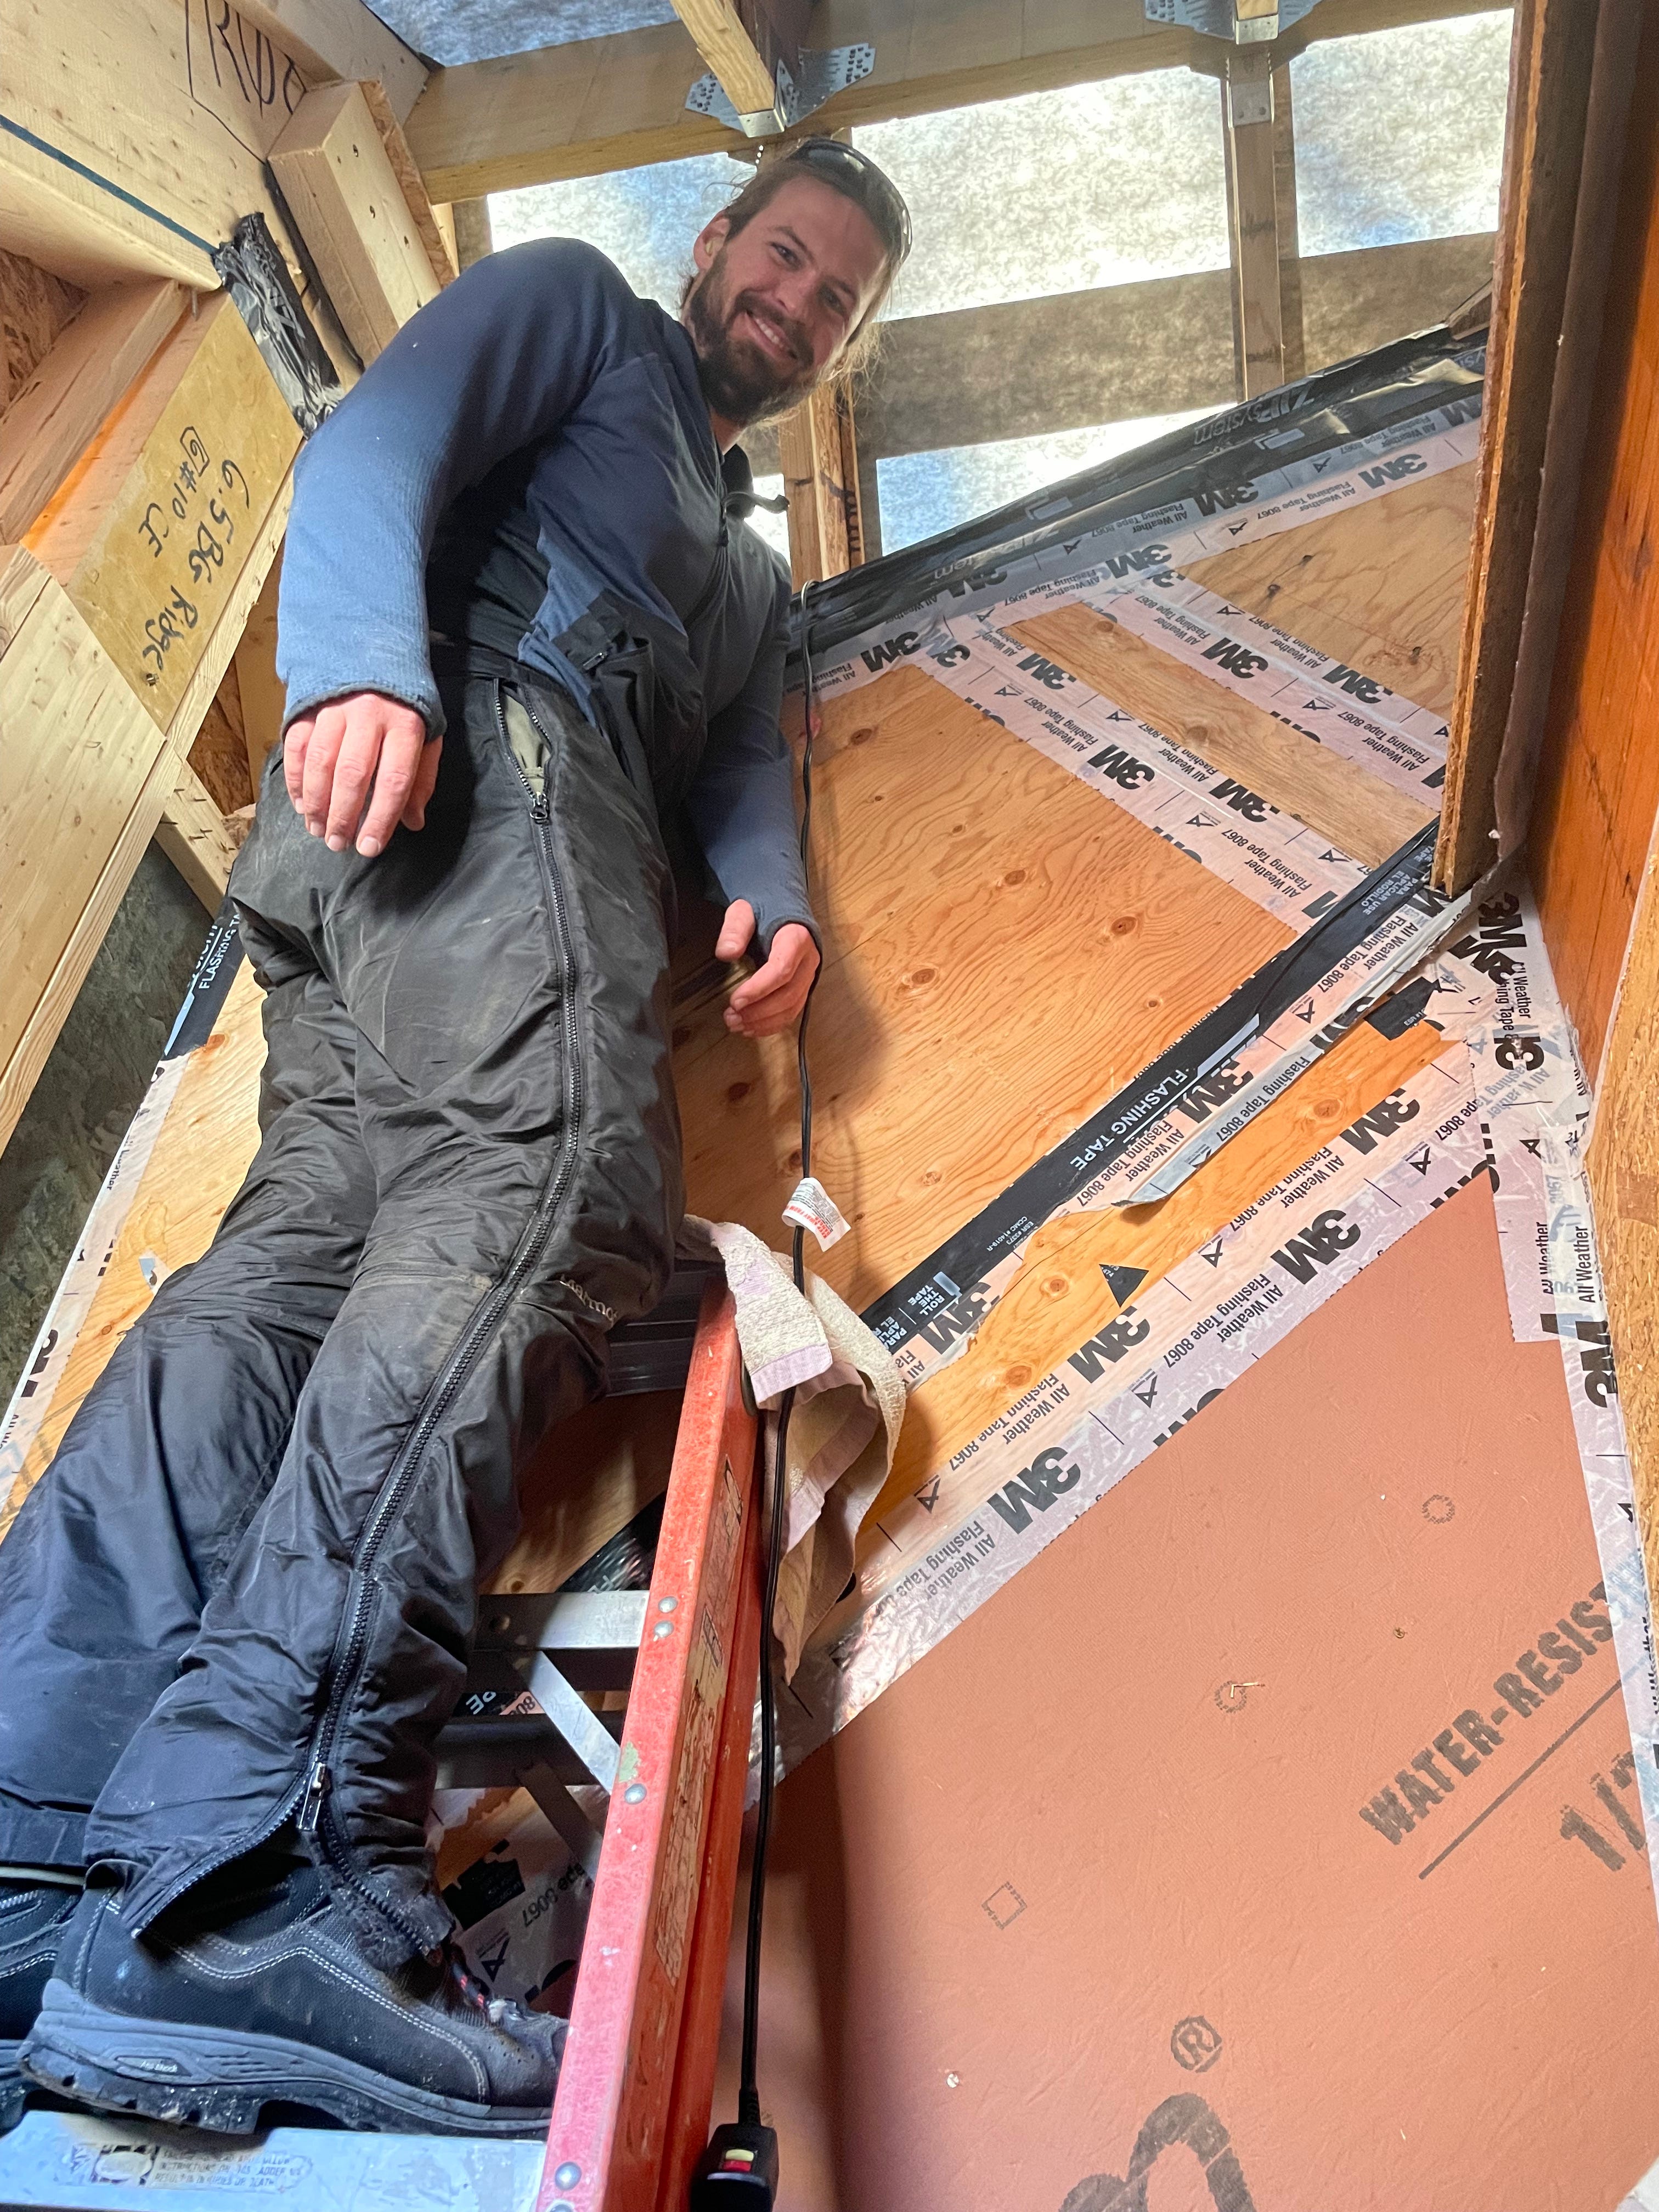
Tying together the original house and addition at roof. The addition and original house lined up perfectly on the first level, a testament to Bensonwood’s precision. At the upper level, the roof line of the addition was carried over to meet the roofline of the original house.
The wall to Skye’s left is the addition that Bensonwood constructed. In front of him is the new roof on the original house, and over his head is the newly framed roof, with the sun shining on the water resistant barrier above. After some more roof decking and insulation, the connection of the House that Moses Chaplain Built to the new addition was complete.
Thanks for reading Green Dream Stories! Subscribe for free to receive new posts and support my work.
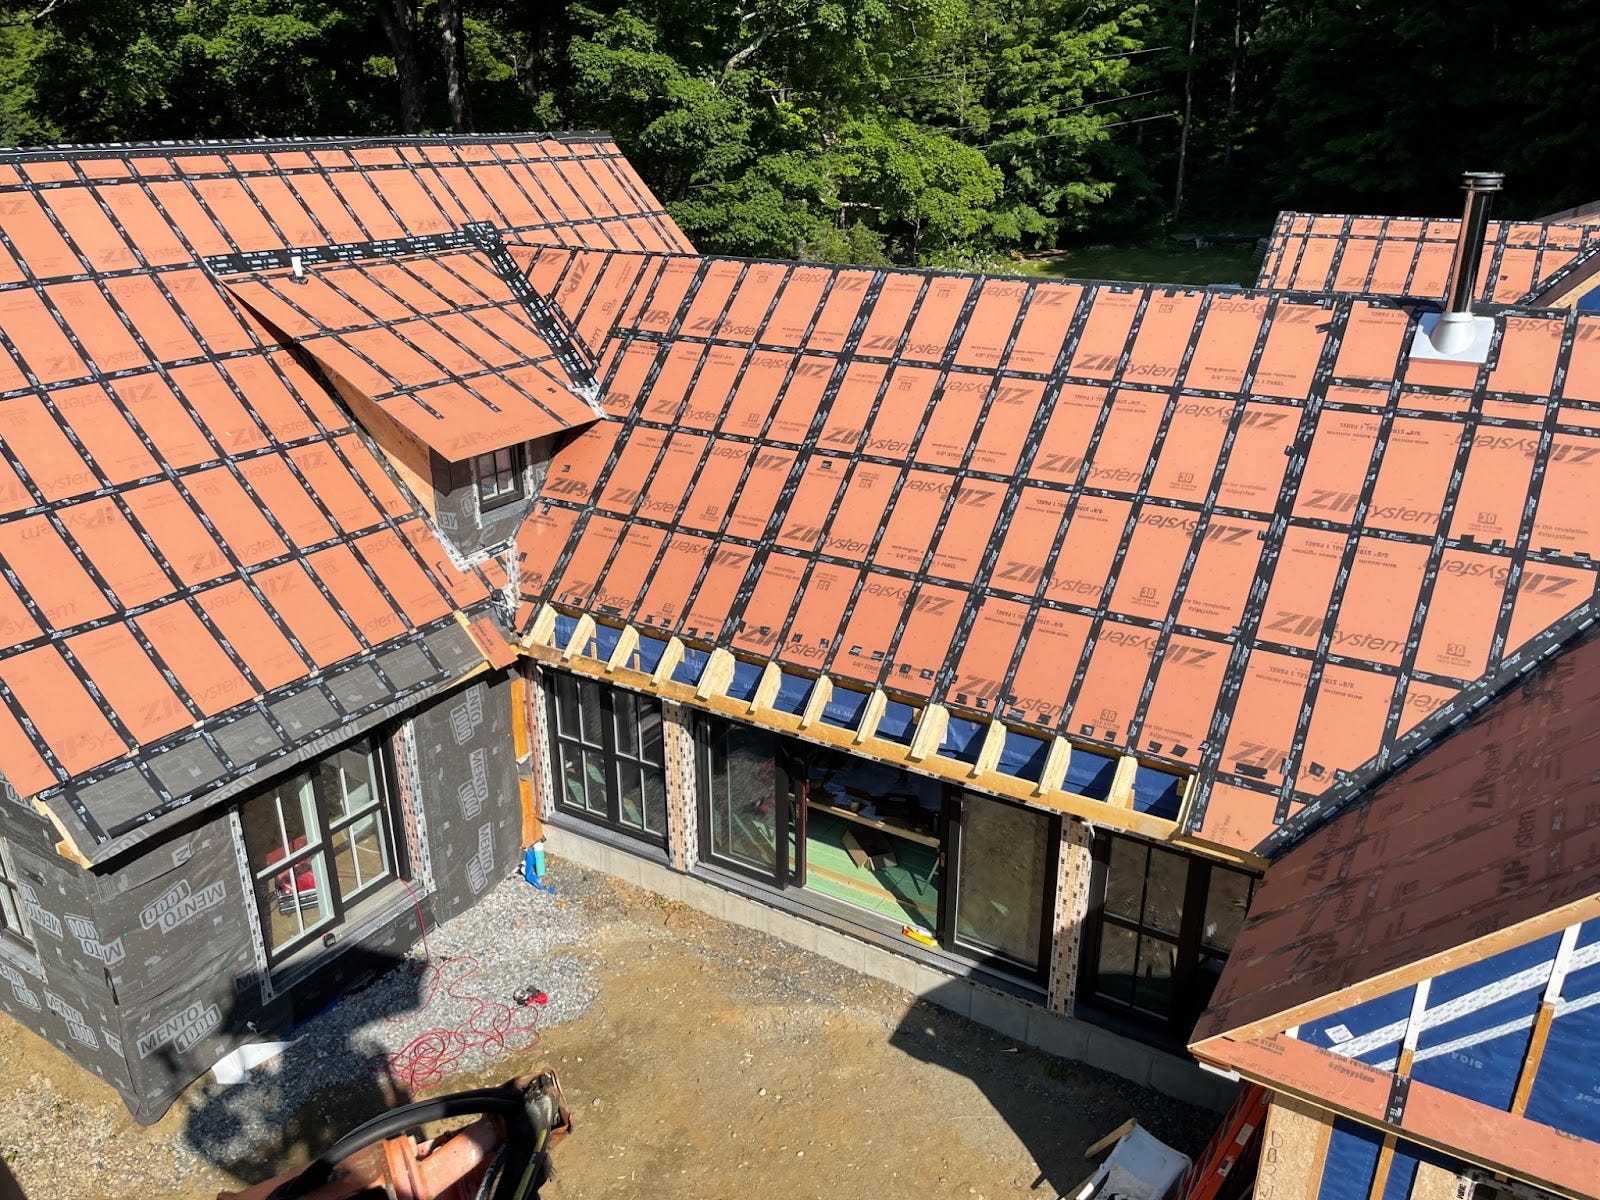
Stopped leaks in the addition roof, and finished primary air sealing of the addition. After Bensonwood finished erecting the addition, some areas of the roof deck were not water tight (as a winter rainstorm made abundantly clear). Further, some places where the house panels came together were not airtight. The Snowdog team used lots of Zip tape (to better seal ridge, valleys, and various points on the roof deck) to get the roof dried in until we could get the final roof on. Bensonwood and Snowdog collaborated to identify and seal the air leaks.
The black lines on the roof is the tape used to seal all the likely leak areas (between roof panels, on nail lines, in the valleys, spots where the deck may have been slightly damaged–doesn’t take much to let water get by). We’ve been dry ever since.
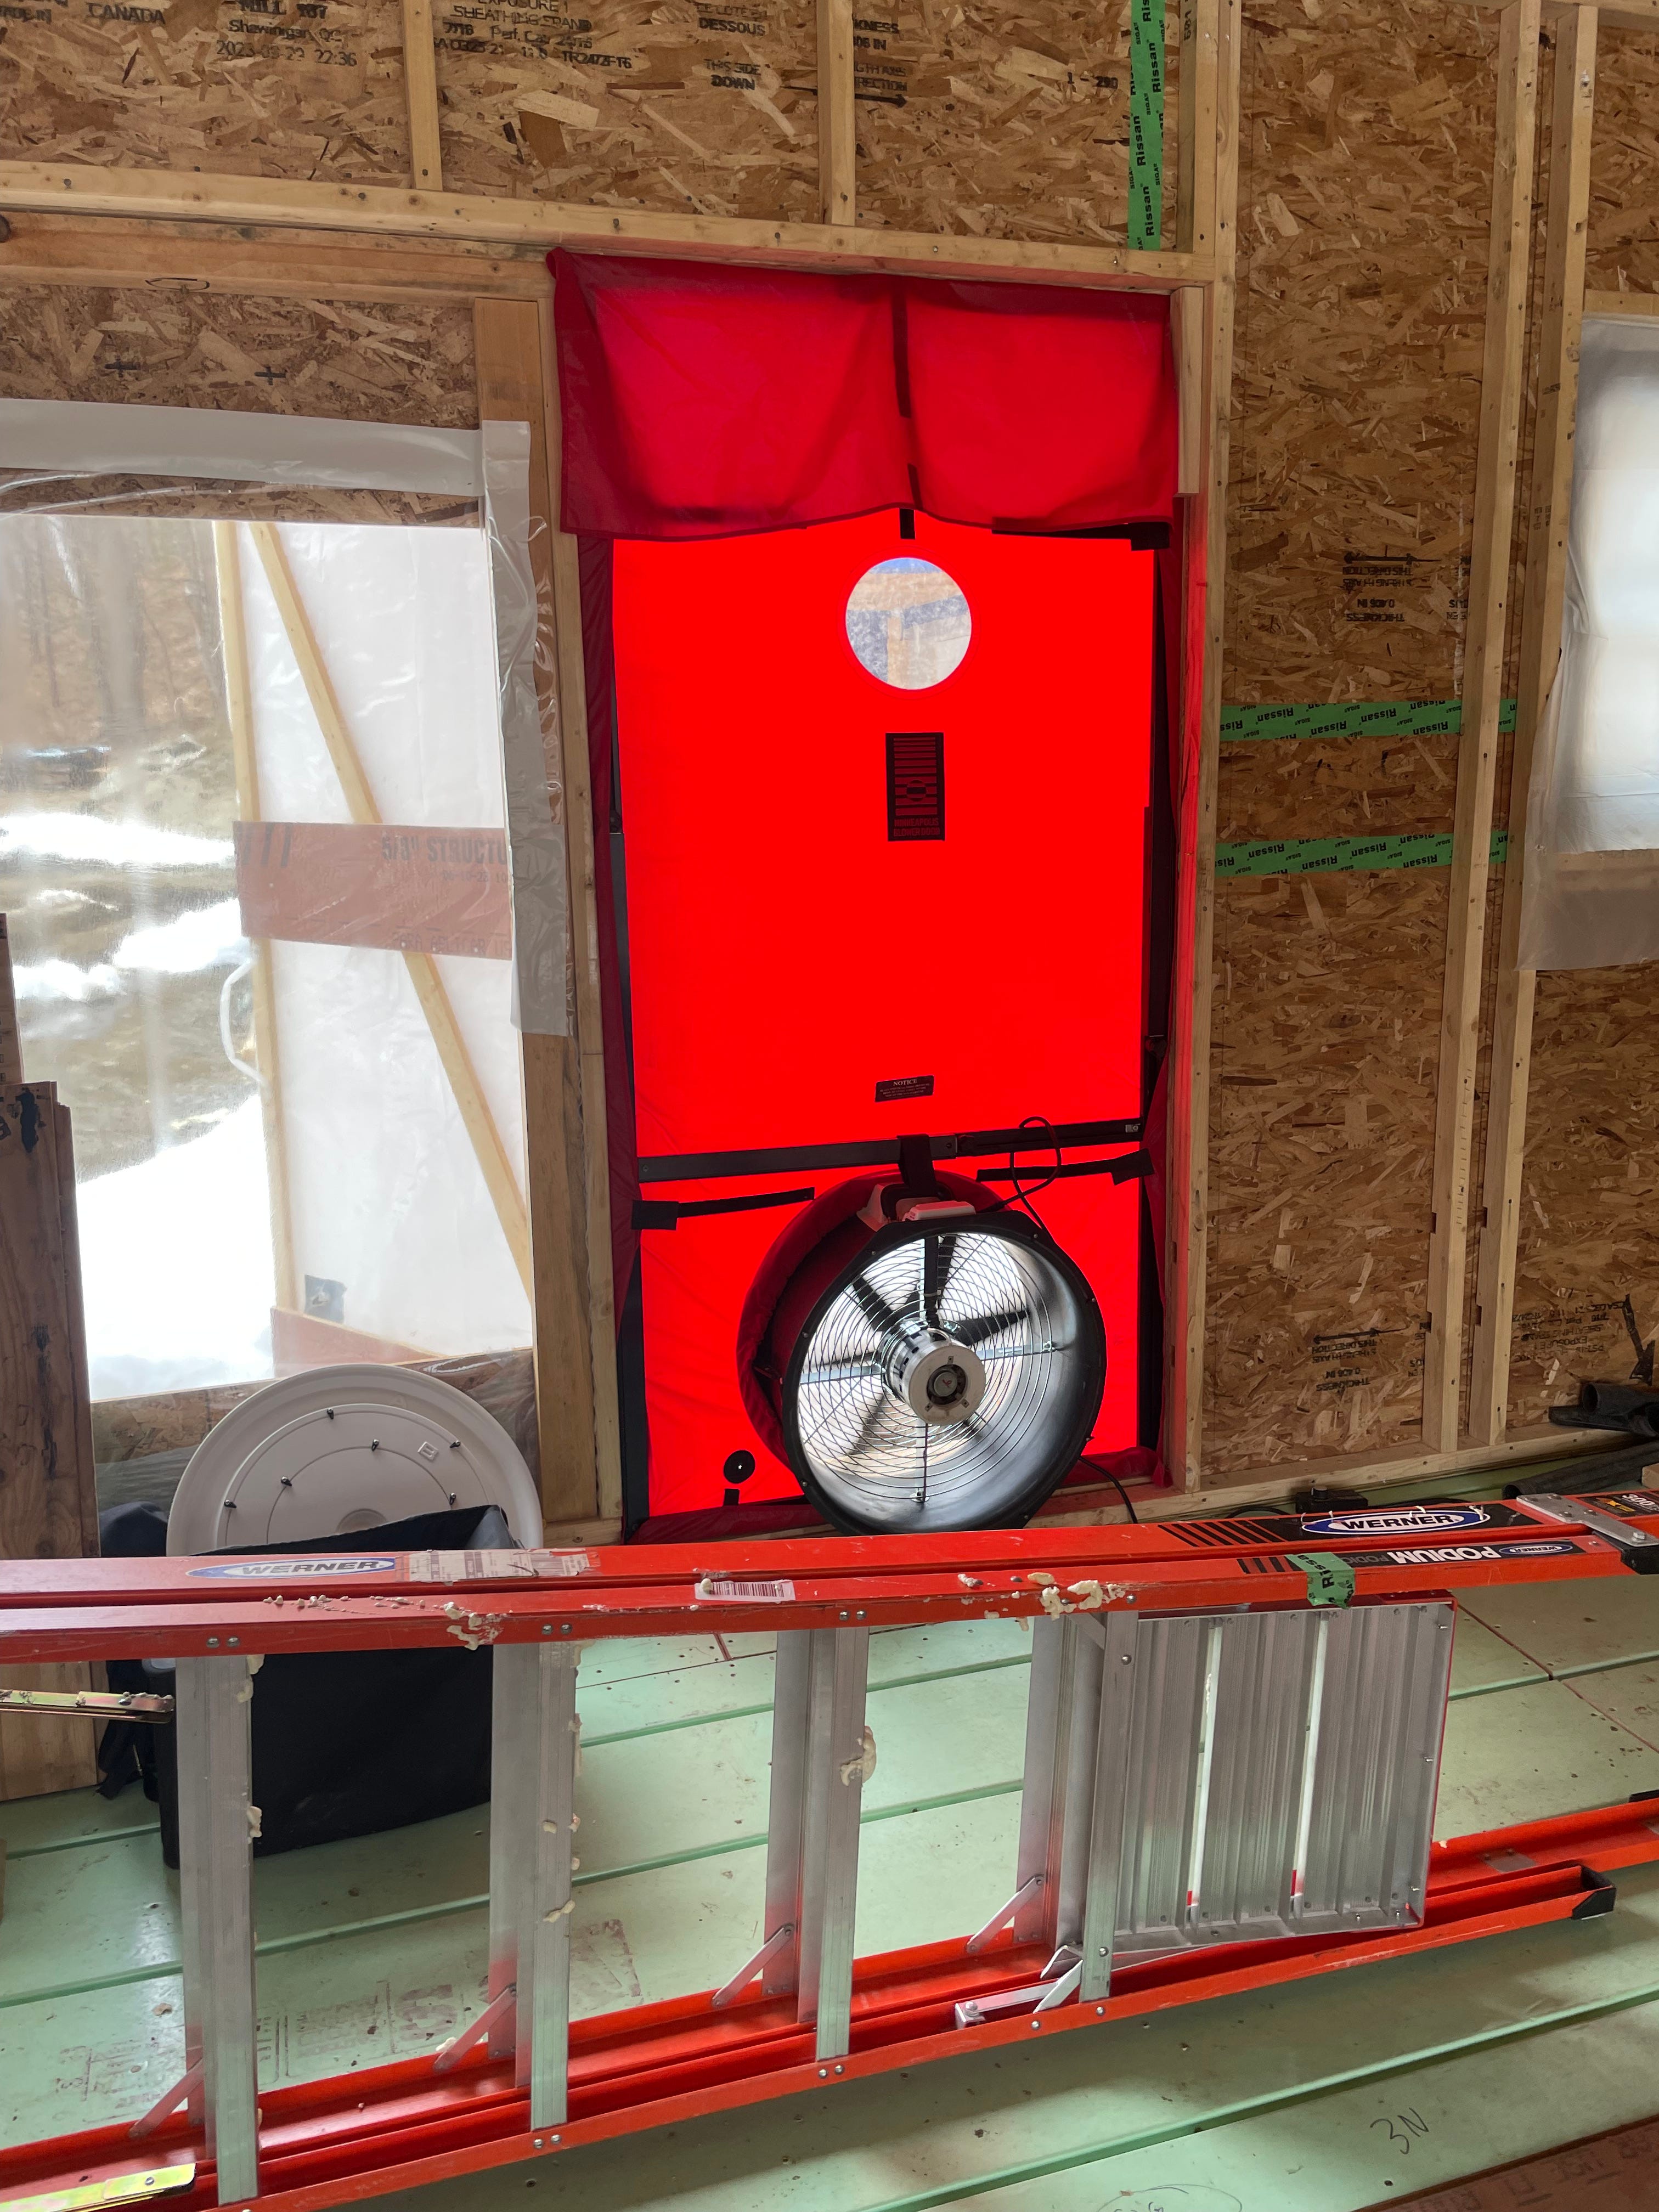
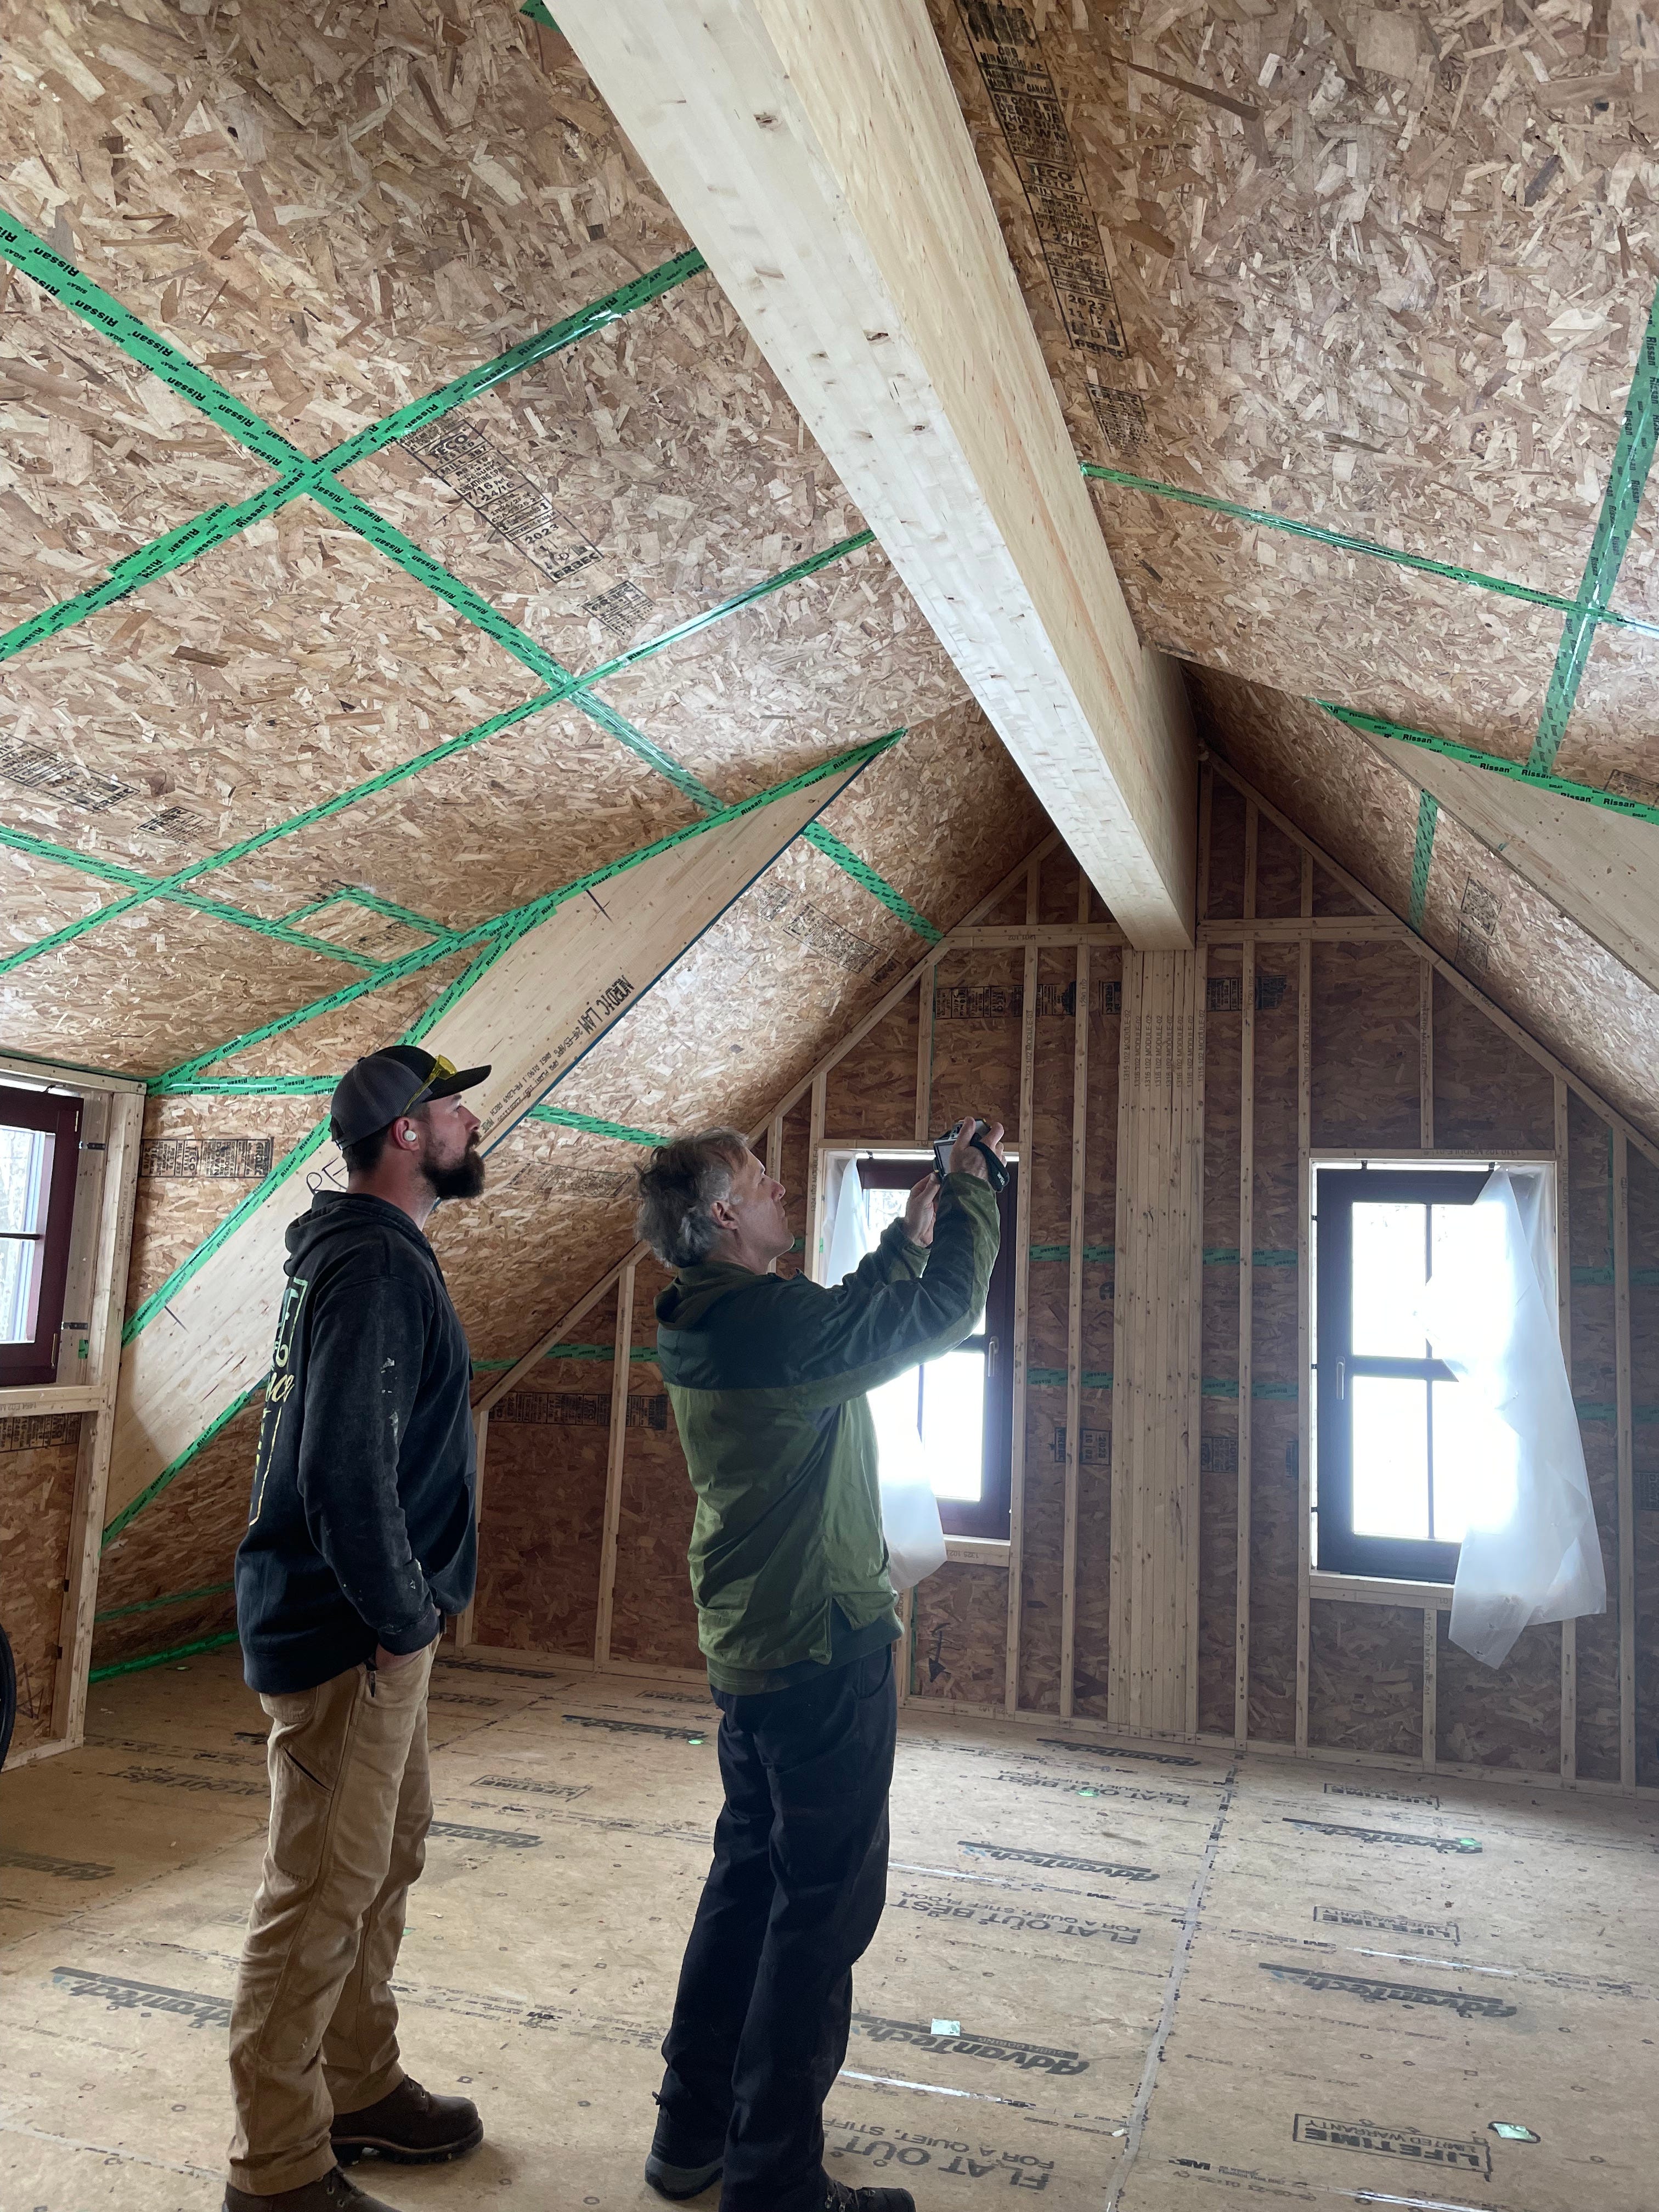
After covering up the window and door openings, the blower door depressurizes the house, causing outside air to come in through any leaks in the building envelope.
In most cases, you can just feel the cold (at the time of year) air coming in when the blower is running. Above, Tommy from Bensonwood found one.
And the thermal imaging camera will spot the rest (above, Michael and Tommy are using the camera to find another leak). Tape, caulk, backer rod, and a judicious use of spray foam took care of all the air leaks. We will use another blower door test after we have addressed any penetrations for wires and vents to get a quantitative number and ensure we meet our airtightness goal.
Insulated addition floor system, and laid down subfloor for radiant flooring
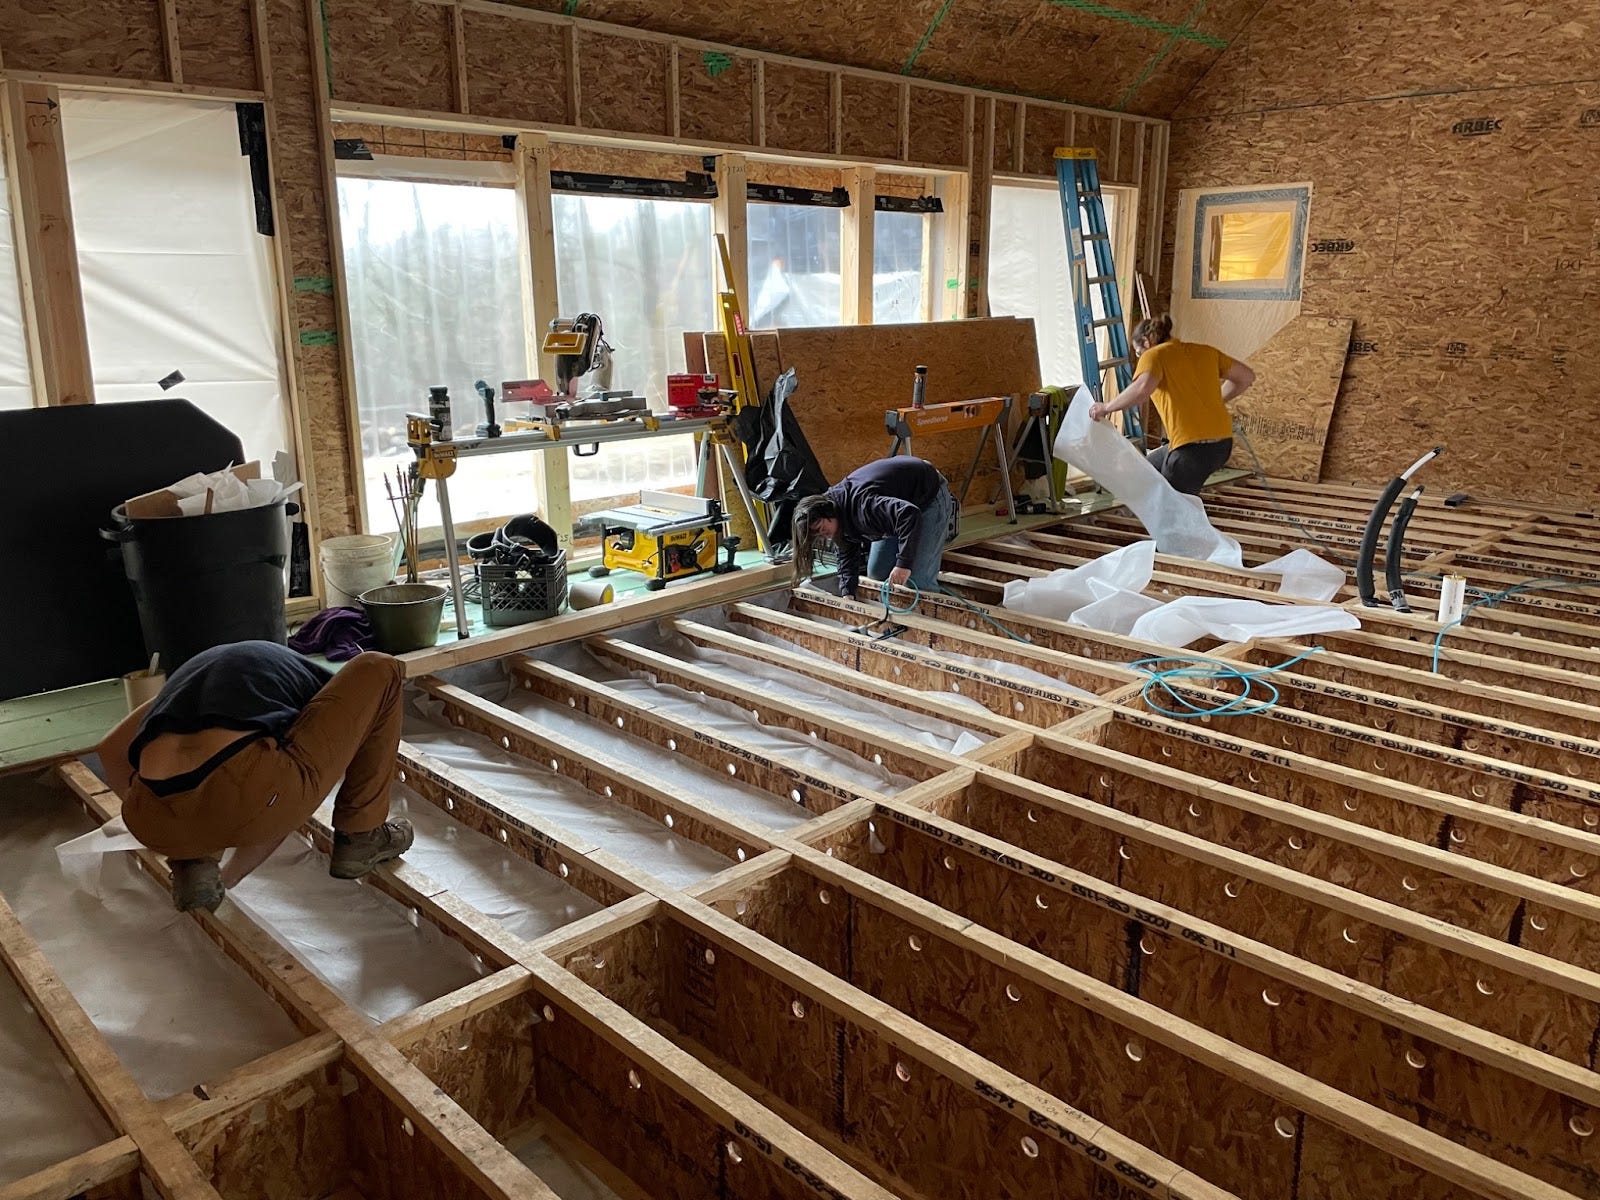
The floor system in the addition utilizes a “slabless slab on grade” approach. The picture above shows the skeleton of that system going in last fall. A double layer of strong vapor barrier material runs on top of and then down the concrete foundation wall, across a sand layer at grade, and then back up the other side, creating a robust vapor (and radon) barrier. Joists hang from the plate that sits on top of the concrete foundation walls–Nell is hanging one in the above photo. After the building was up and weathered in/dried out, the next steps could start.
Dylan, Nell and Skye hard at work getting ready for insulating the floor system in the great room. The holes in the joists will allow conditioned air to flow freely just under the subfloor when connected to the HVAC system, which we have engineered into the design in case any drying is ever needed.
The floor system below the ventilated space was dense packed with cellulose, as Skye is doing here. This system eliminates the concrete slab (and its high embodied carbon), and takes advantage of the carbon sequestering and insulating properties of cellulose (“slab” below floors is insulated to about R-50). Finally, the subfloor (the sea green material Skye is standing on) was installed over the insulated floor system. This product is Warmboard-S, a thick plywood subfloor with channels to run tubing for radiant heating, and a thin layer of aluminum on top to allow for good heat distribution across the whole panel.
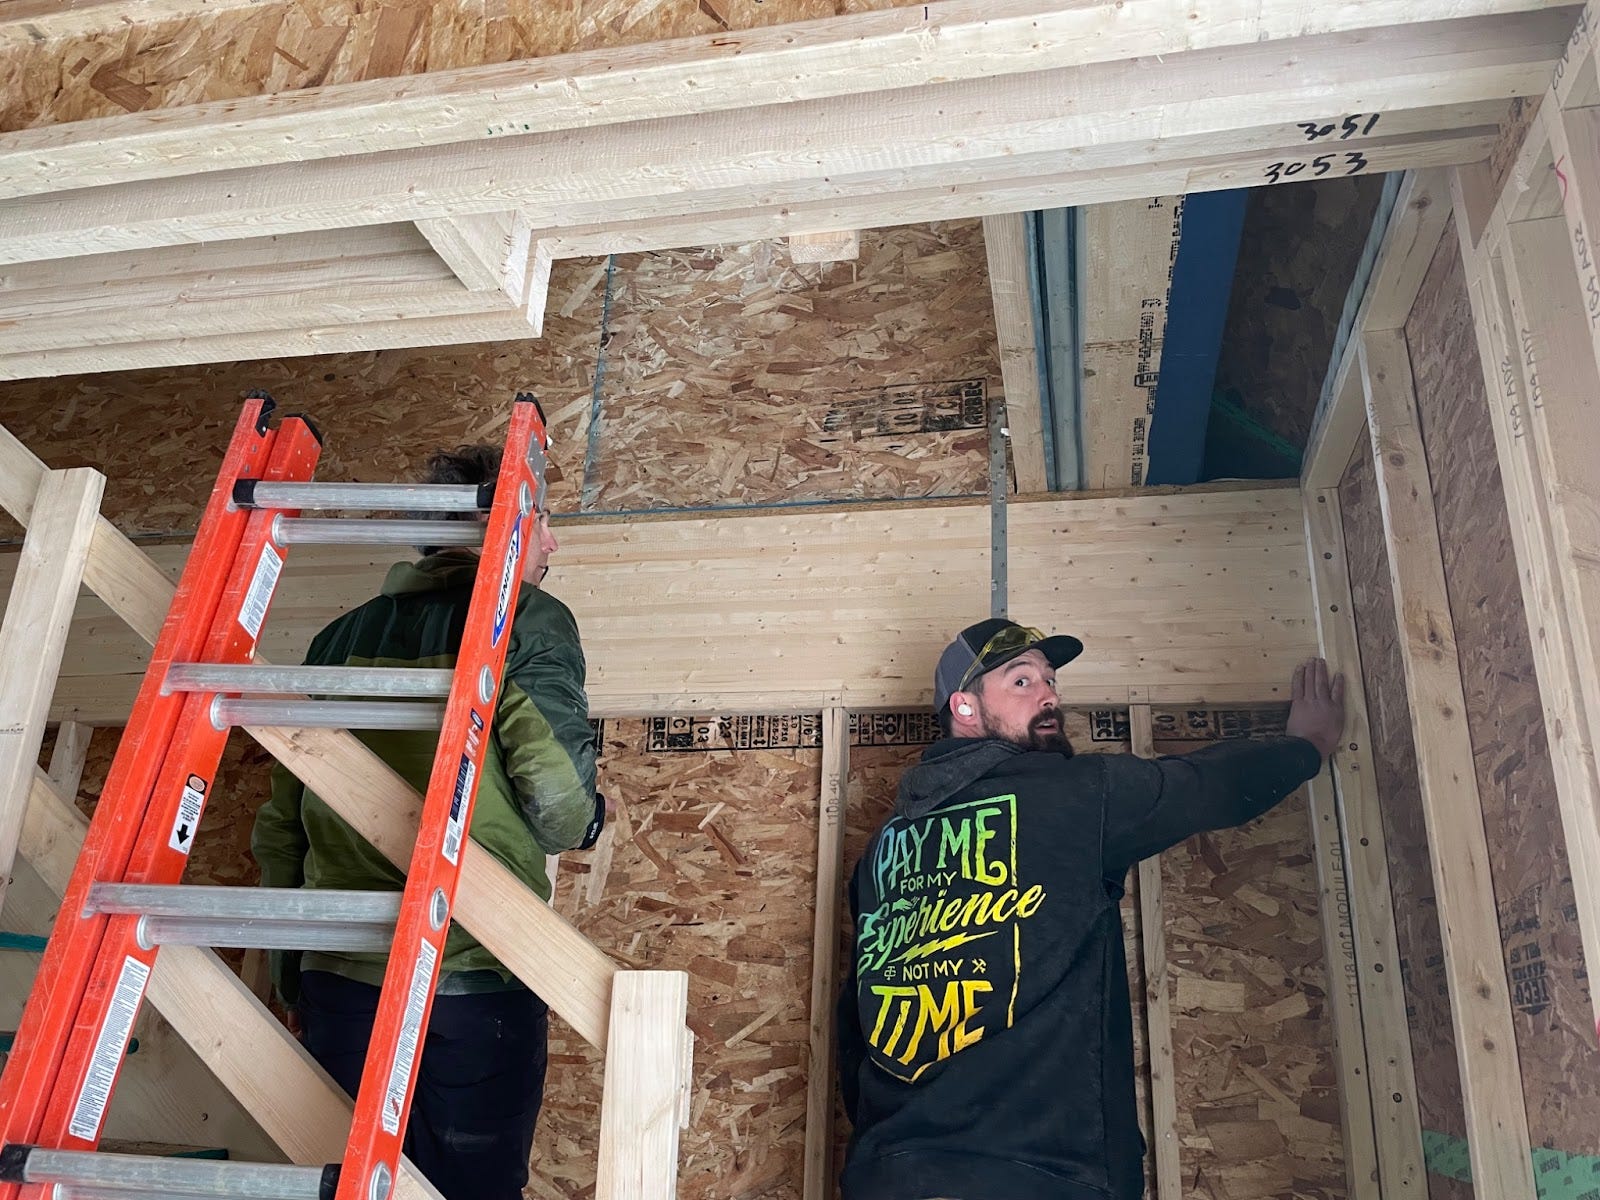
Framed interior walls on top of subfloor. This gave us a real sense of the layout and scale. It also meant the electricians and plumbers could do their rough-in work to get us ready for sheetrock.
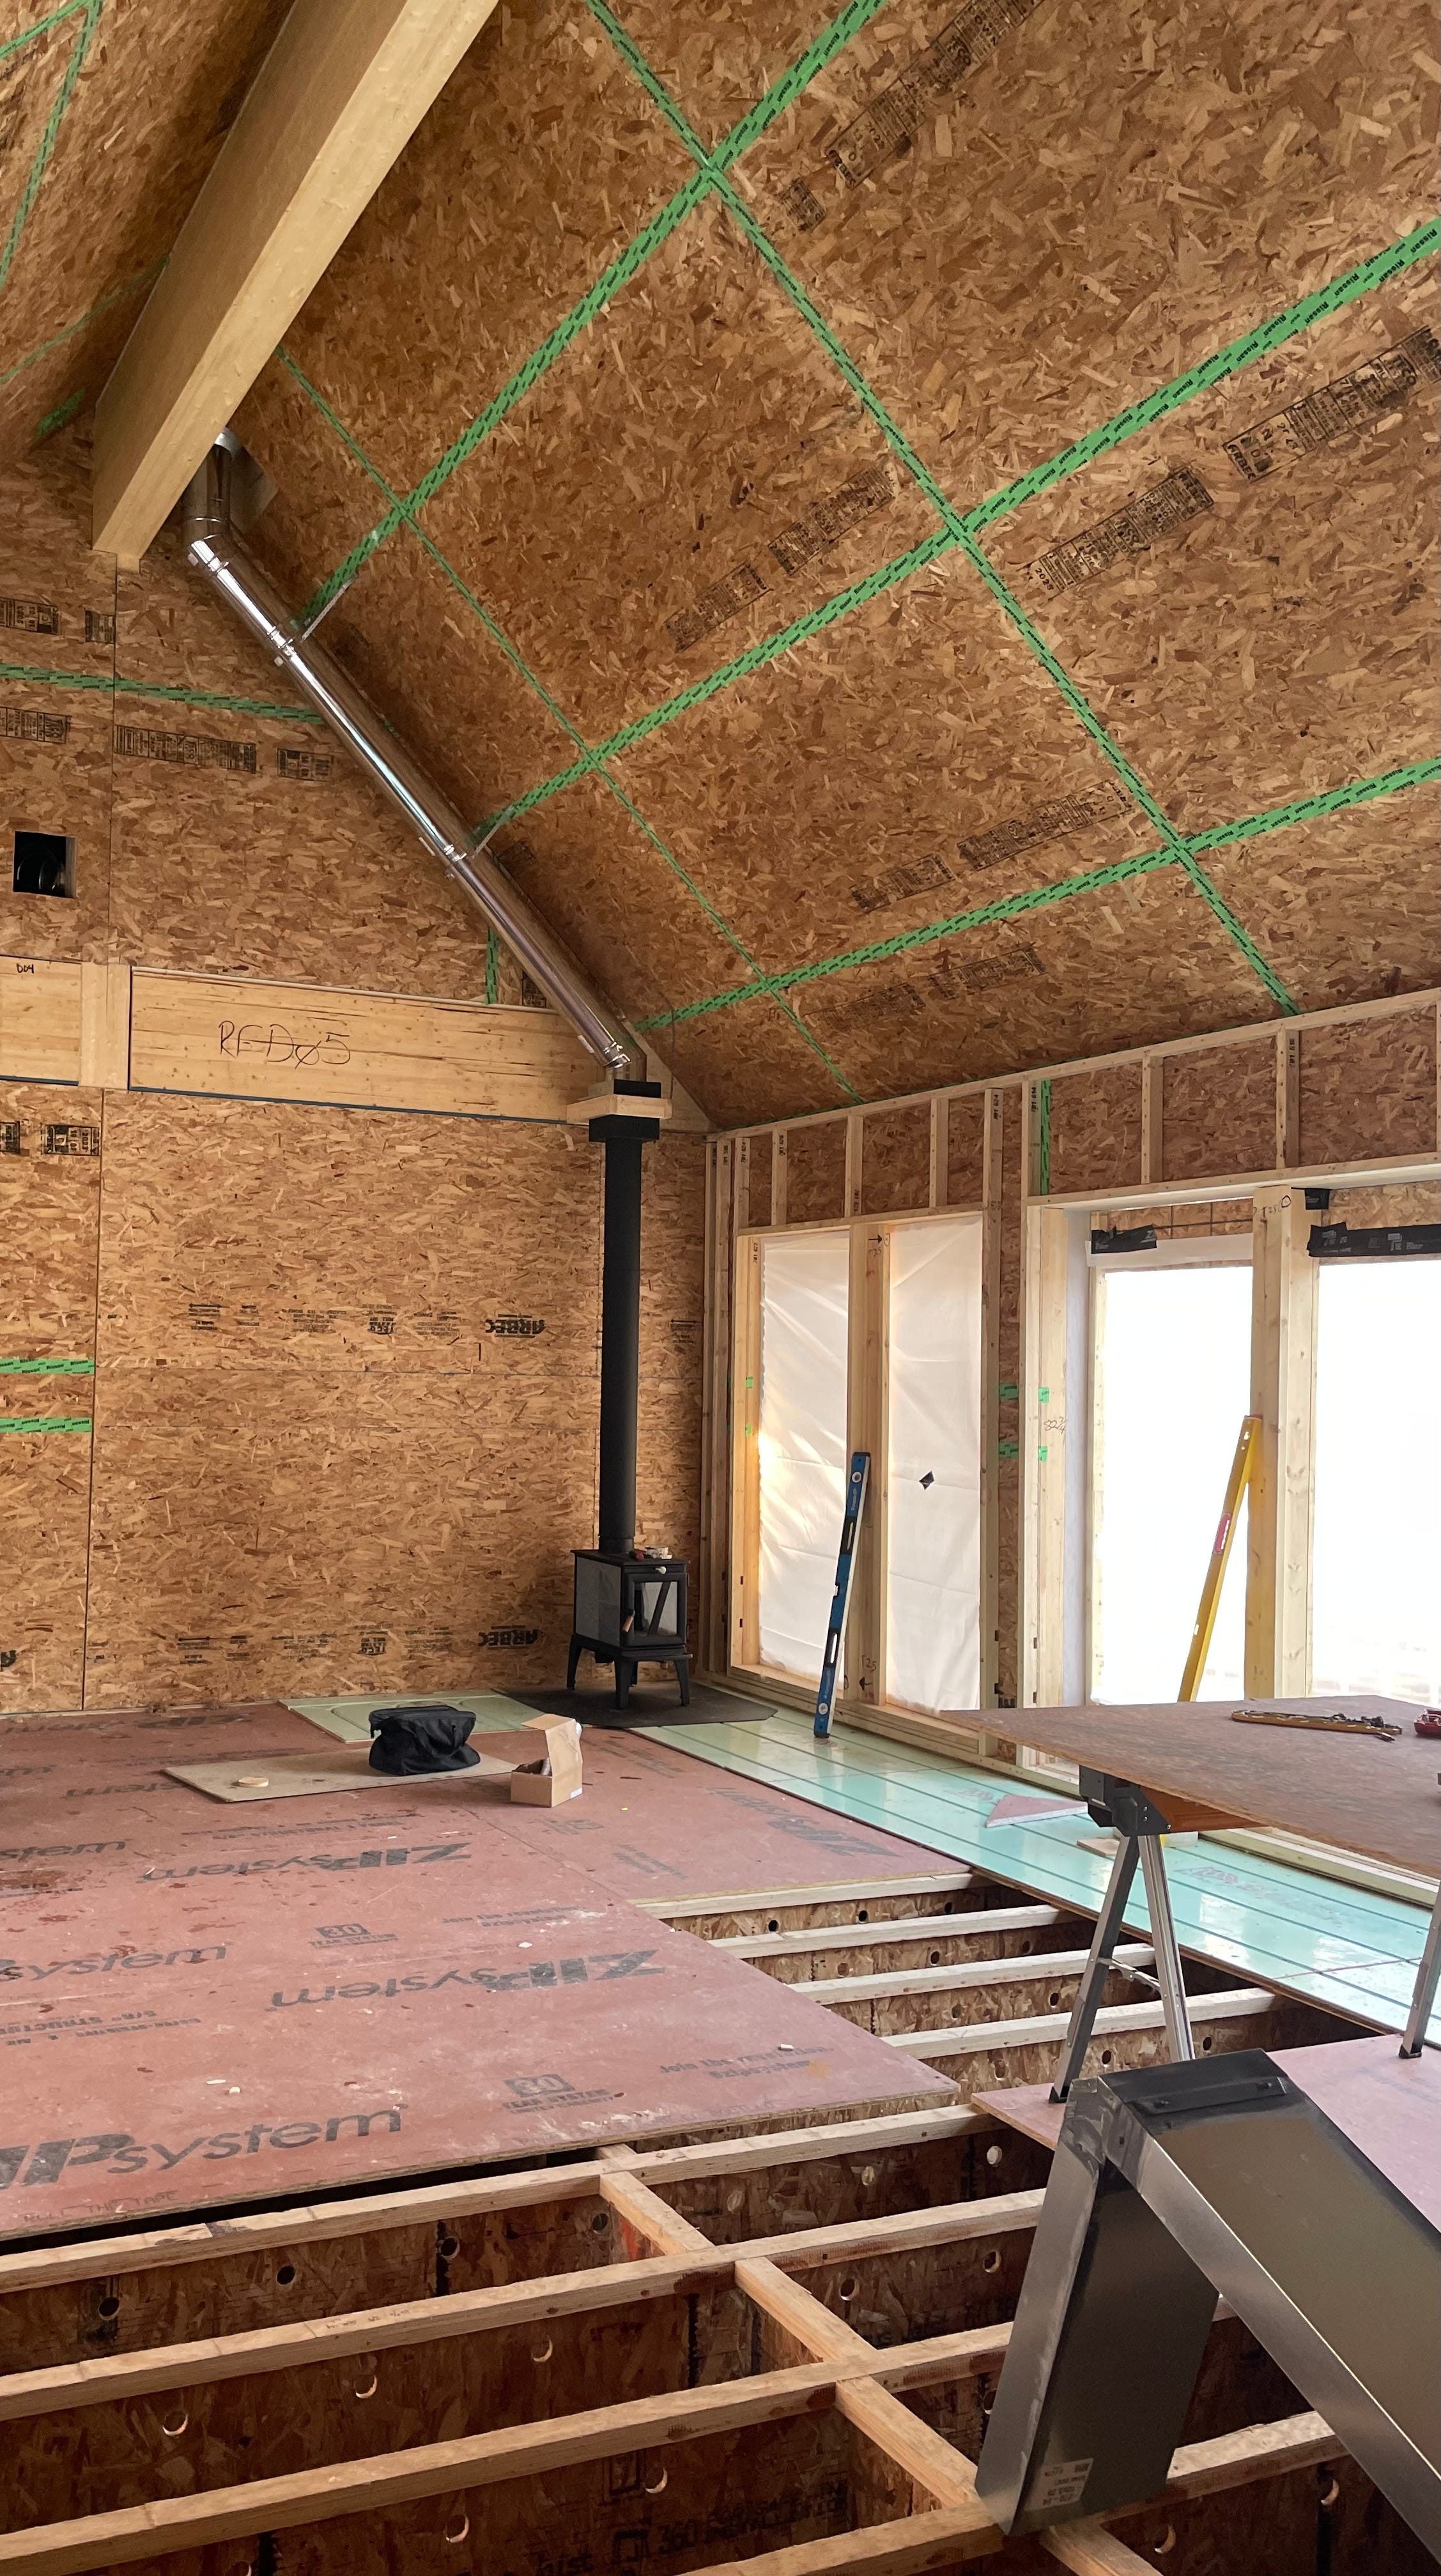
Woodstove installed
The Hearthstone Lincoln stove, shown in the corner above, is one of the smallest/lowest output EPA rated stoves on the market, which was necessary because the great room needs very little heat due to the air tightness and high insulation values. While it will mostly be an art piece, the stove will also serve as backup heat in the instance of a long power outage. Not visible in this photo, a duct runs from the bottom of the stove combustion chamber to an outside wall, providing external combustion air avoiding backdraft when lit. This is important in a well airsealed home.
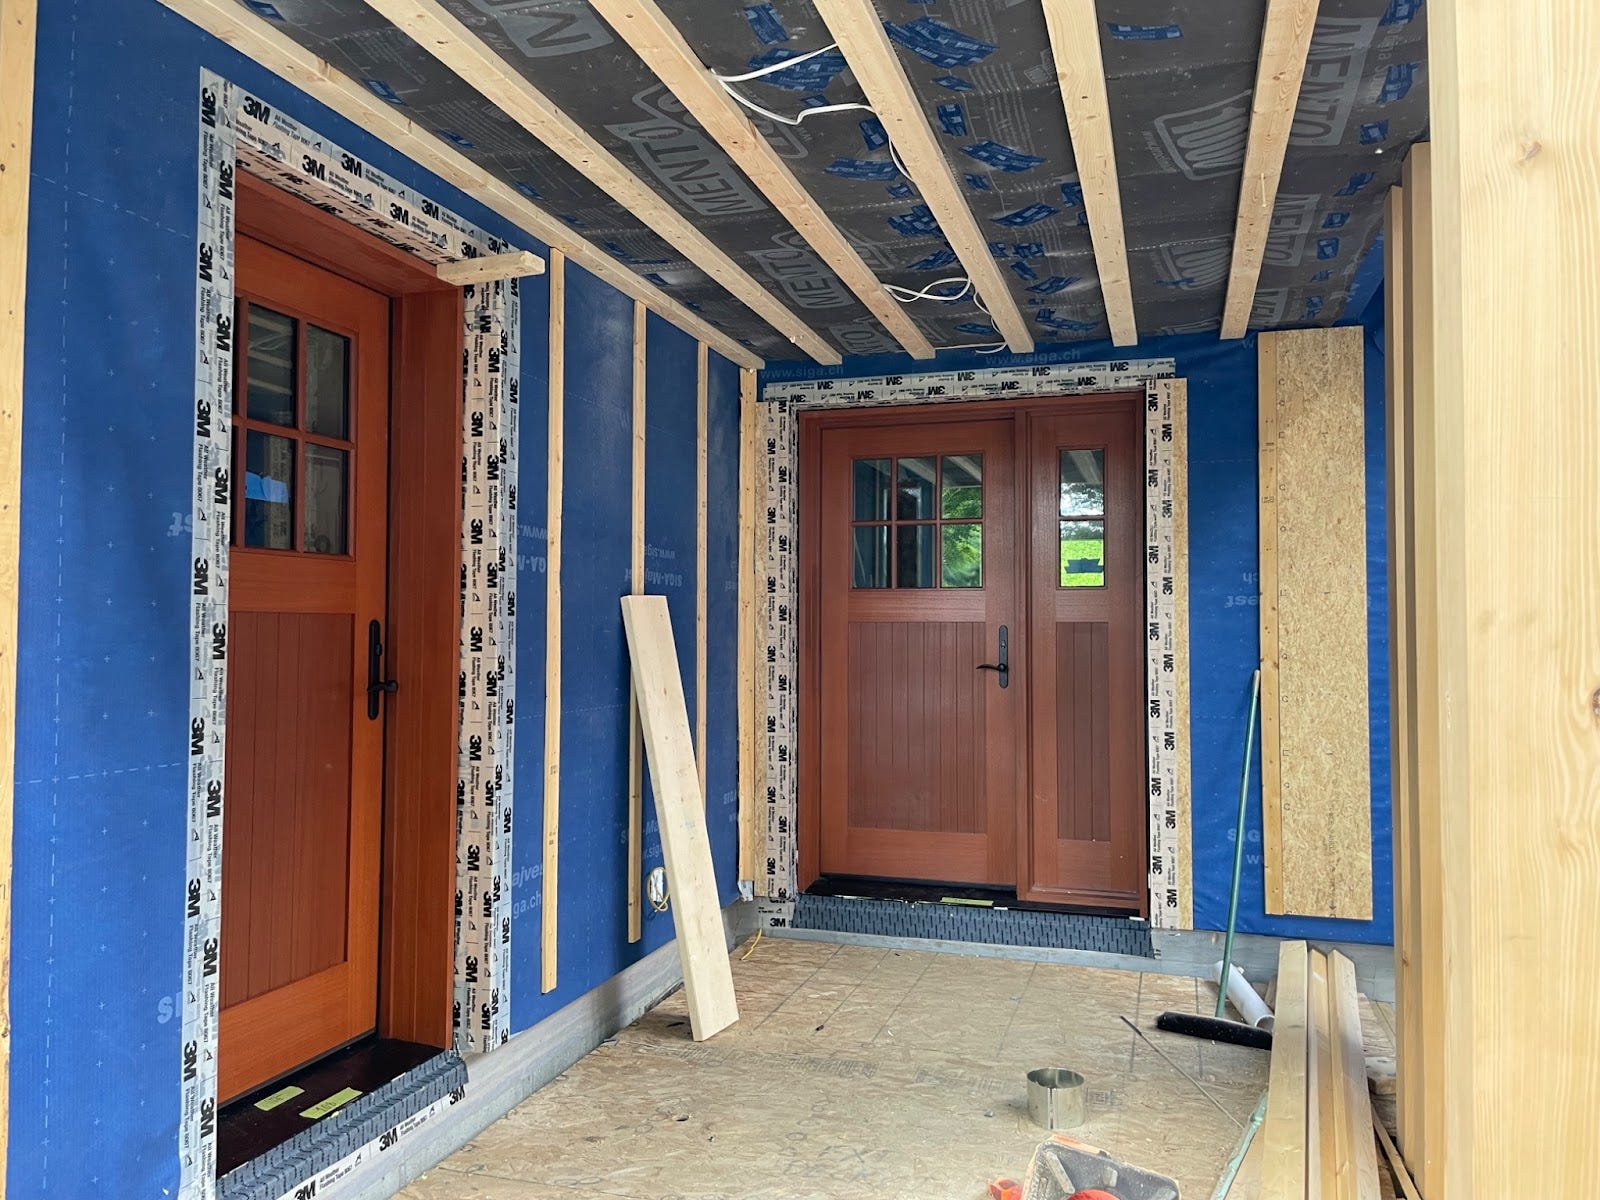
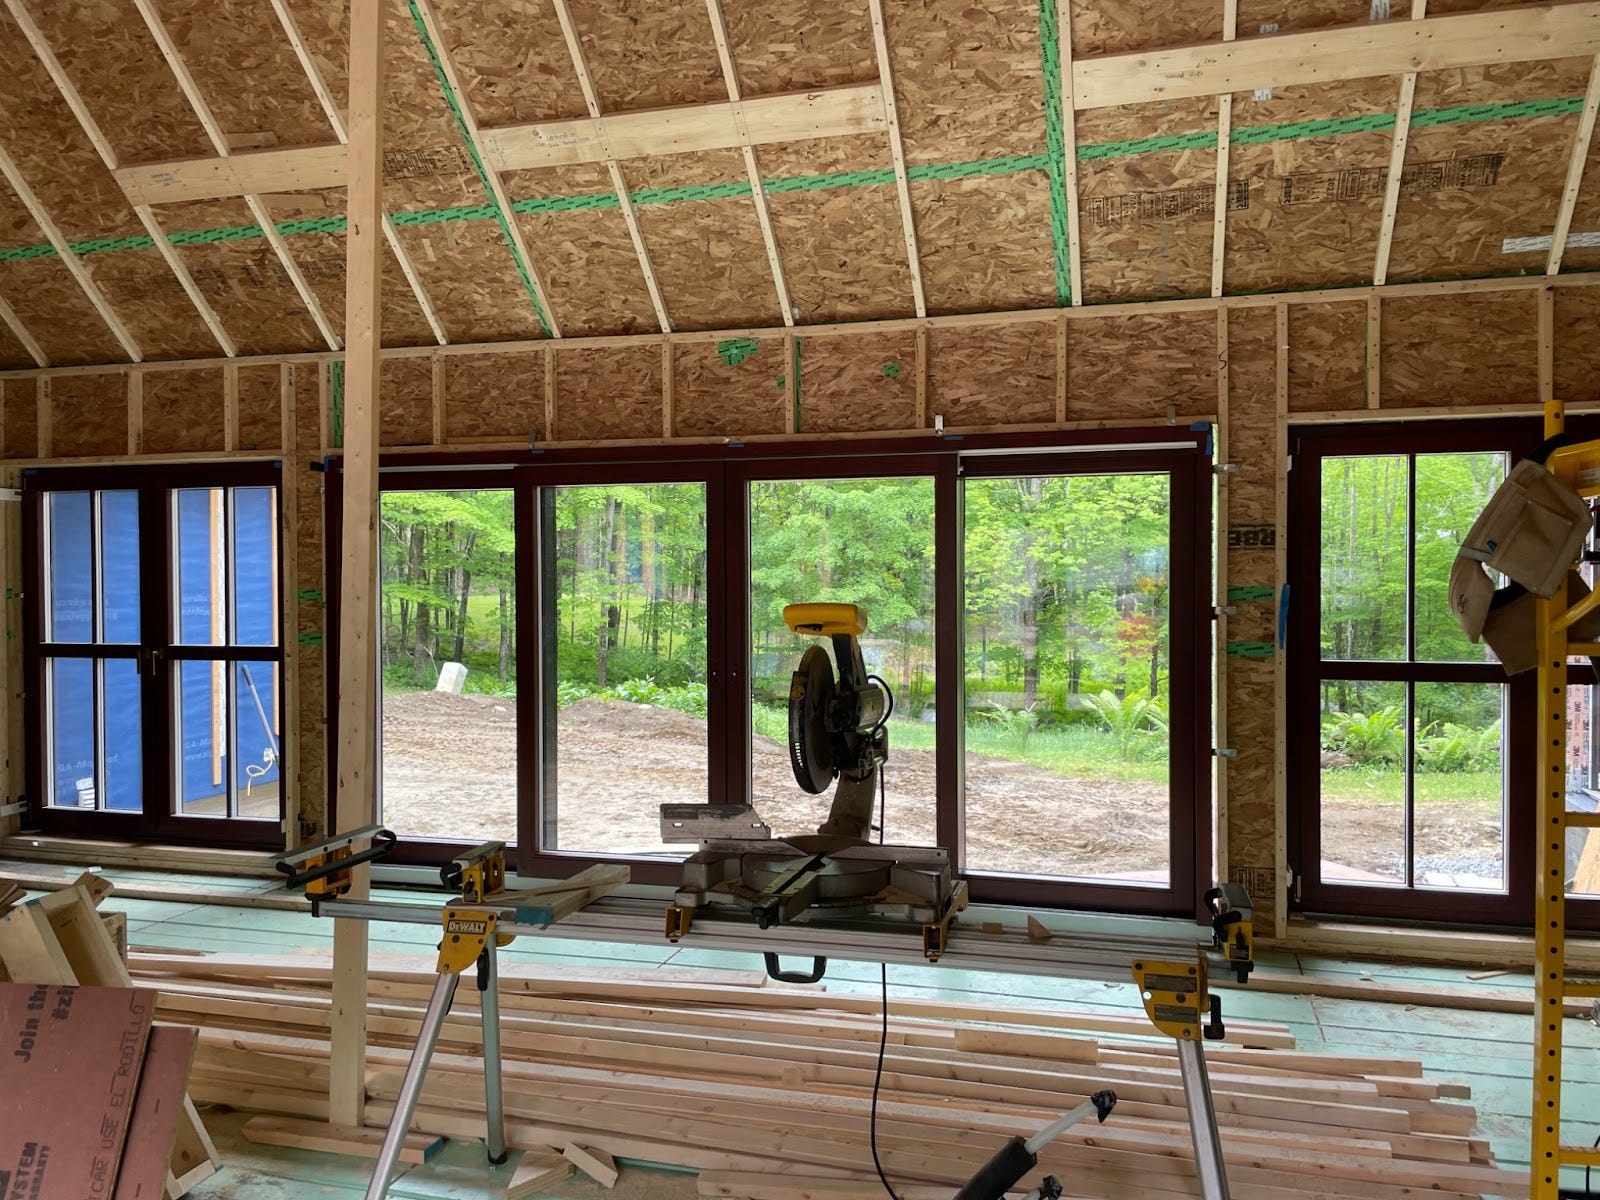
Remaining windows (not already installed by Bensonwood) and doors installed
Mike Bays and his team at Graemar Carpenters made some beautiful insulated and tight wood doors for three of our main entrances.
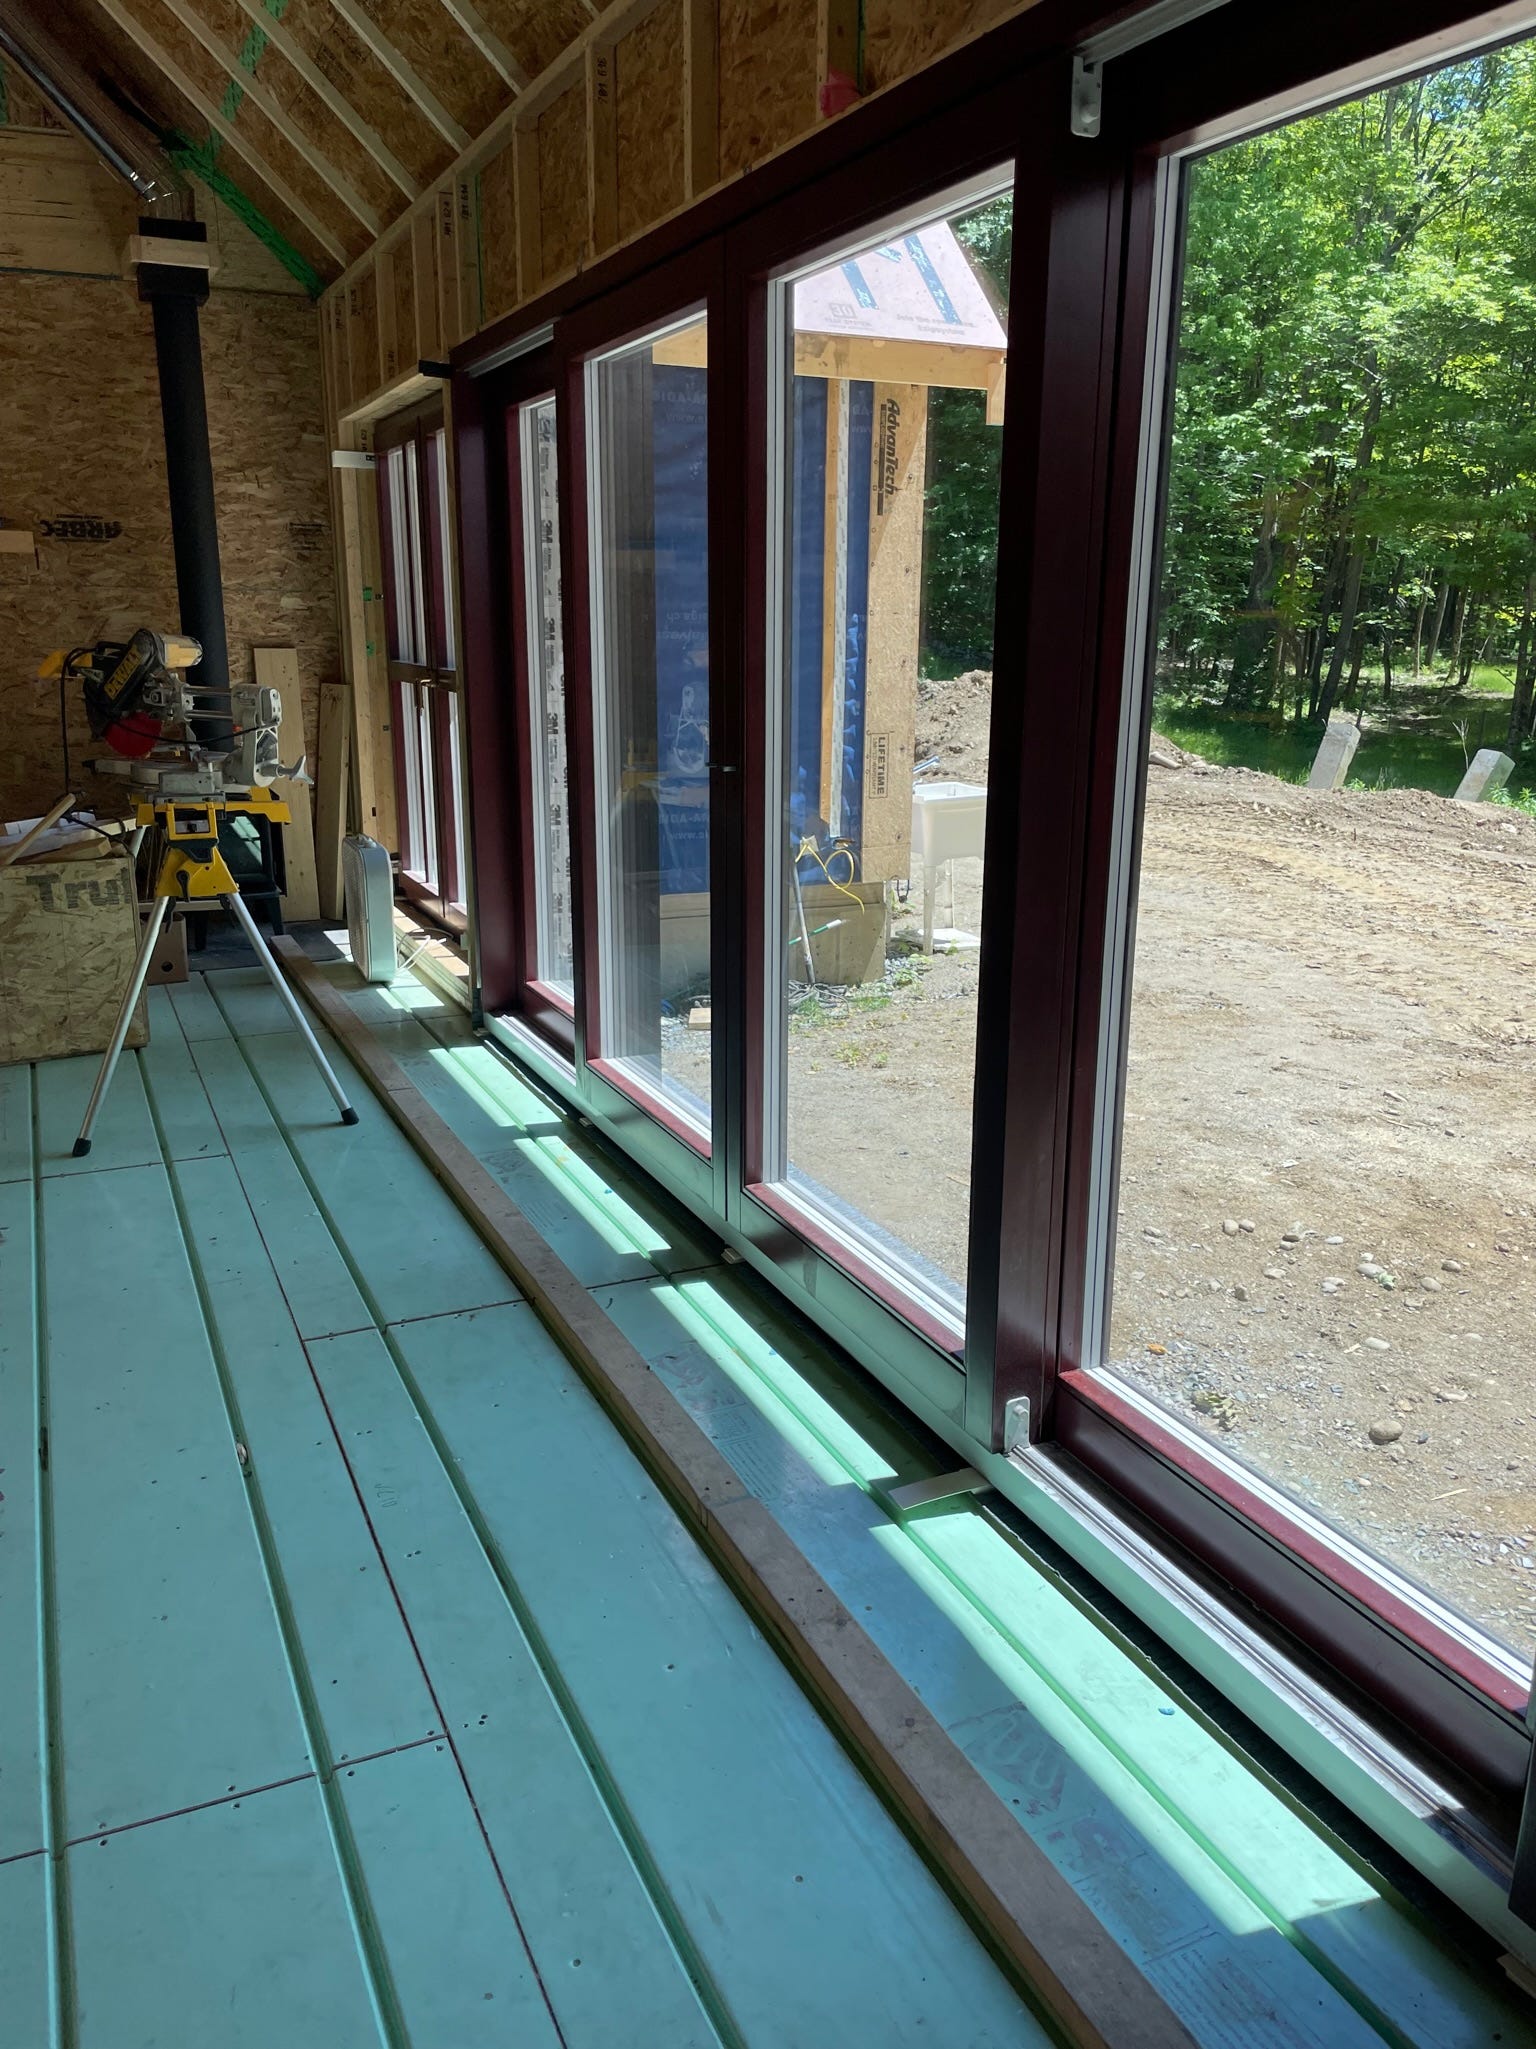
The former three season breezeway, now the great room that will house our kitchen and living room, features the most glazing and really creates a sense of being outside all the time. The thermal performance of the triple paned windows (~R-7.6) help mitigate some of the heat loss impacts of all that glazing. Scott Baum of Sublime Windows has been a great partner in getting us products that fit the project goals.
This pic, of the south facing side of the great room, highlights another window design element. Taken at roughly noon around the summer solstice, this illustrates how the large eave overhang minimizes direct sunlight (and heat gain) in summer. In winter, the sun will be lower, allowing the sun to come in, and help passively heat the room.
Rough electrical and rough plumbing nearly completed in addition (sheetrockers scheduled!)
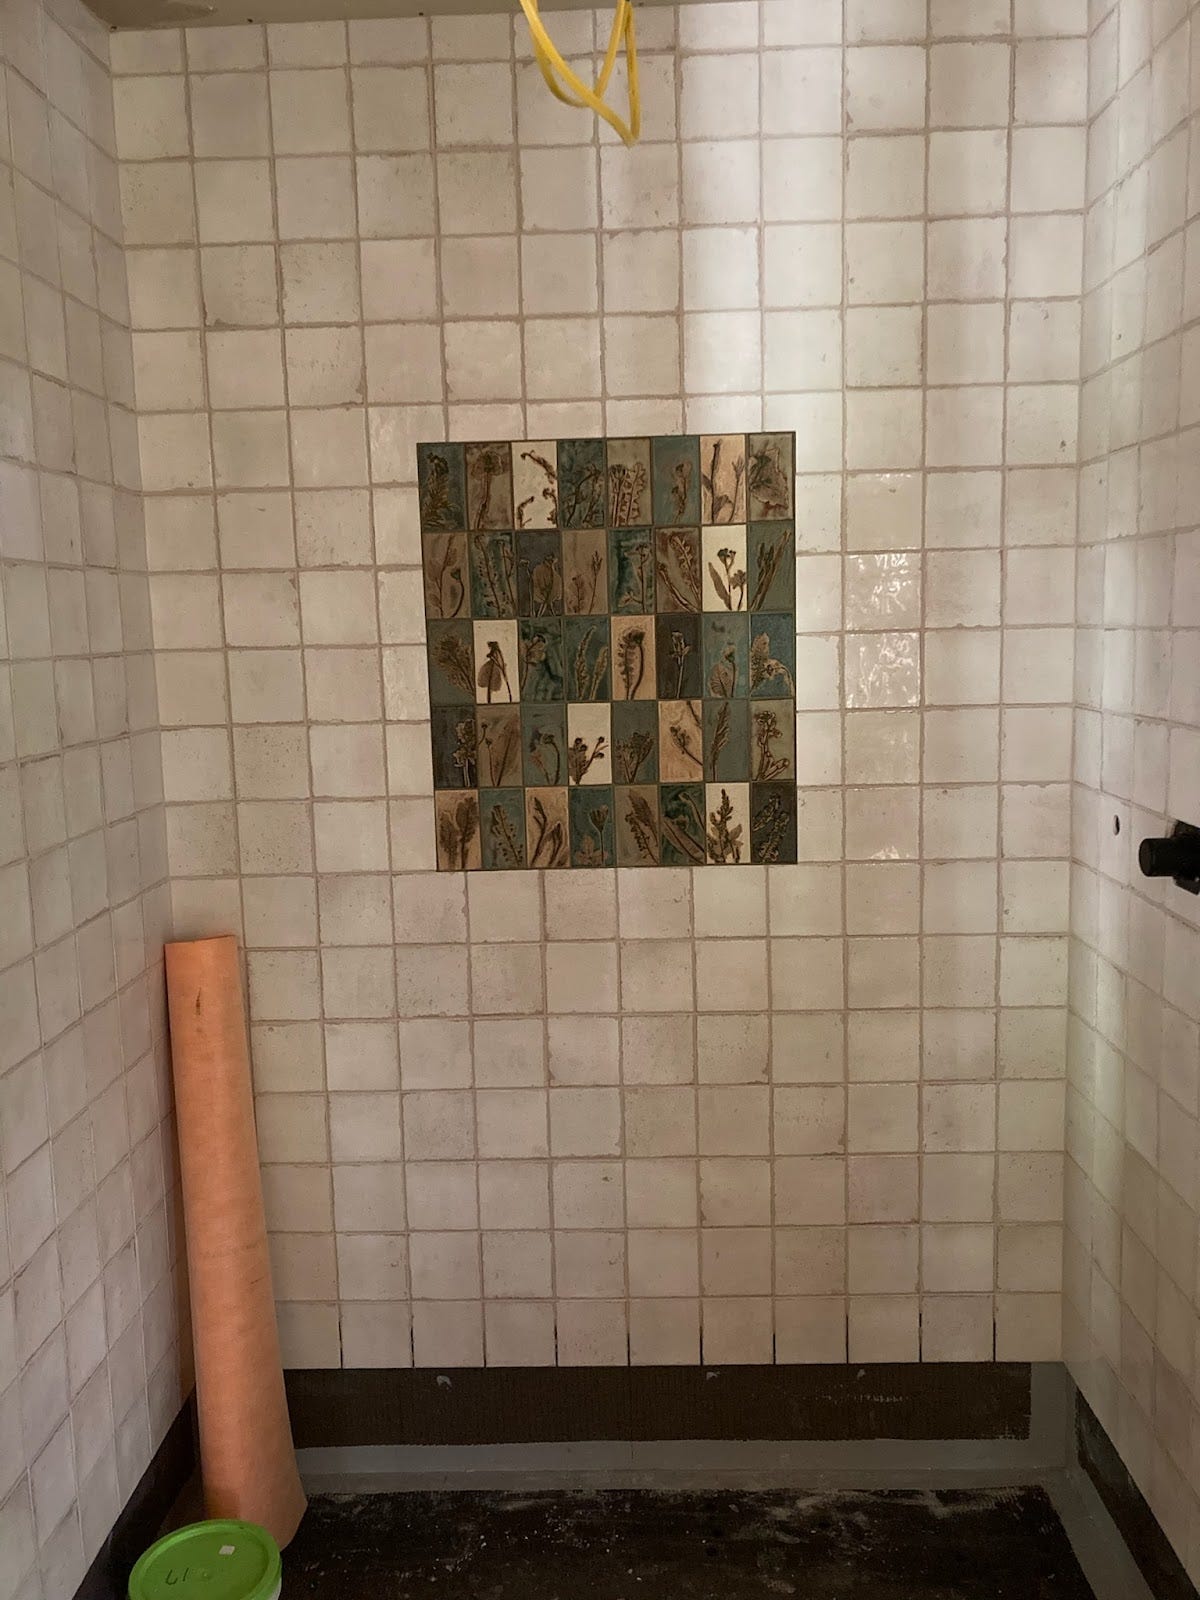
Bathroom tiling complete for two bathrooms
Our interior designer (and daughter, Abby) sourced these tiles from an Etsy site, and created this design for the shower. As an independent artist herself (biased, perhaps, but I love her work), Abby was eager to support an artist making such creative tiles using impressions of actual plants.
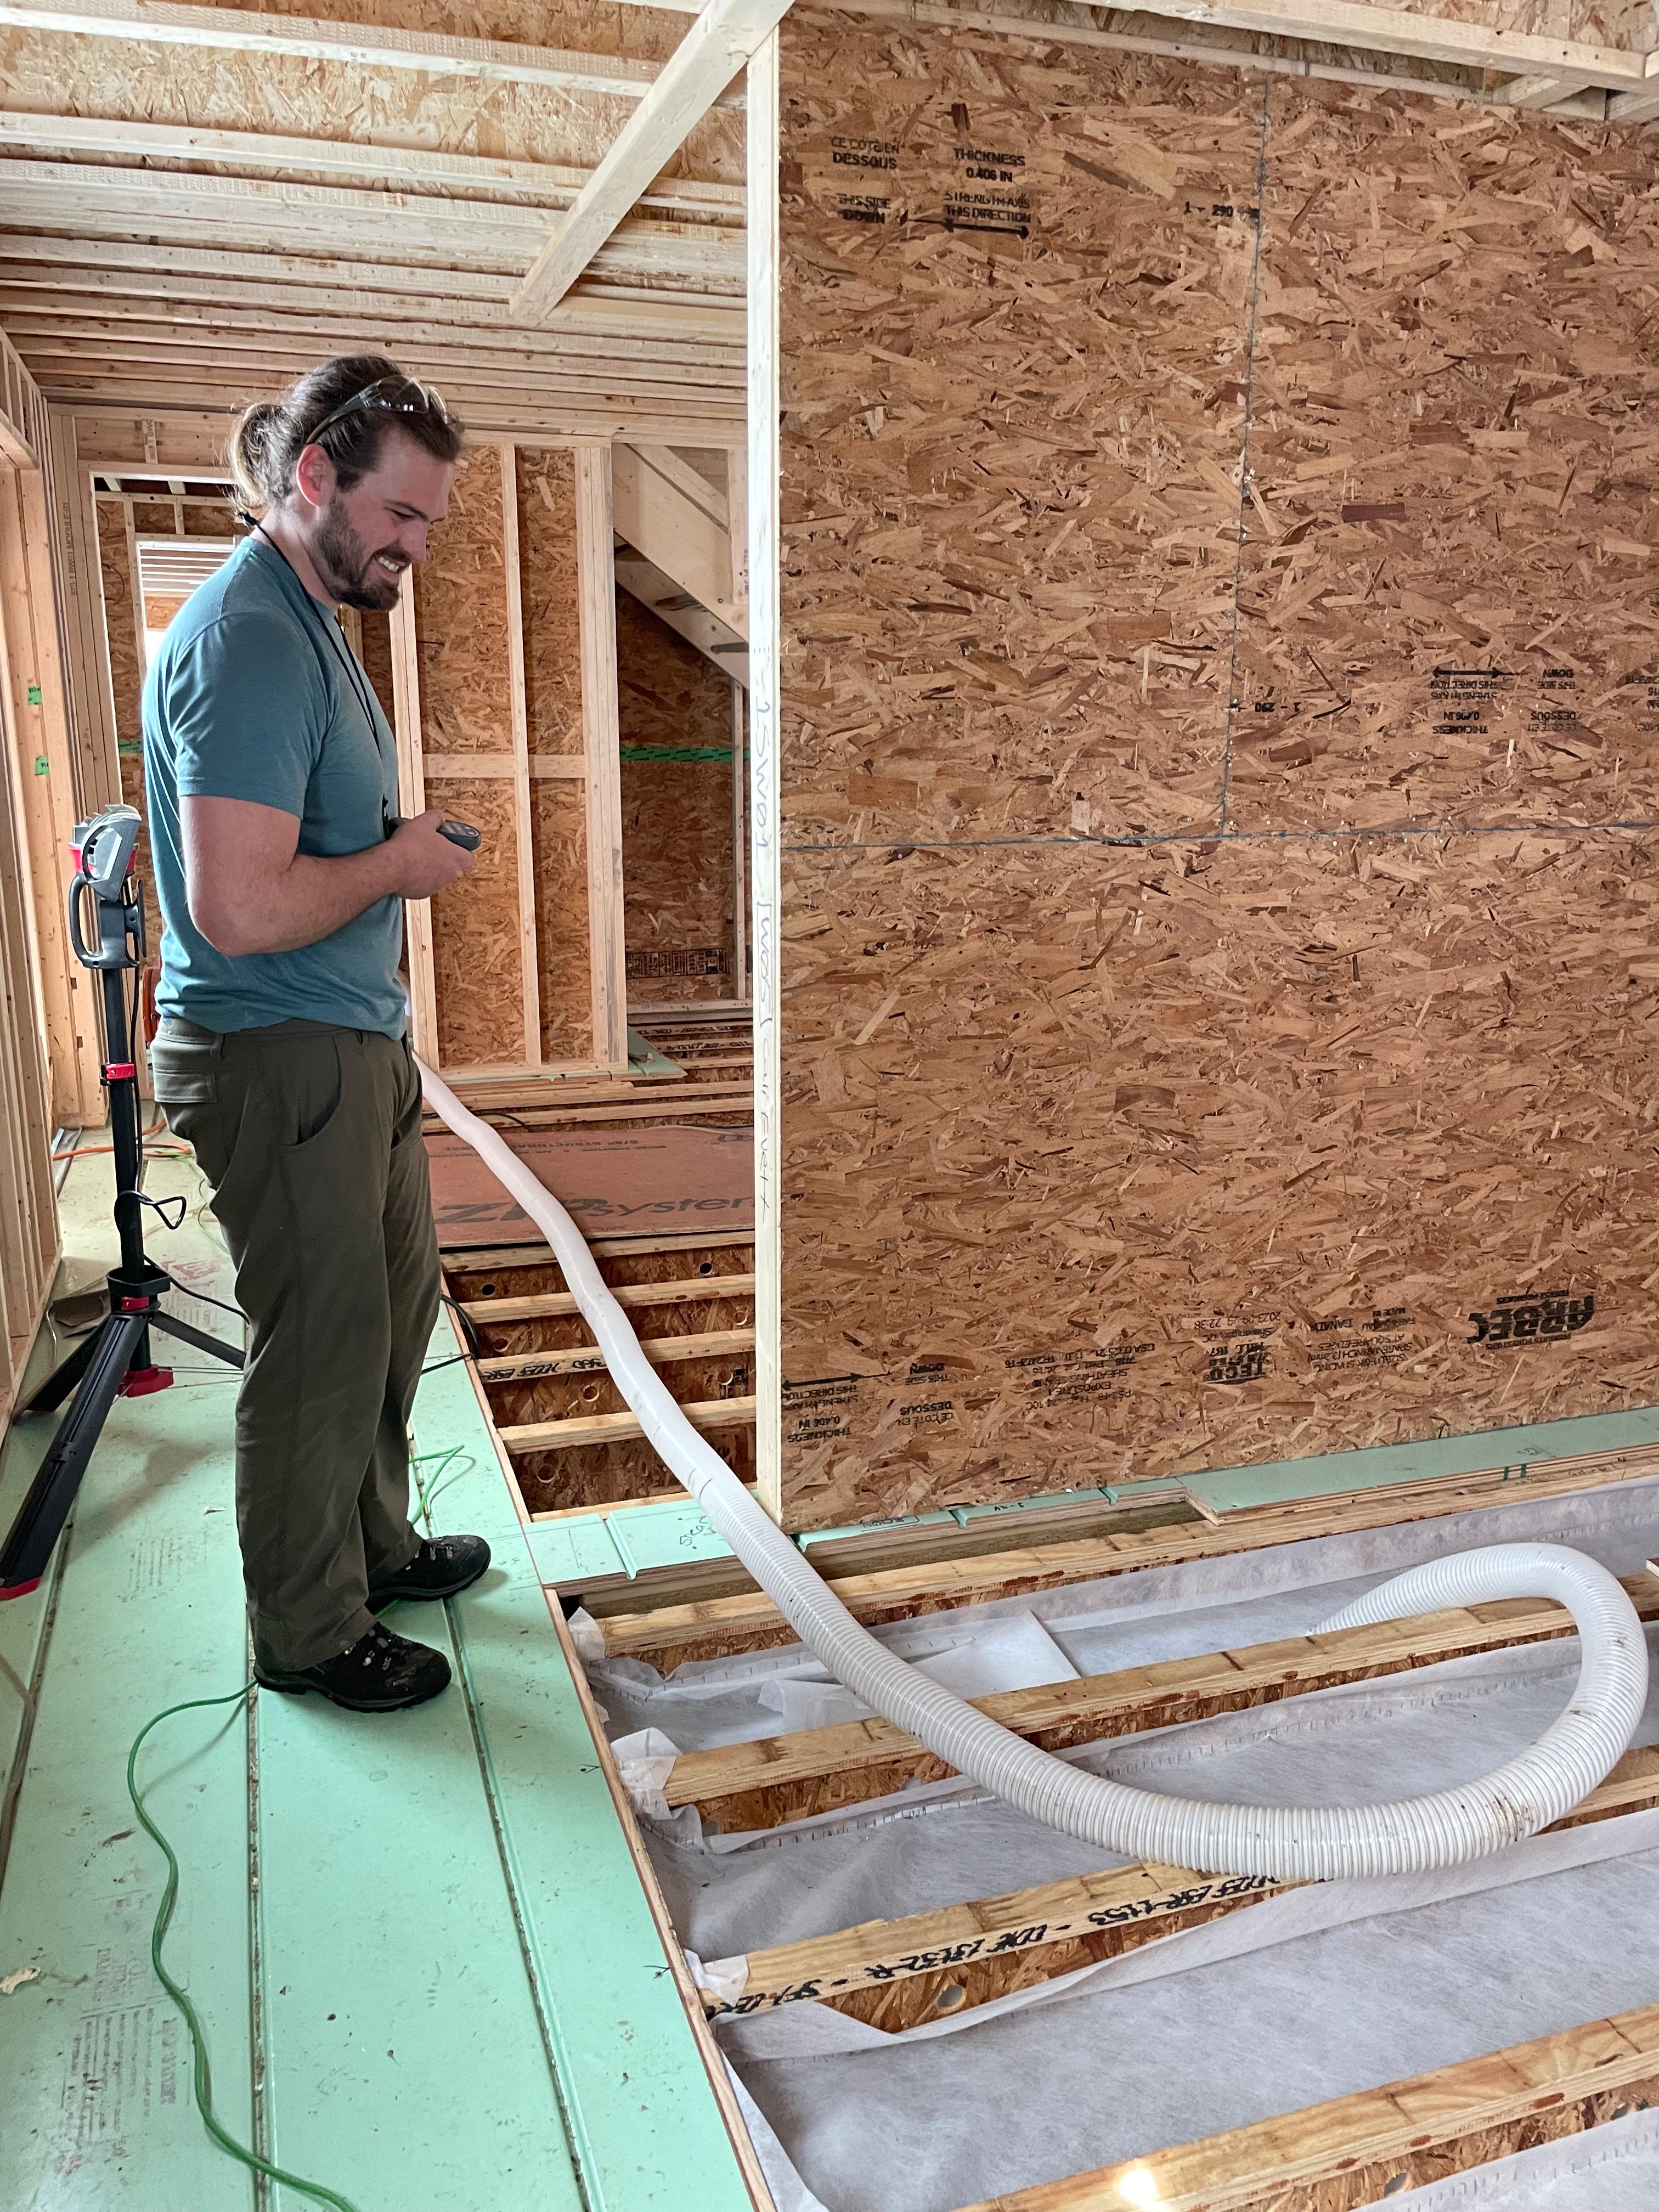
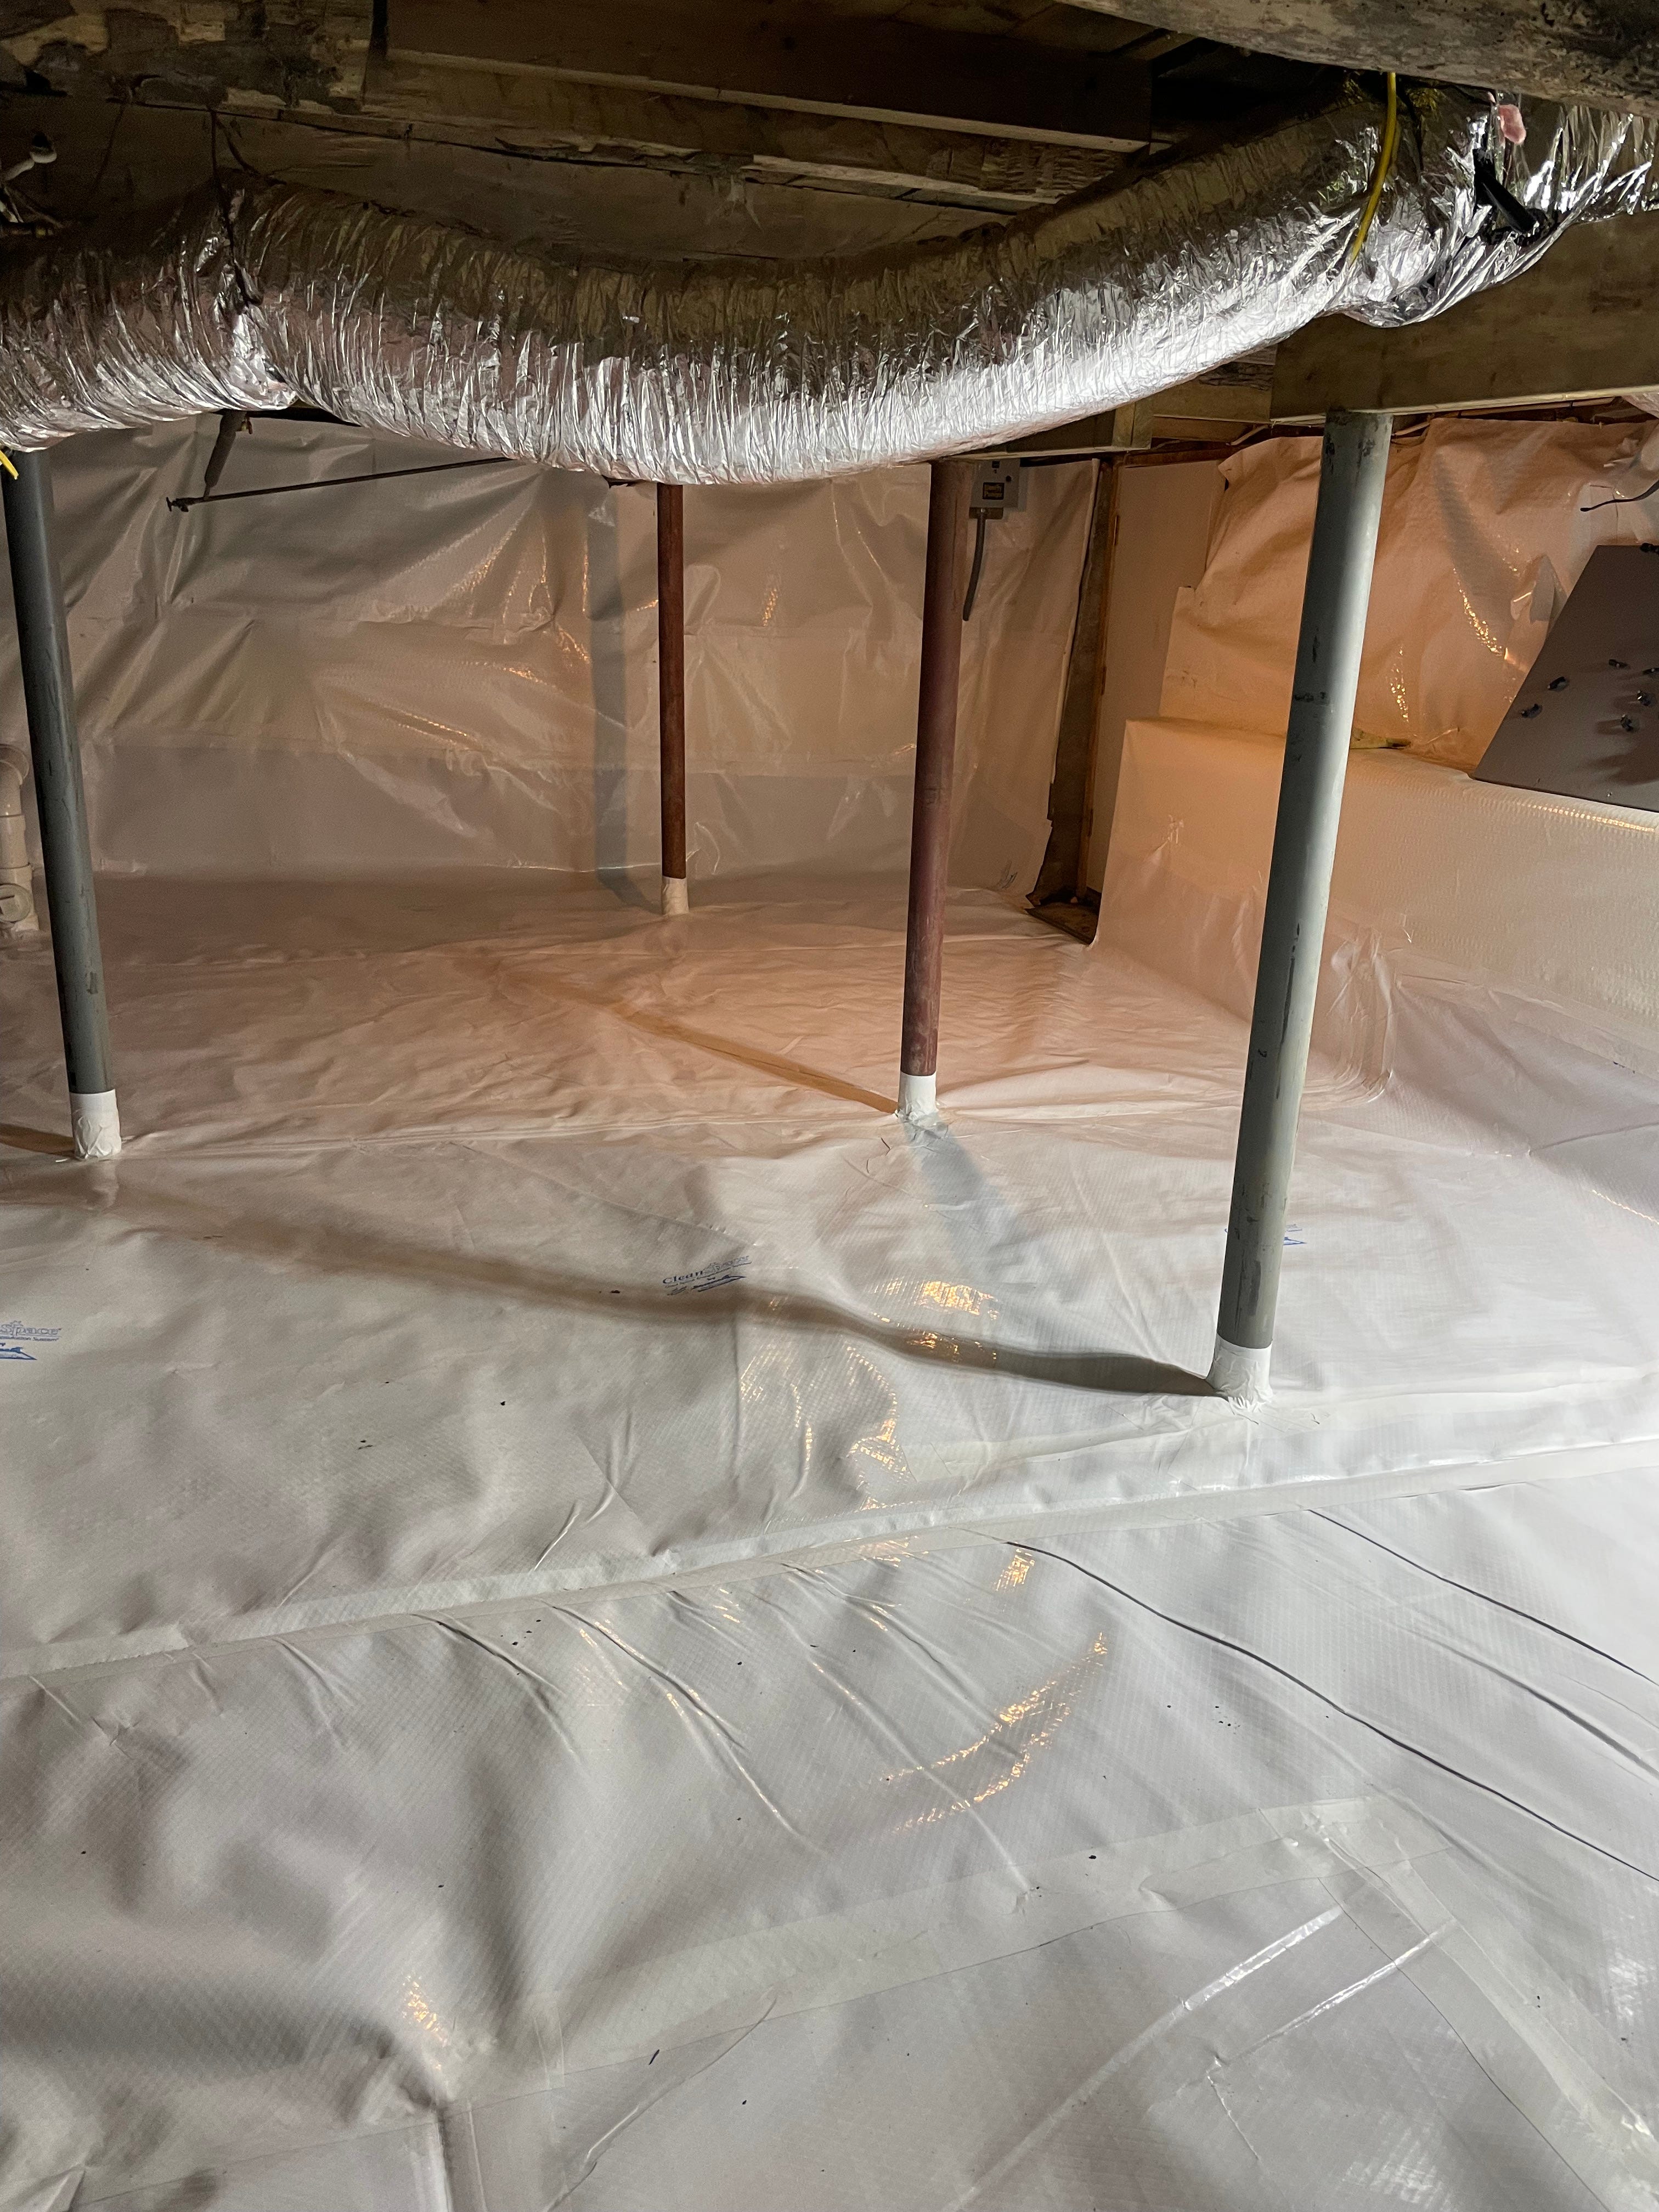
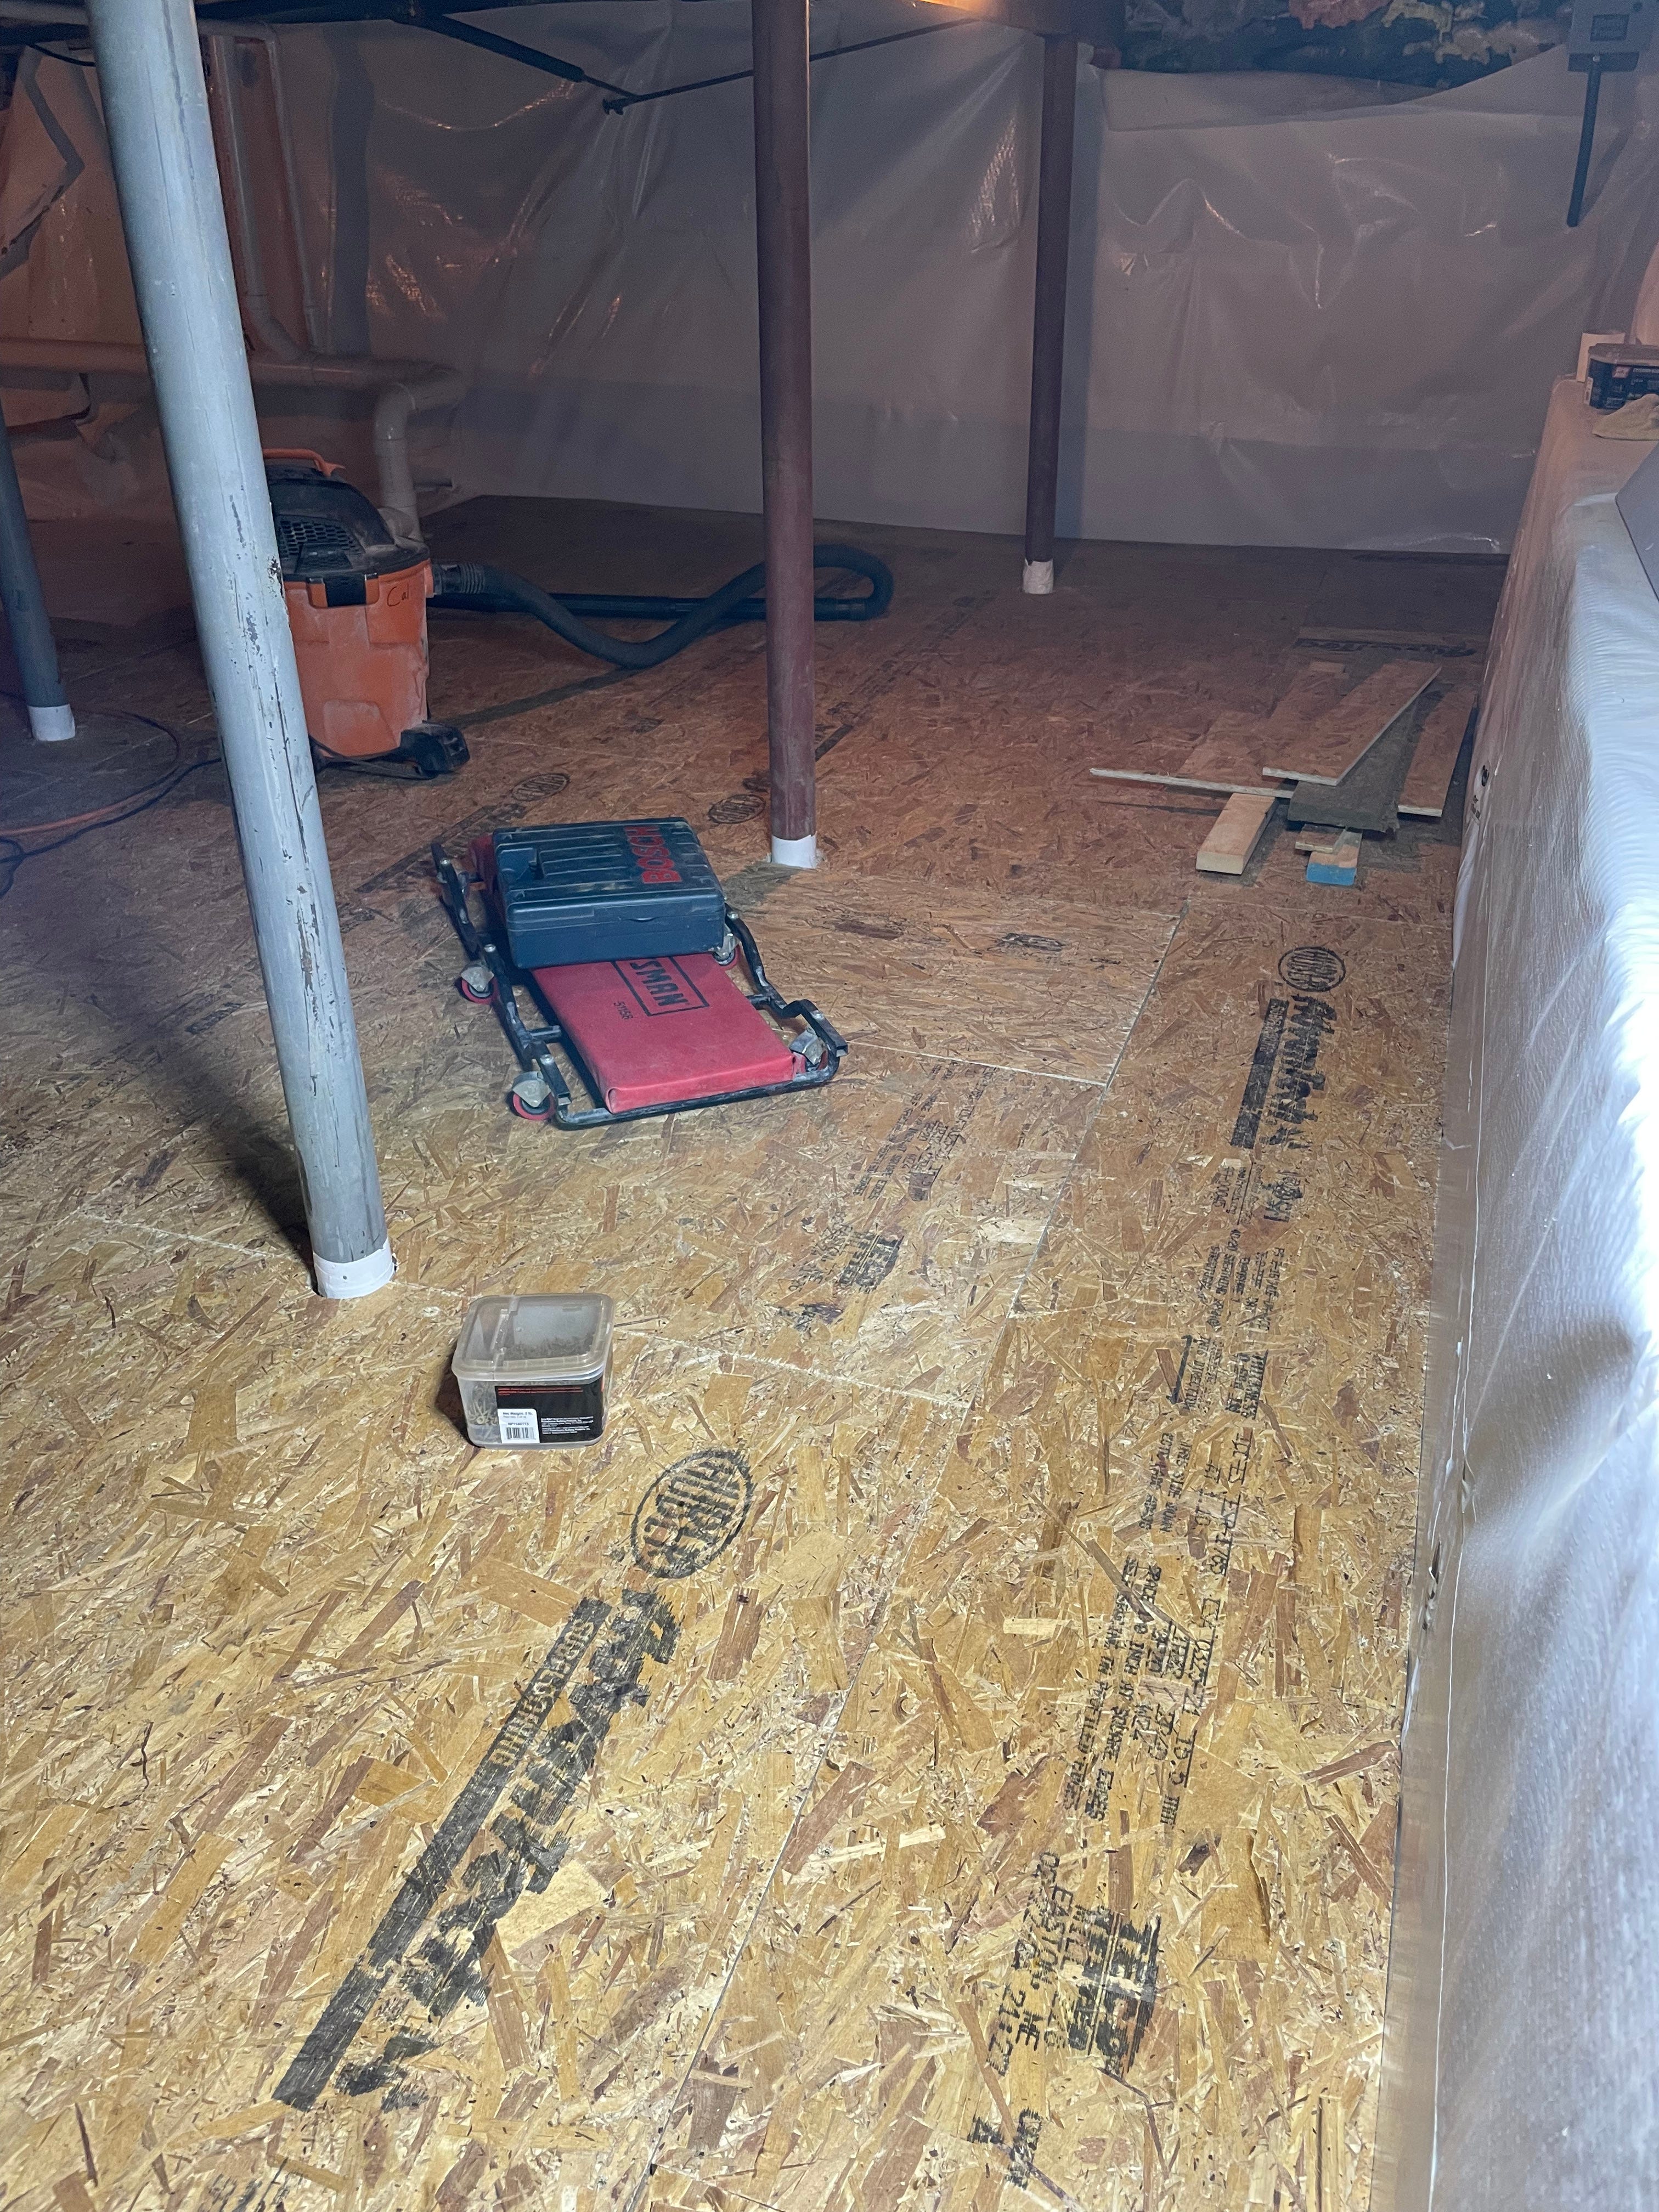
Updated vapor barrier, completed airsealing sill, and built an insulated floor in the basement.
The complete vapor barrier, now taped to the sill around the top of the foundation, has really finished the process of drying the basement that was covered in a prior post.
The floor has Rockwool Comfortboard insulation (~R-12) on top of the vapor barrier, below two layers of subfloor. This is where much of the HVAC equipment will be set. With the dehumidifier and heat pump hot water heater down here now, this room is very cool and dry in summer. I will admit to eating lunch down there a few times on the hottest days of the heatwave this summer.
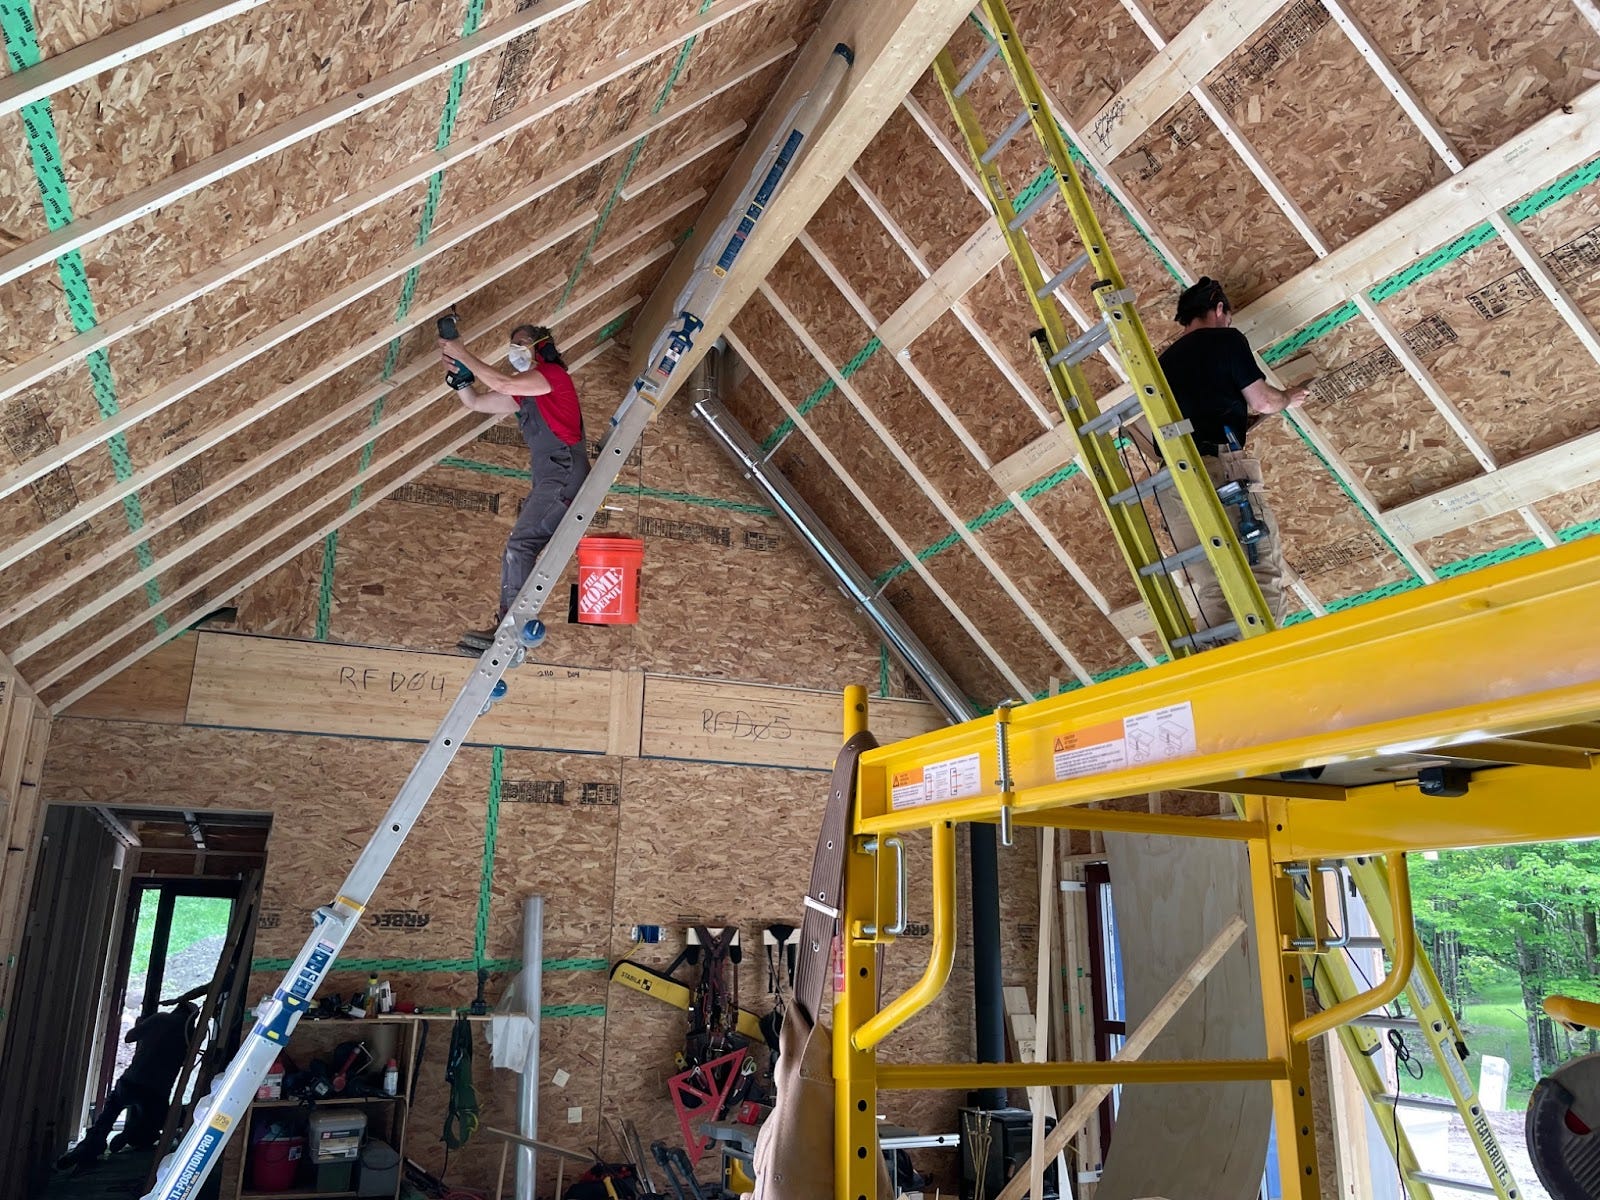
Strapped ceilings for drywall and trusses
Madeline (left) and Jack are setting the strapping in the great room to make room for wires, and provide nailing for V-groove that will cover the vaulted ceiling. The blocking between the strapping near Jack is for the eventual attachment of trusses that our nephew Jay, a professional carpenter and timber framer extraordinaire will create using the hand hewn beams that were originally part of the framing of this space. We shope Jay and his spouse Pip will be posting their own Green Dream Story soon…they are building a very efficient home in Quebec!
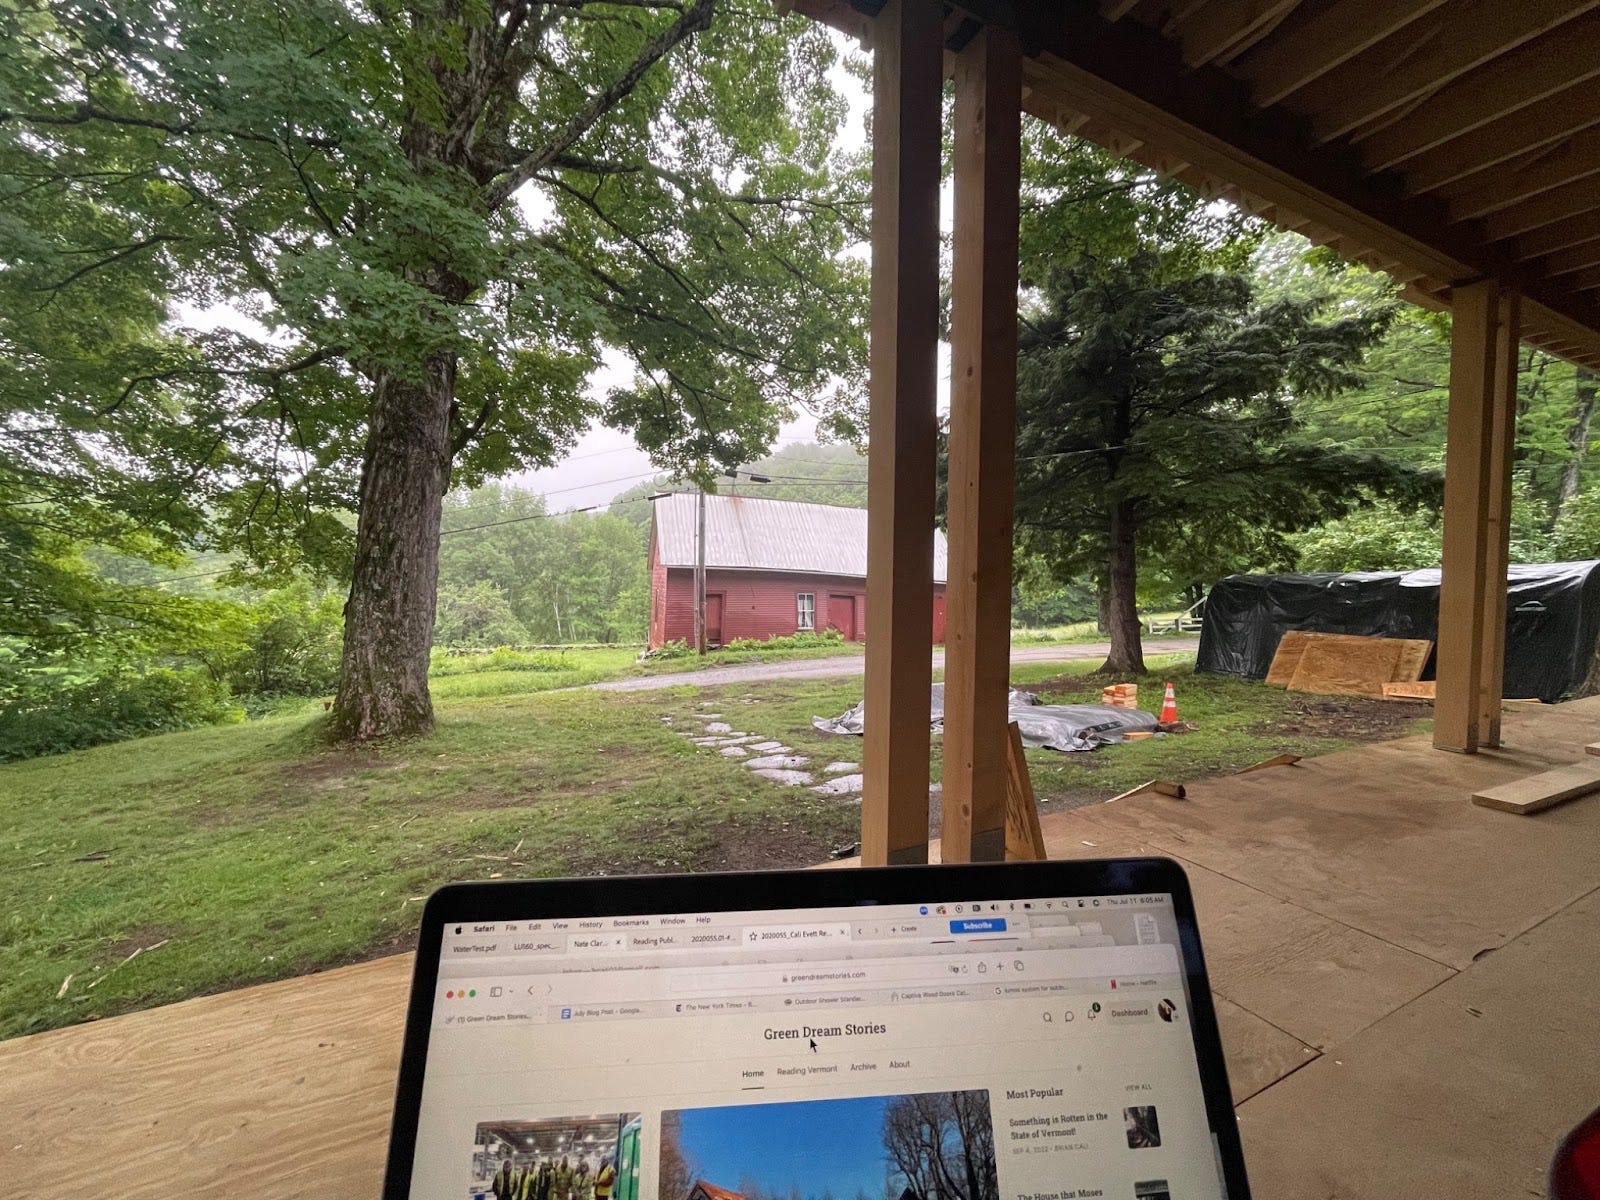
Built the porch on the original house.
We have a photo of the house with a porch at one time–probably early 20th Century, but evidence of it was long gone when we took over as stewards. Well, a porch is back on again–and I love it!
The porch is a great place for blogging!
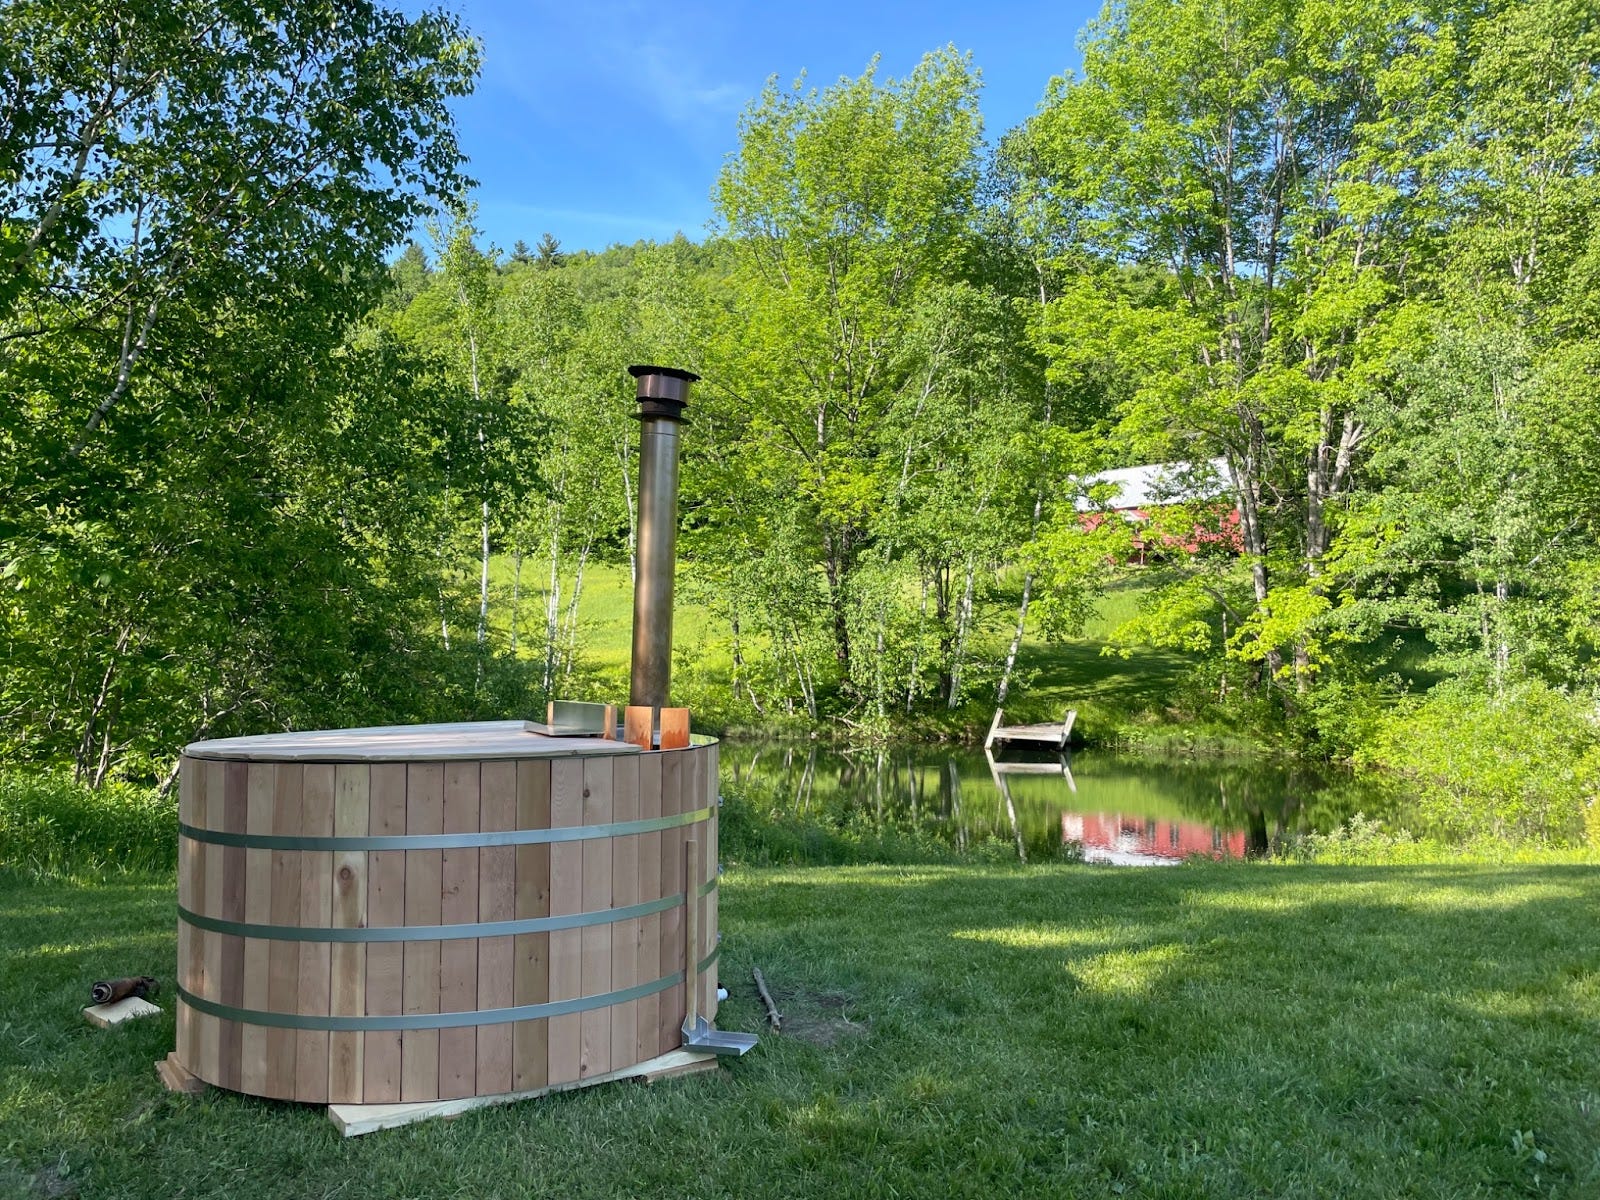
Got a wood fired hot tub
The Alumitub is awesome. Heated with a wood fire, water from the pond, summer nights listening to the frogs and watching the stars….and the only electricity needed is for the pump to get water into the hot tub, which we plug into the solar panel (so filling only happens during the day!)
Copelands visited.
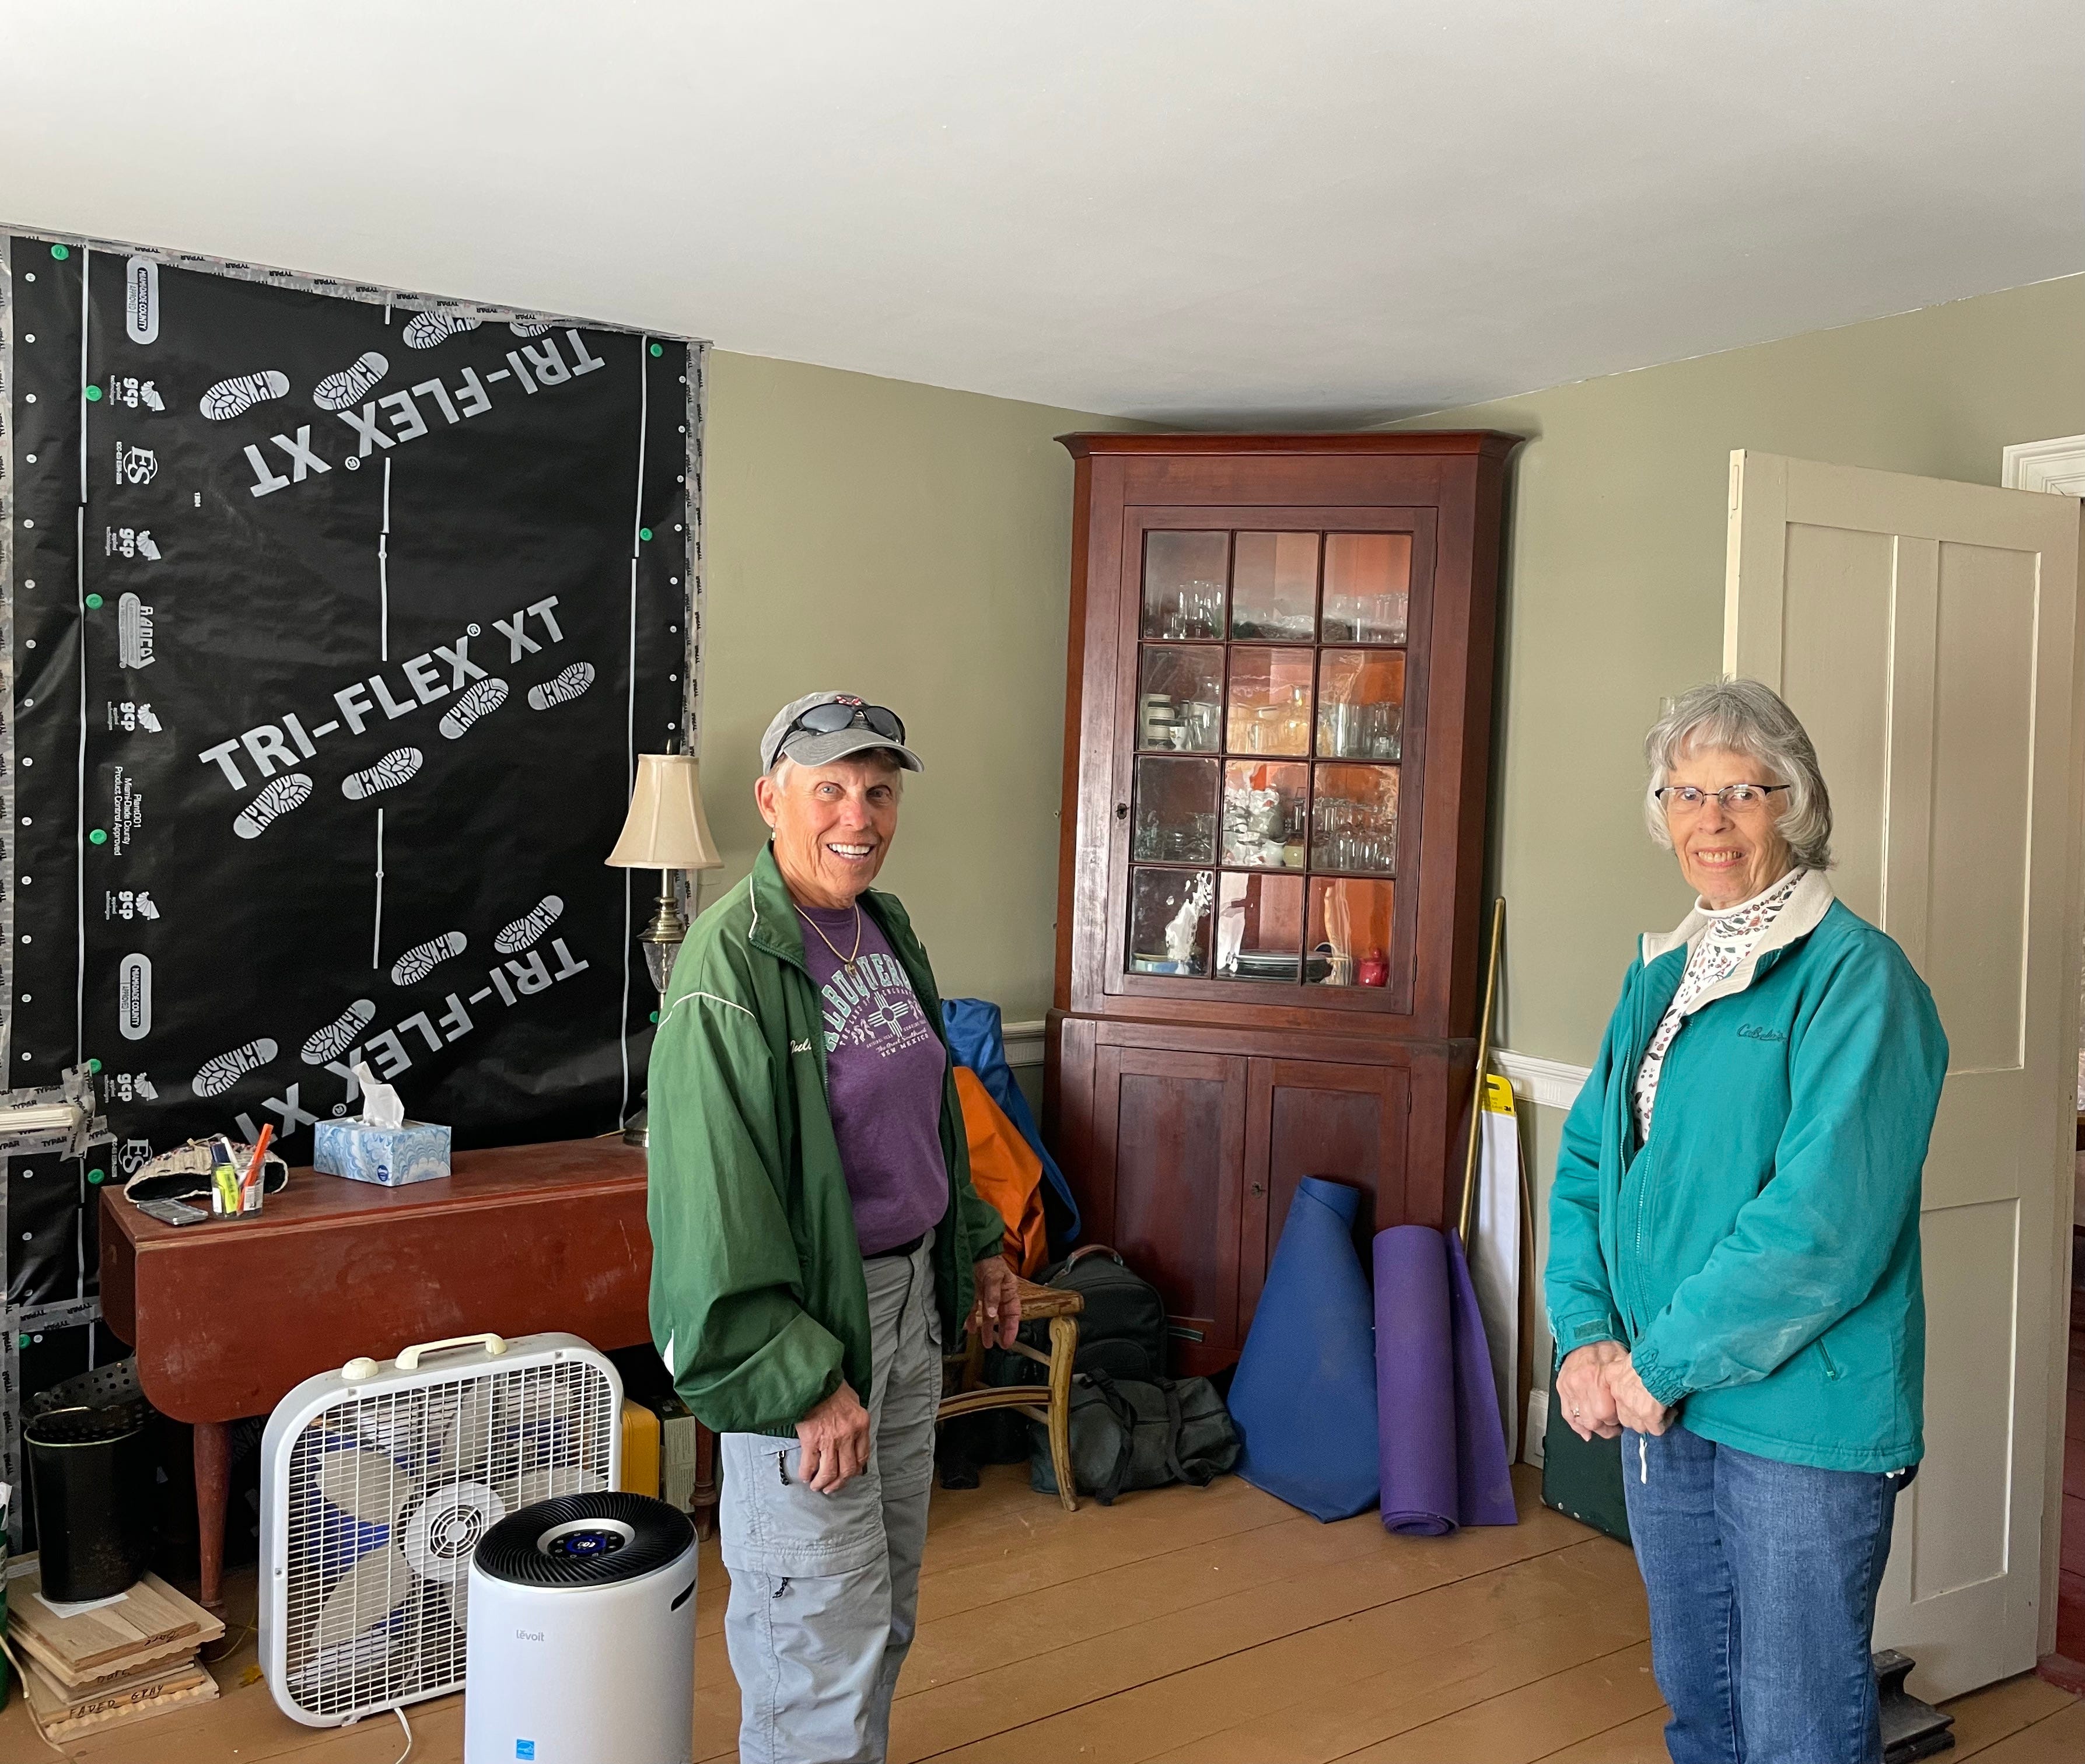
Amongst the many unforeseen benefits of ensuring that the House that Moses Chaplin Built endures has been the opportunity to connect with the living history of the place. In a previous post, I discussed the kindness of Ginny and Sally in sharing their story as the family who were stewards of this place just before us–for about 80 years. Well, we were so delighted to have been more recently visited by members of the family (the Copelands, who I mentioned briefly in a prior post) that had lived in the house before Ginny and Sally’s family. I hope to have more to write about this in the future with their cooperation, but I am so happy to have been connected with sisters Fern and Julie and their cousin Bill of the Copeland family. Teaser: Julie (left) and Fern are standing in front of the spot where their mother was married in this house. I think of it regularly as I pass through the room these days, and it makes me smile.
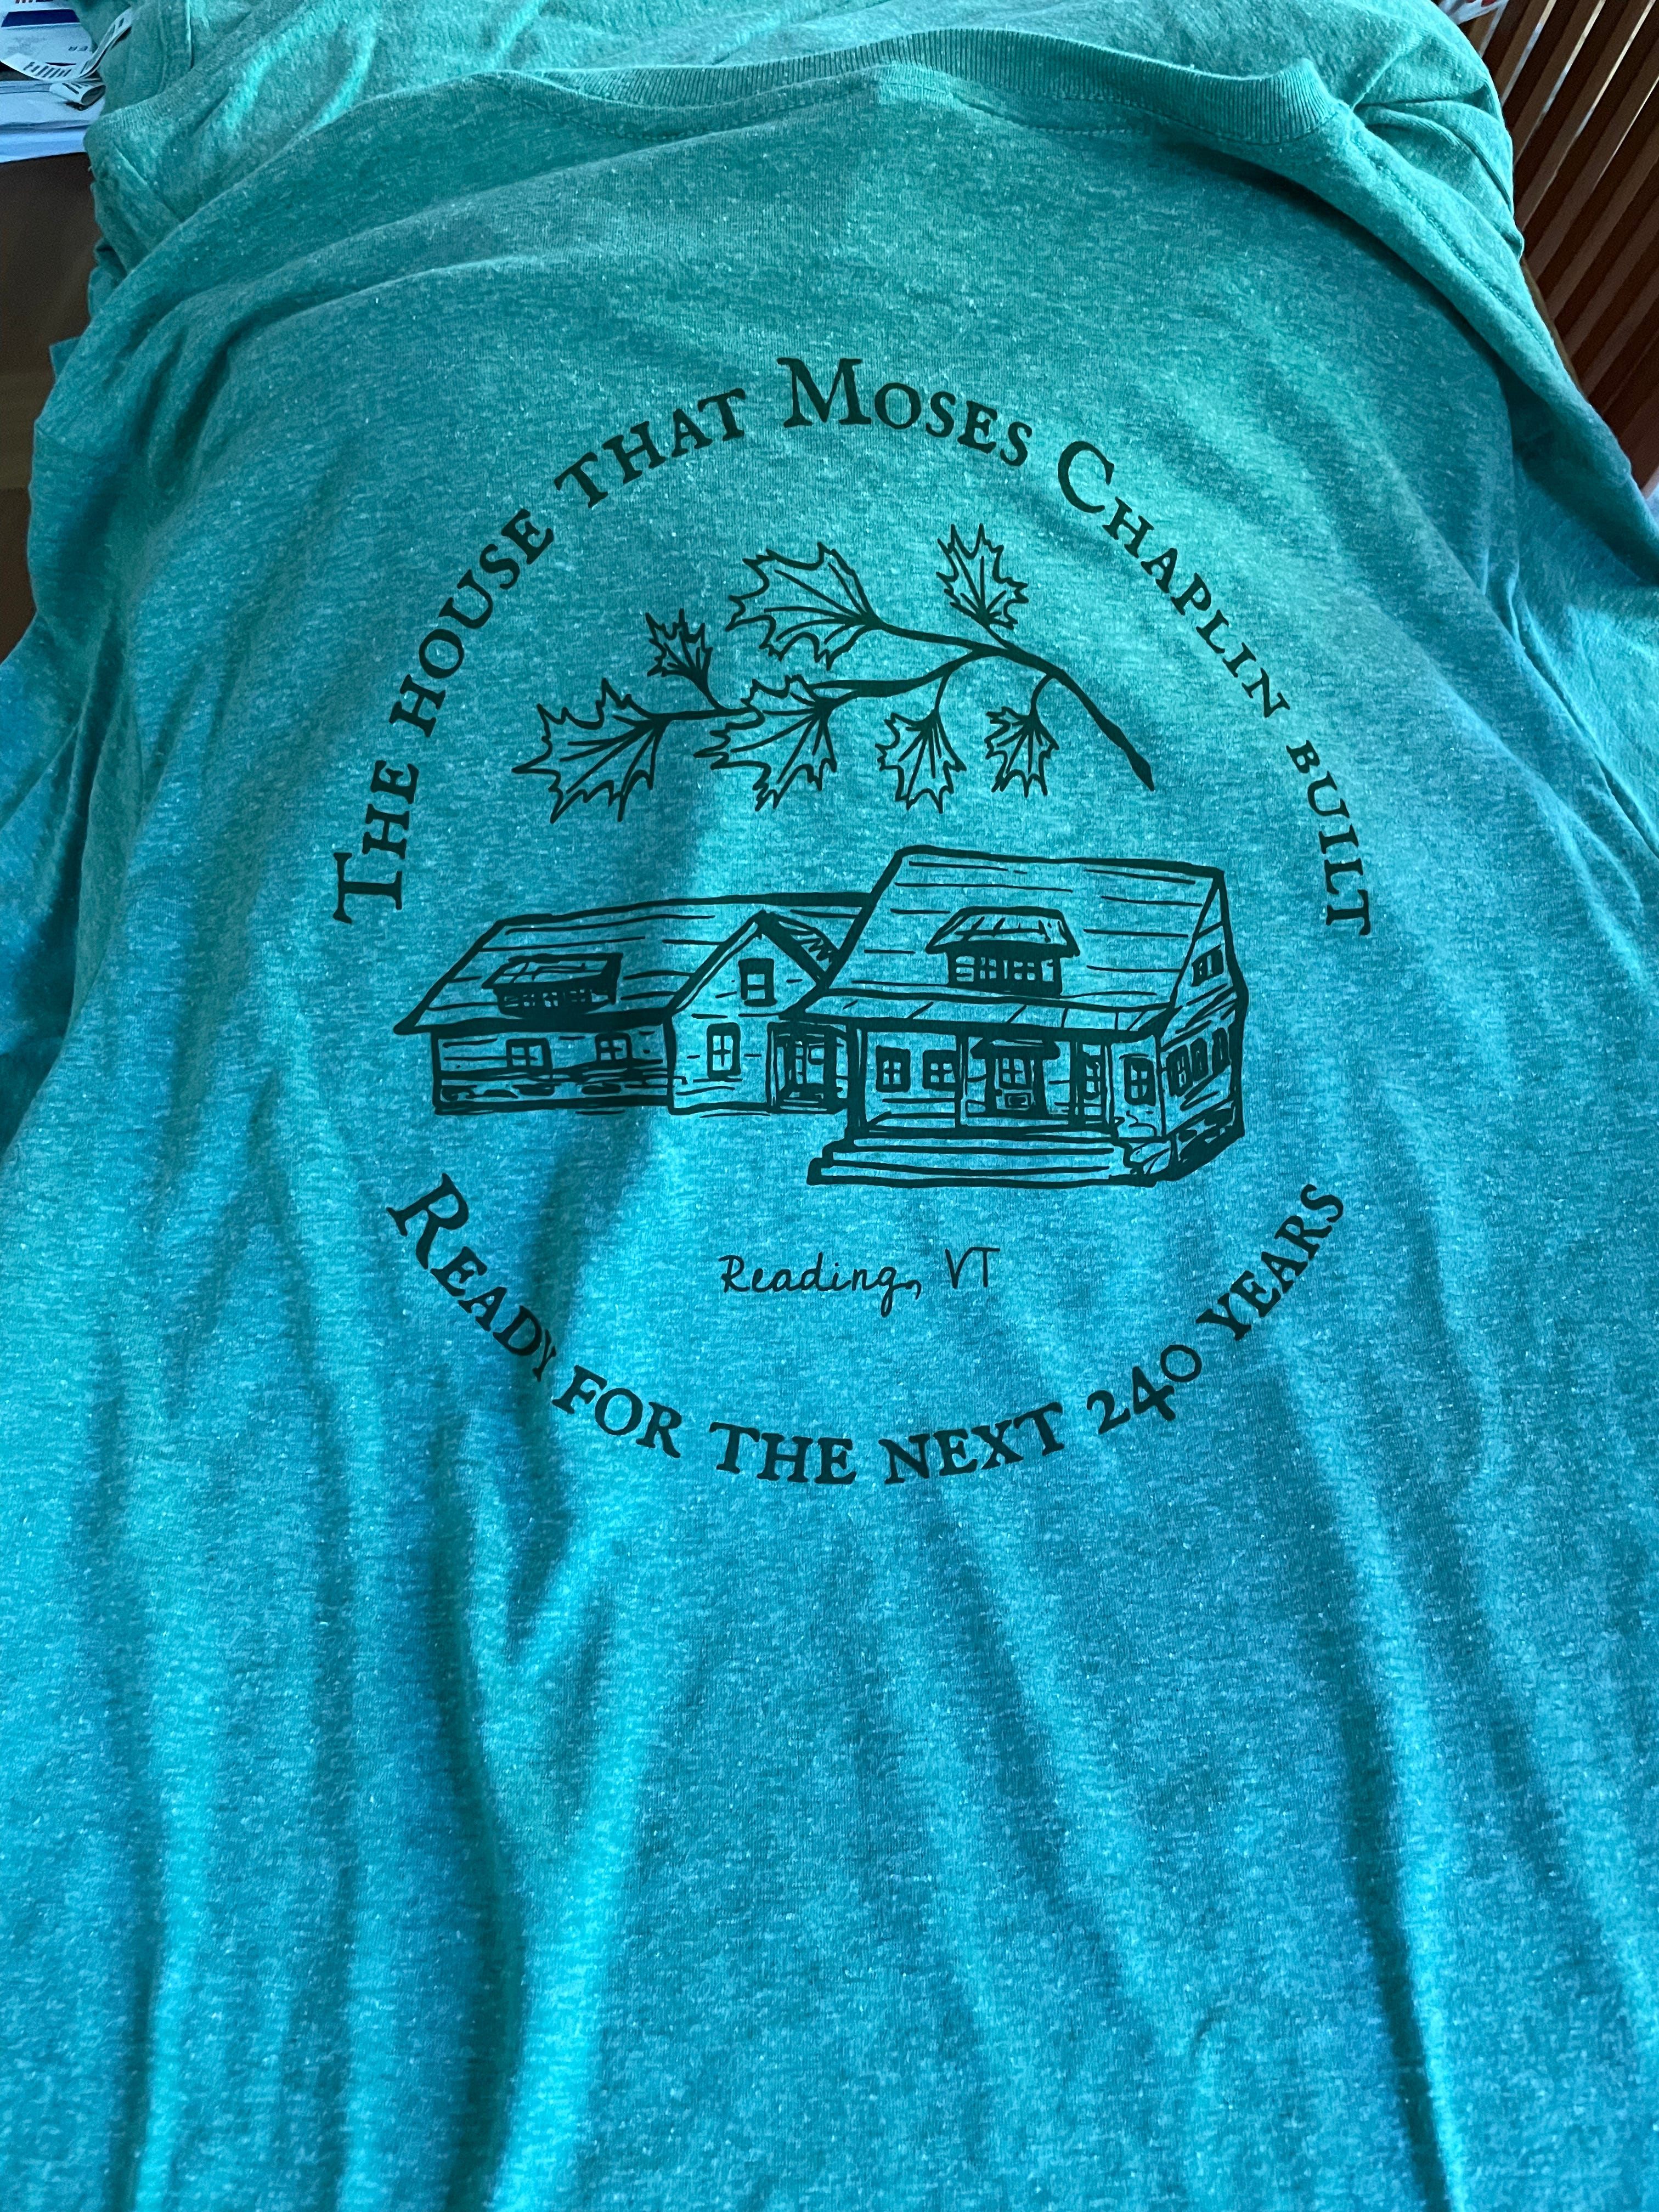
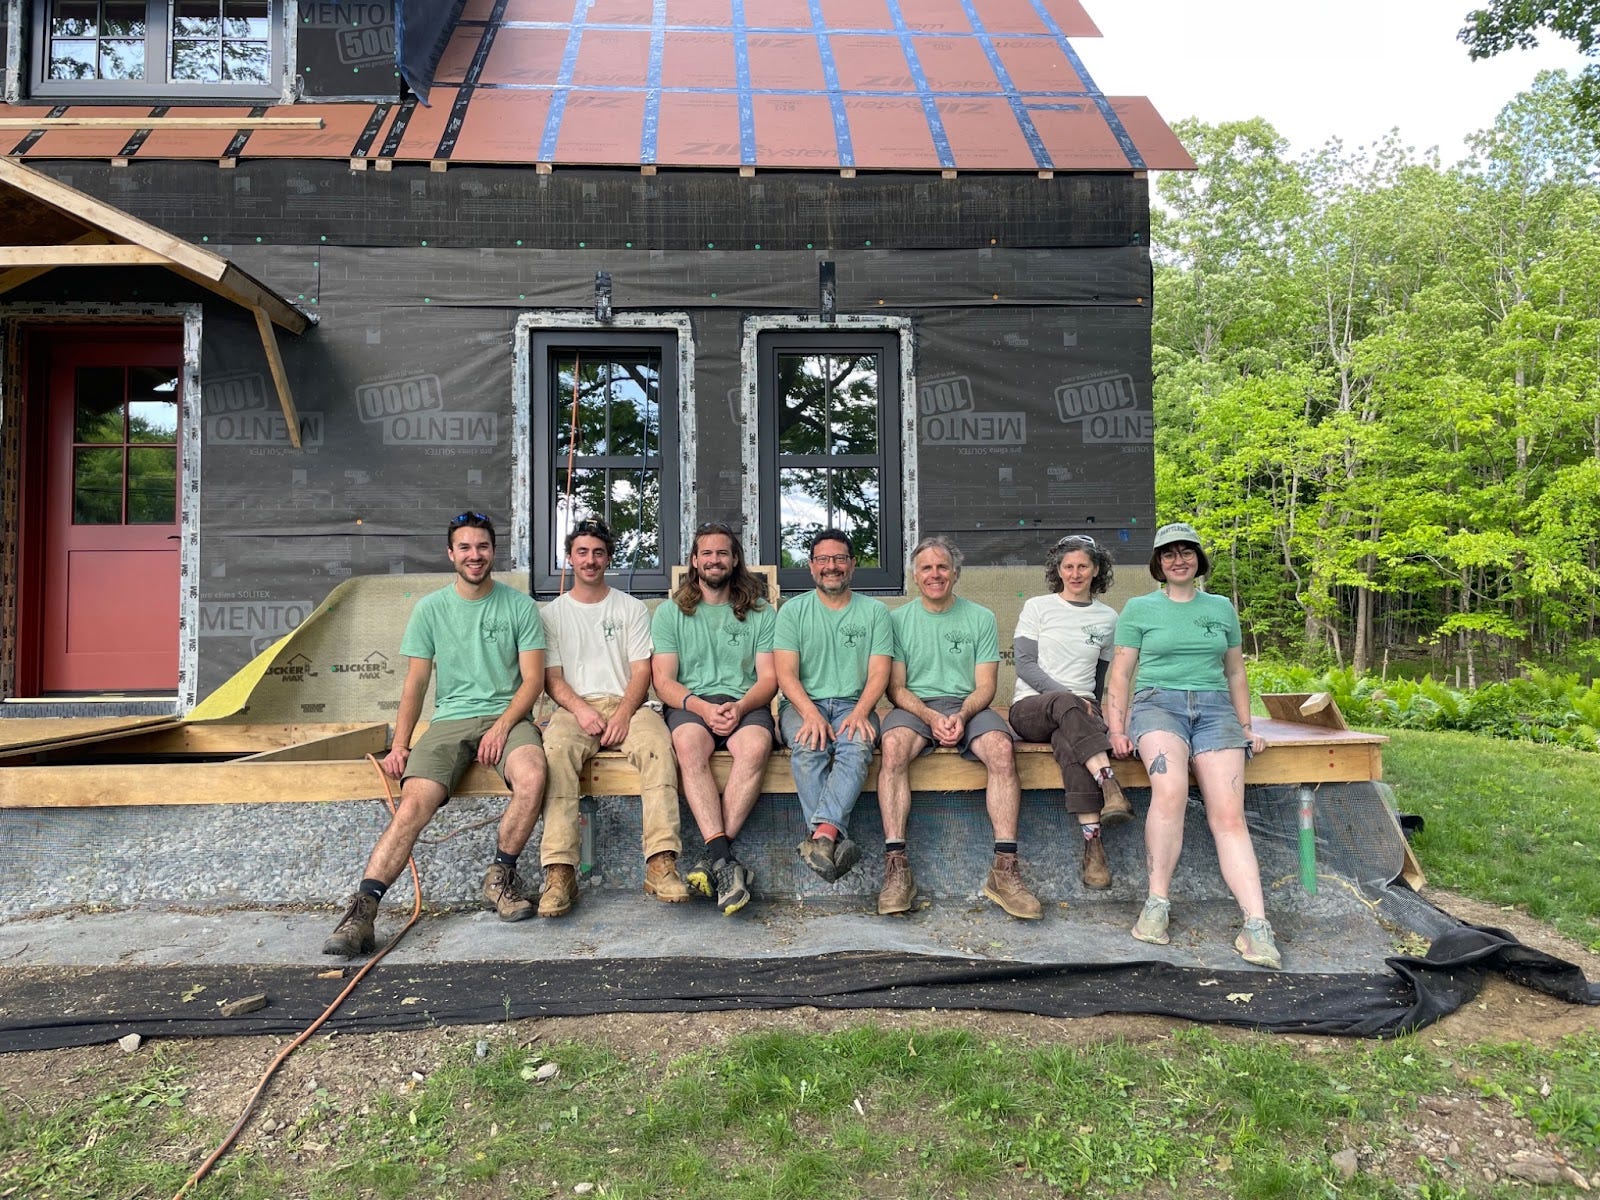
T shirts made, and said “see you later” to Skye
The aforementioned daughter Abby designed/sketched these t-shirts to share with the team. While they are to commemorate the project as a whole, we accelerated their creation so we could share with Skye, who was heading off on a new adventure to Idaho.
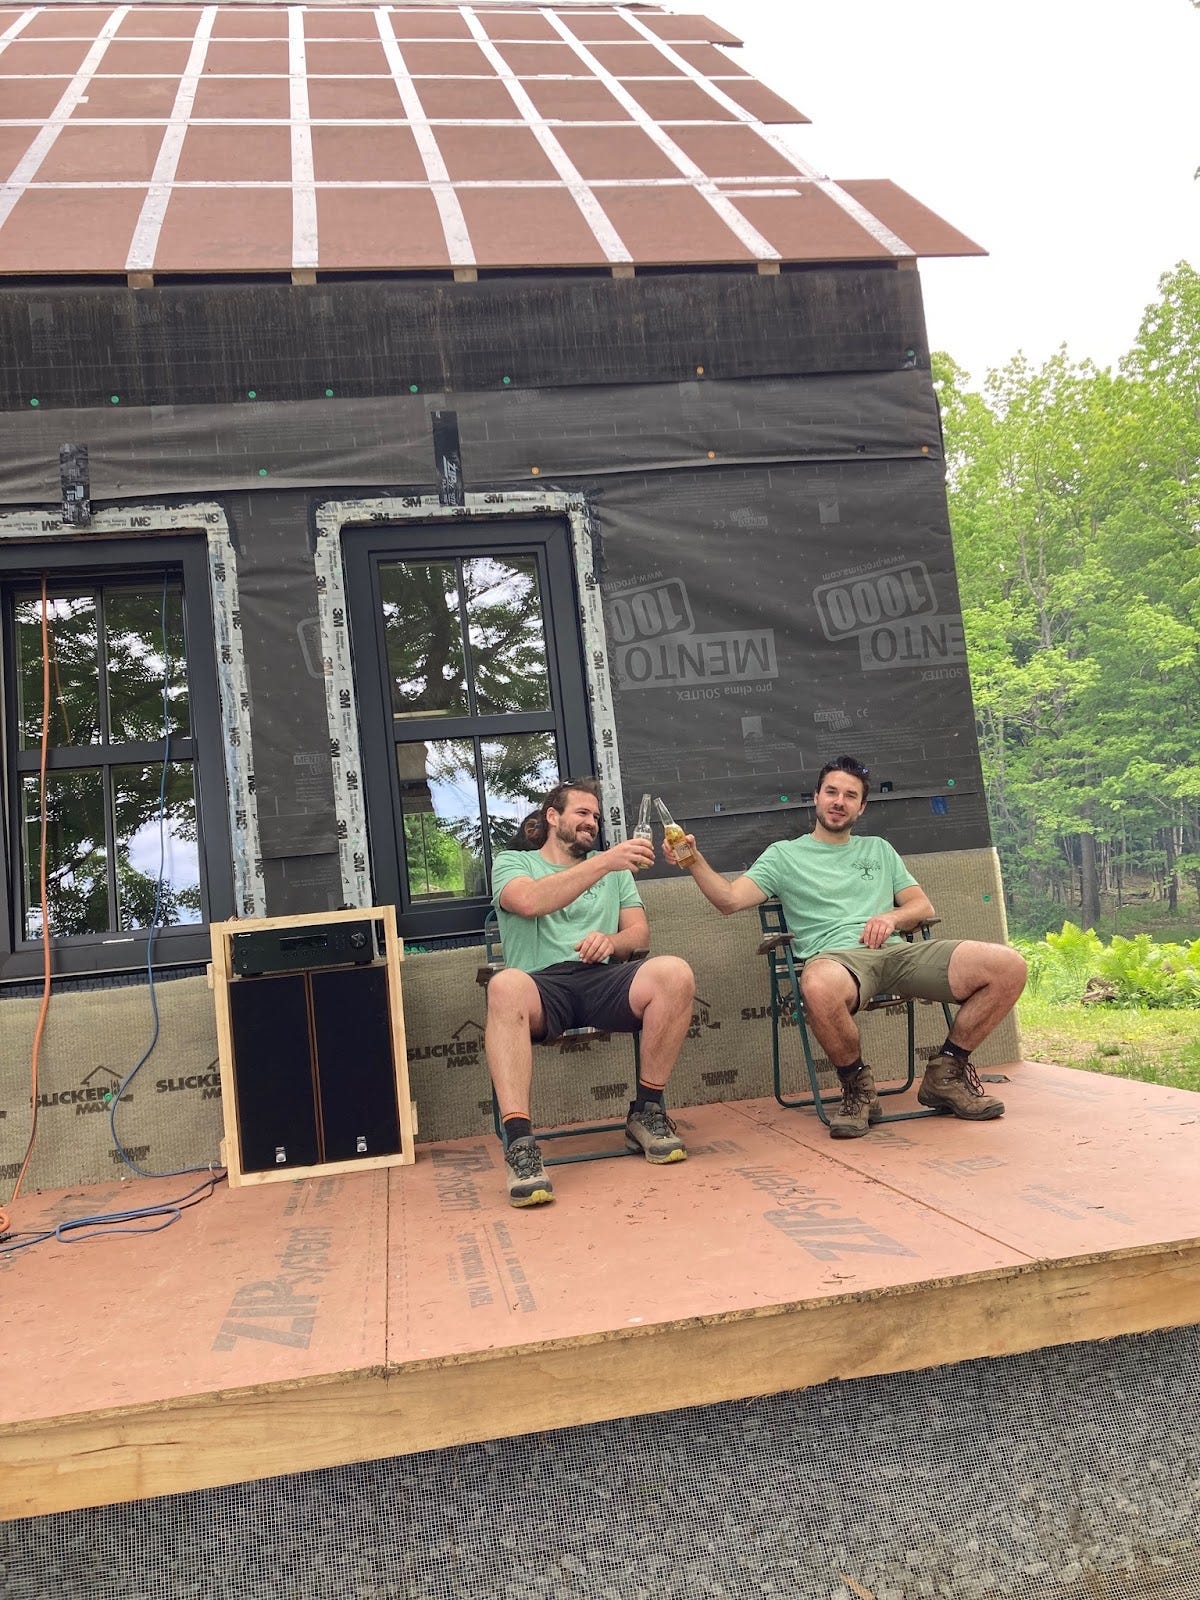
The t-shirt comes in two flavors, and Snowdog wears them well! From left, Dylan, Jack, Skye, some blogger dude, Michael, Madeline, Nell.
These two are lifelong friends, and business partners on their outdoor gear company, Alpine Gremlins. Entrepreneurs for sure–love it!
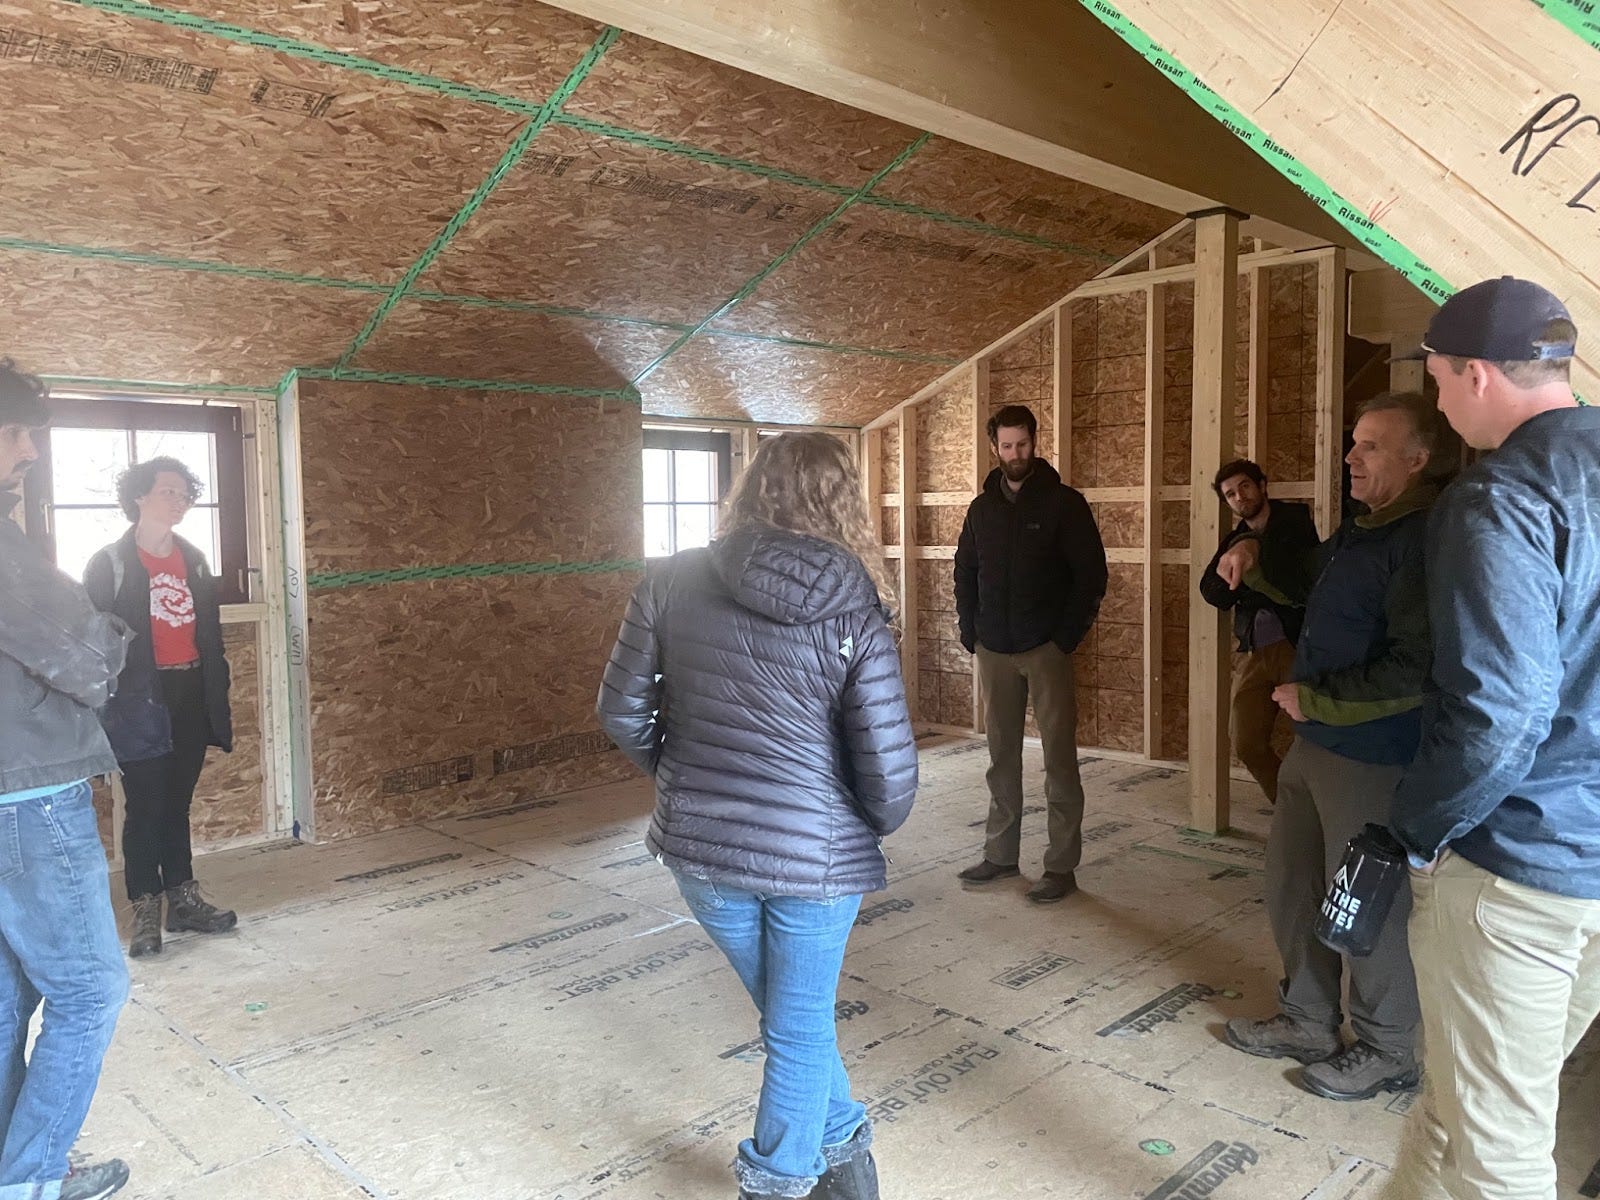
Hosted Yestermorrow Net Zero Building Design (NZBD) class
Hands down, the most instrumental experience that shaped this project, was being a student in the Yestermorrow Building Science and Net Zero Building Design Certification Program. I have posted extensively about this program and its impact before. So…it was very full circle–and such an honor and delight for Michael (one of my instructors from the class, and now GC on this project) and me to host the spring semester 2024 students at the site! They were motivating and inspirational to us, and we were psyched to have them come visit! Special thanks to Stephen Stuart, lead instructor for the course, for helping make this happen!
Finally, three little morsels–a list in of itself!
We are so delighted to have been selected to be a stop on the Northeast Sustainable Energy Association Pro Tour this summer. On August 9th, 2024 we will be hosting folks to come see a work in progress, and learn more about our Net Zero Energy Retrofit and Expansion of a 1782 Farmhouse in Vermont. If you have interest in seeing the project live, getting into some of the details you care about, and meeting some of the folks involved, we’d love to see you! You can register here.
I write this in the shadow of the passing of the remnants of tropical Storm Beryl, which–exactly one year after the devastating floods that happened throughout Vermont in 2023, has brought more flooding and ruin to so many not far from here. Feeling deeply for those affected in Barre and other parts of Vermont. And recommitted to the urgency of action in developing more climate resiliency, effecting a faster transition to clean energy, and doing it in a way that brings the benefits to all people, especially those with the least resources to do it on their own.
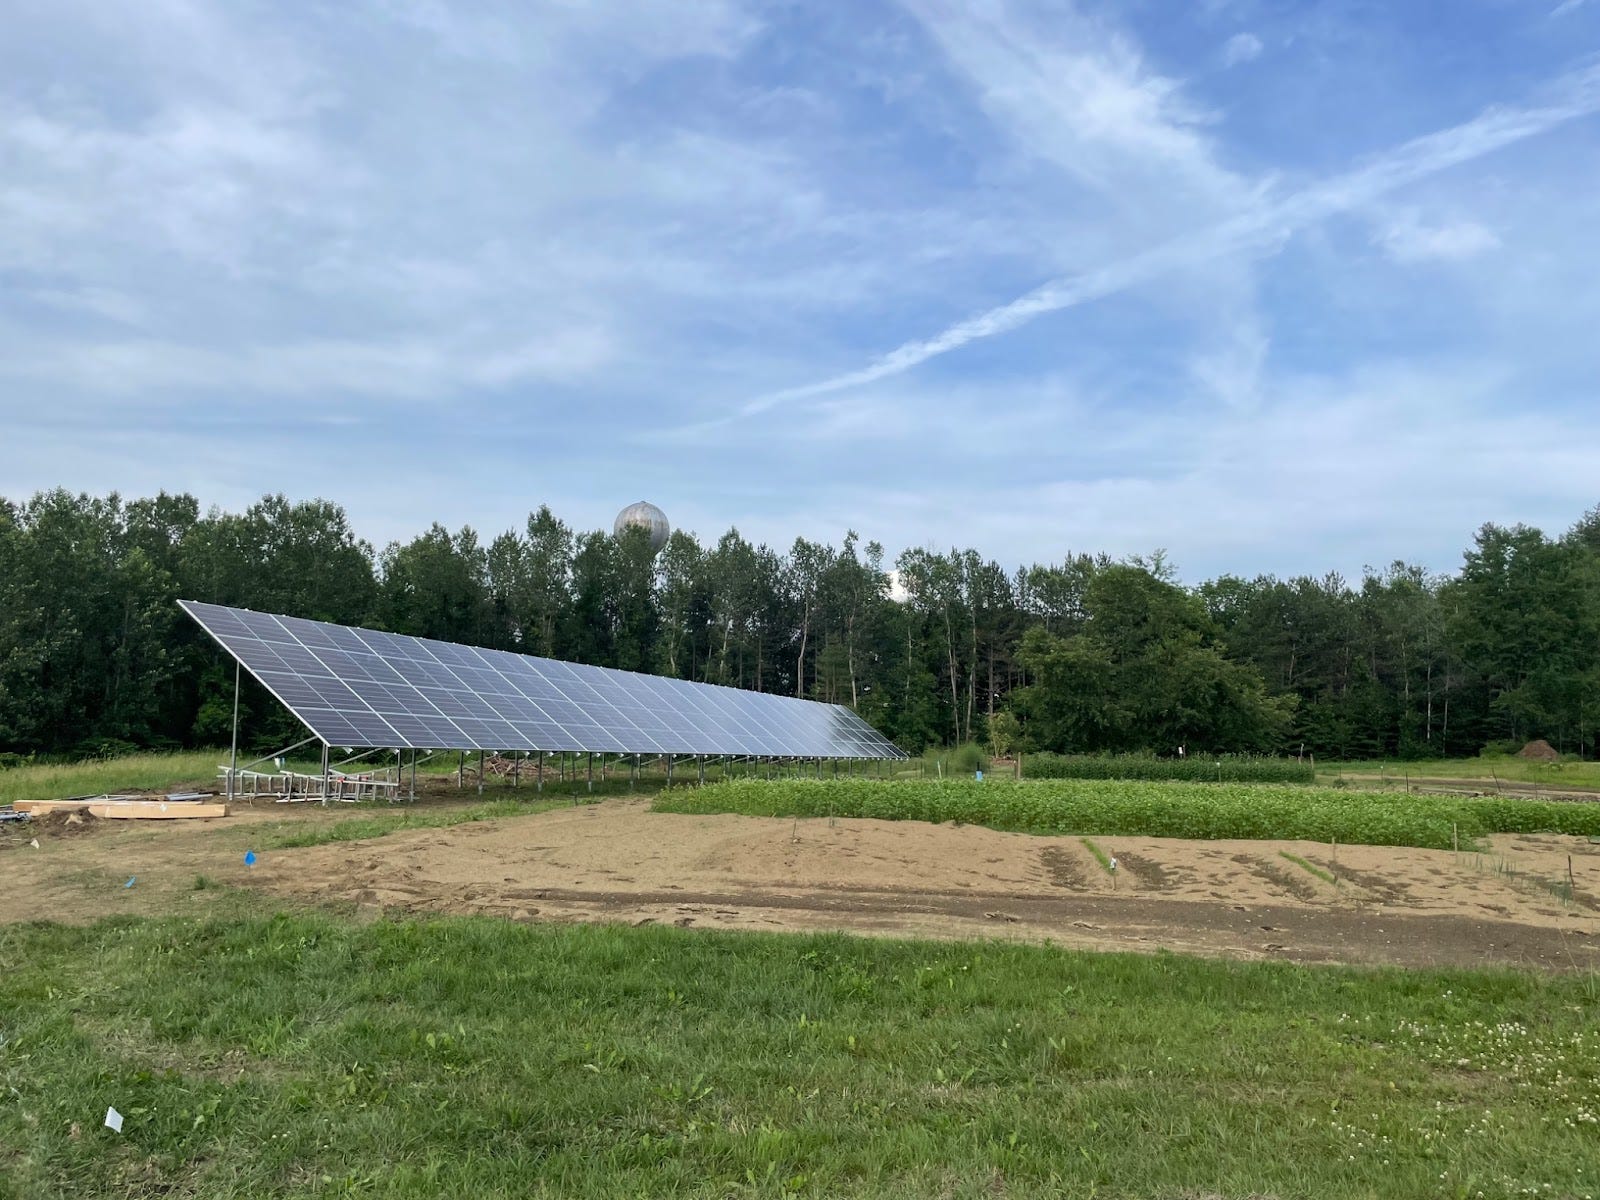
This month, the final work will be completed to get a town-owned solar array up and running in my town of Reading! The array is located behind the firehouse and designed to make as much power annually as the current electricity consumption of the town buildings. Made possible by new rebate incentives for municipalities and nonprofits as part of the Inflation Reduction Act, and just as importantly…by the support of residents in town who voted to make this purchase. It will bring renewable energy and significant energy cost savings to the town over its lifetime, and I think it looks great next to the community garden.
Thanks for reading Green Dream Stories! Subscribe for free to receive new posts and support my work.


Starting from the beginning, I think. Already eye-opening and inspiring! Can't wait to read all your posts!
Very impressive, Brian. Thanks for the journal.