

“I understand why you would want to do that, but have you thought this all the way through to the end product?”, Garrett asked. “I am not sure it ends where you want it to with the current plan.”
Garrett and I had met about a month prior. I was looking for a carpenter to focus on the interior work, and I was in a bind. We had lined up the flooring job with David and Charlie of Genuine Wood Floors, but as described in another post, the subfloor in the original house needed to be leveled out before they would do the flooring installation. When Garrett and I were having this conversation, David and Charlie were due in 5 weeks to start installing the floors in the original house.
“If we level the subfloor in the original house as you’ve asked, that will impact how the baseboard trim runs across the floor, the height of doors and their ability to swing, and how the door frames land at the bottom. You see, they are currently tied into a floor that is decidedly not level, so when you level the floor…it will really accentuate the irregularities. And it will create a lot of work to make the existing finish line up with the new floor. As for the walls and windows…there is no way to tie the existing window casings back into the new windows without it looking at least somewhat forced together. It will definitely take a lot of extra labor. And where do we stop chasing these lines that are not square, level or plumb relative to the floor? What is your fixed point? We always need to work from a fixed point.”
He wasn’t saying “No”. But he was leading us there.
As with the flooring conversation with David and Charlie, Garrett was saying that taking one step back to create a solid template for finish work was going to allow us to ultimately move faster, and create a high quality finished product.
He was also saying I should probably call Genuine Wood Floors and tell them we needed to reschedule the install so we could get the work back into a sequence that made sense: subfloor, then framing walls and ceiling, then sheetrock (and ideally some painting), and THEN floors.
Garrett is a clear thinker. He asks probing questions that help us more clearly articulate our end goal. He sees three steps ahead. And both he and his frequent collaborator, Gary, came highly recommended by folks in town that we trust. With mutual agreement that this could work out, he and Gary were on the job.
In case it wasn’t clear from Garrett’s line of questioning, the first order of business–very much not the original plan of “light touch in the original house”-- was gutting much of the interior of the original house.
The decision to gut the interior of the original downstairs, and reconfigure the upstairs, was not made idly. We had come to love both the history of the house and certain finishing details that recalled that history. What made the choice easier was that Garrett cared about these things as well. And it was clear that he considers the choice of whether to demo, and how much, on a case by case basis based on goals and the situation at hand.
So, as we mapped out the plan forward, we all agreed to bring back traditional elements in many places. In some cases, we would reuse/repurpose materials. In fact, we ended up saving a barn full of material (window sashes, doors, old framing material, etc.)! In other cases, we would seek to recreate elements we liked so much. You will see examples of both in future posts.
But, for now, a story about demo, and bringing things back to allow for quality finish work:
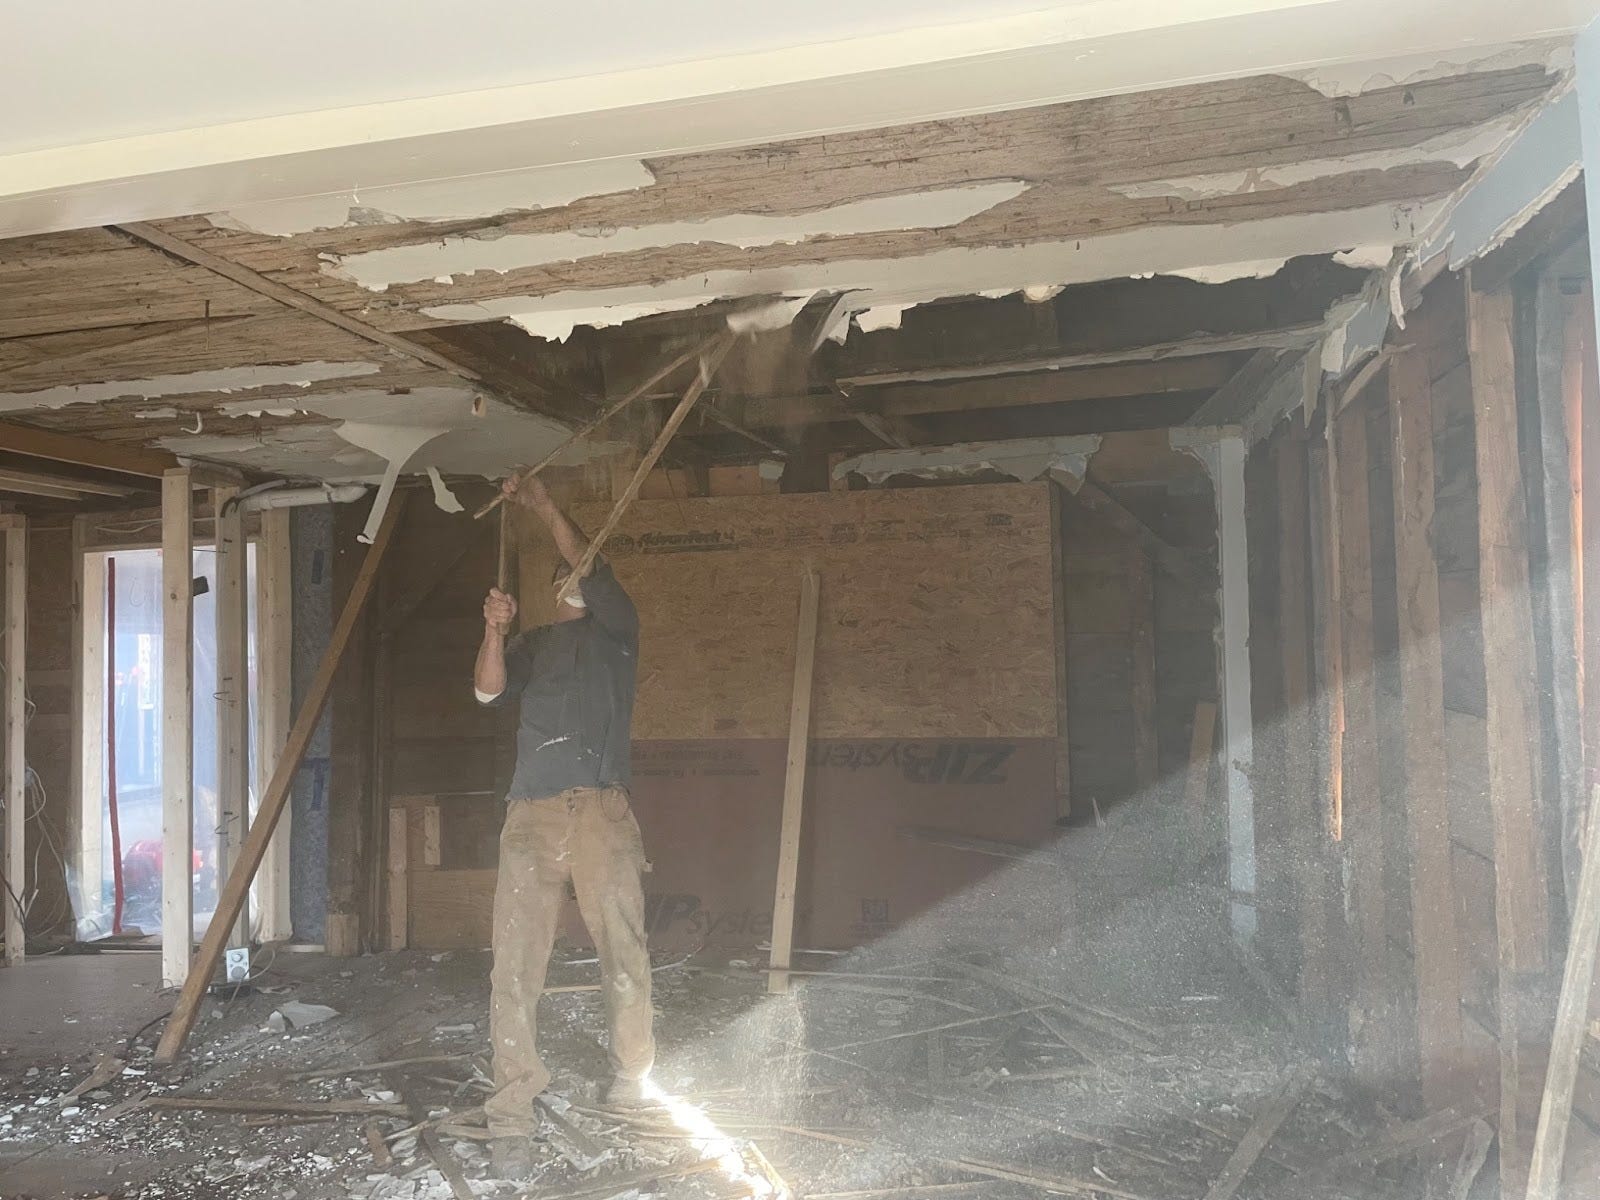
Garrett going after the ceiling in the living room. It had a layer of plaster and lathe, and then strapping, and then a layer of sheetrock over that. And a lot of mouse….leavings. Like 240 years worth. We were happy to be rid of those! And, if you are thinking this is an opportunity for ceiling height gain…you’re right!
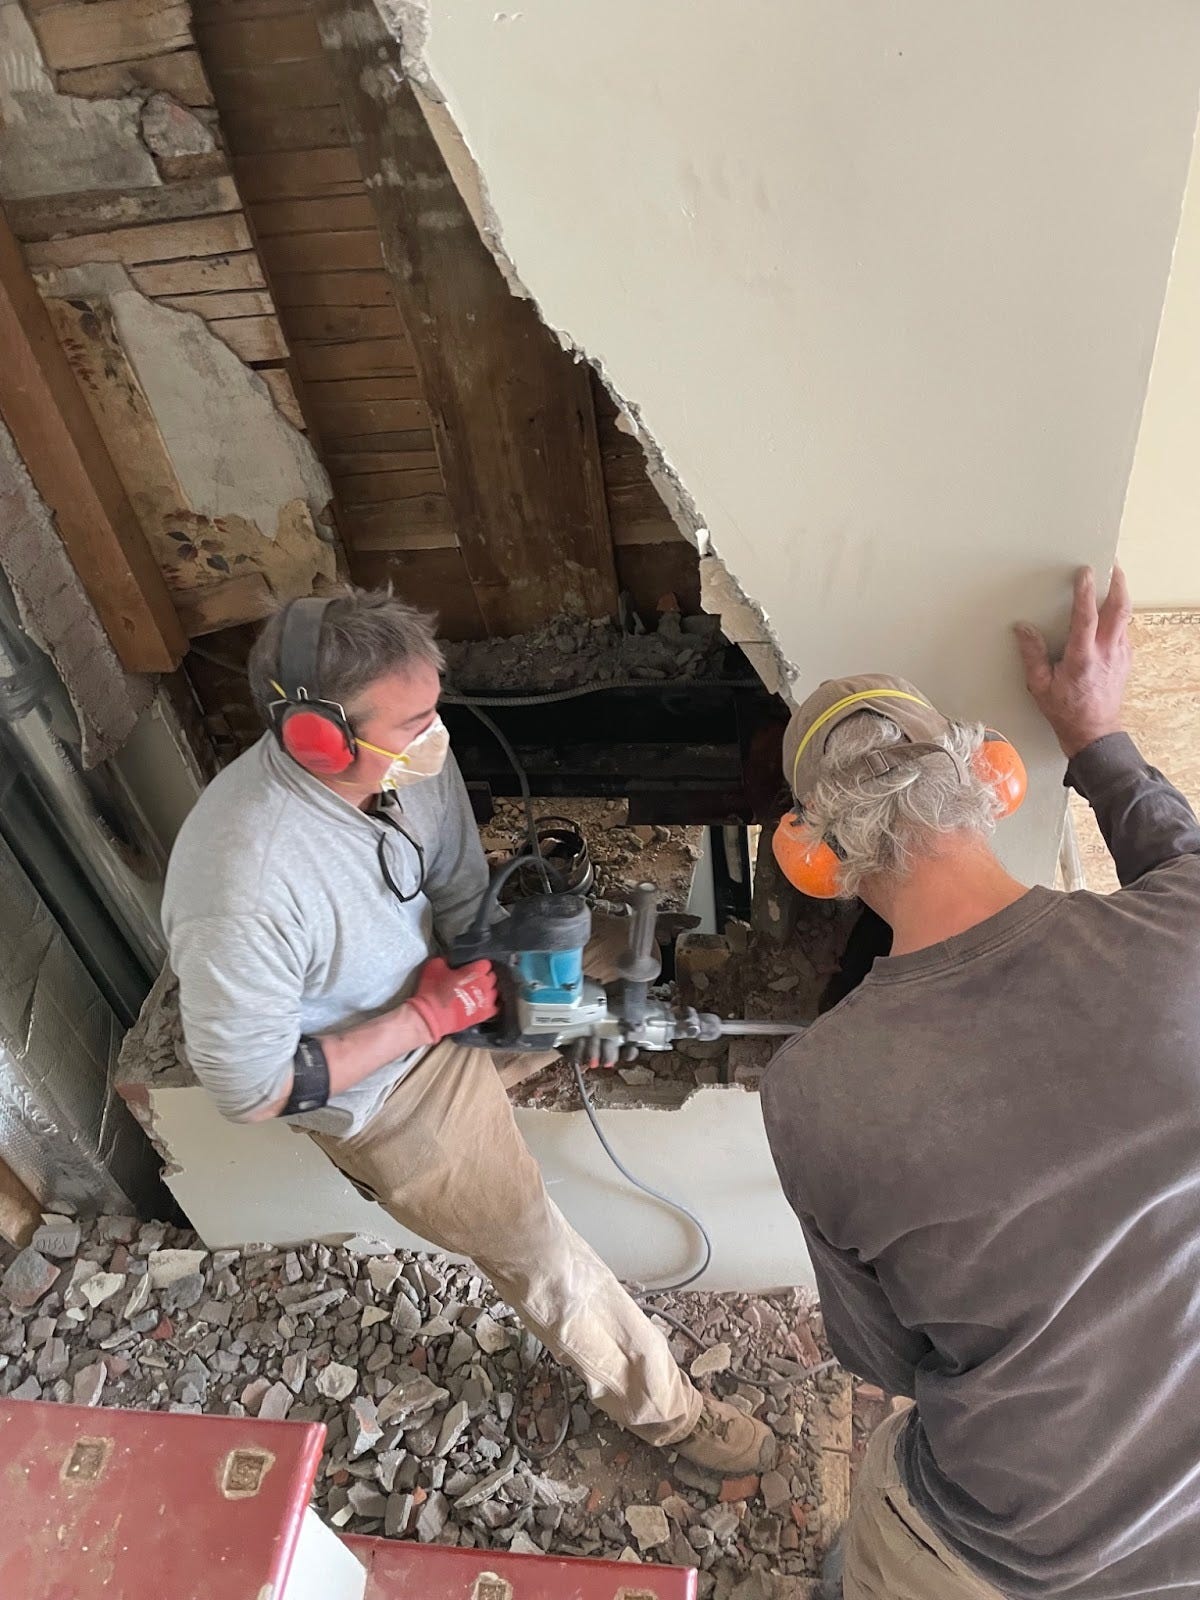
Gary and Garrett team up to take out the old chimney. It was no longer functional, as the chimney had been taken down below the roof line already so we could put A Hat on the House. And we didn’t want to keep the fireplace (also known as ”a huge hole in the house that leaks heat like crazy”) in this high performance home anyway. It took some discussion, but losing the chimney all the way to the basement meant (1) more room in the front hall, and (2) a bonus upstairs closet!
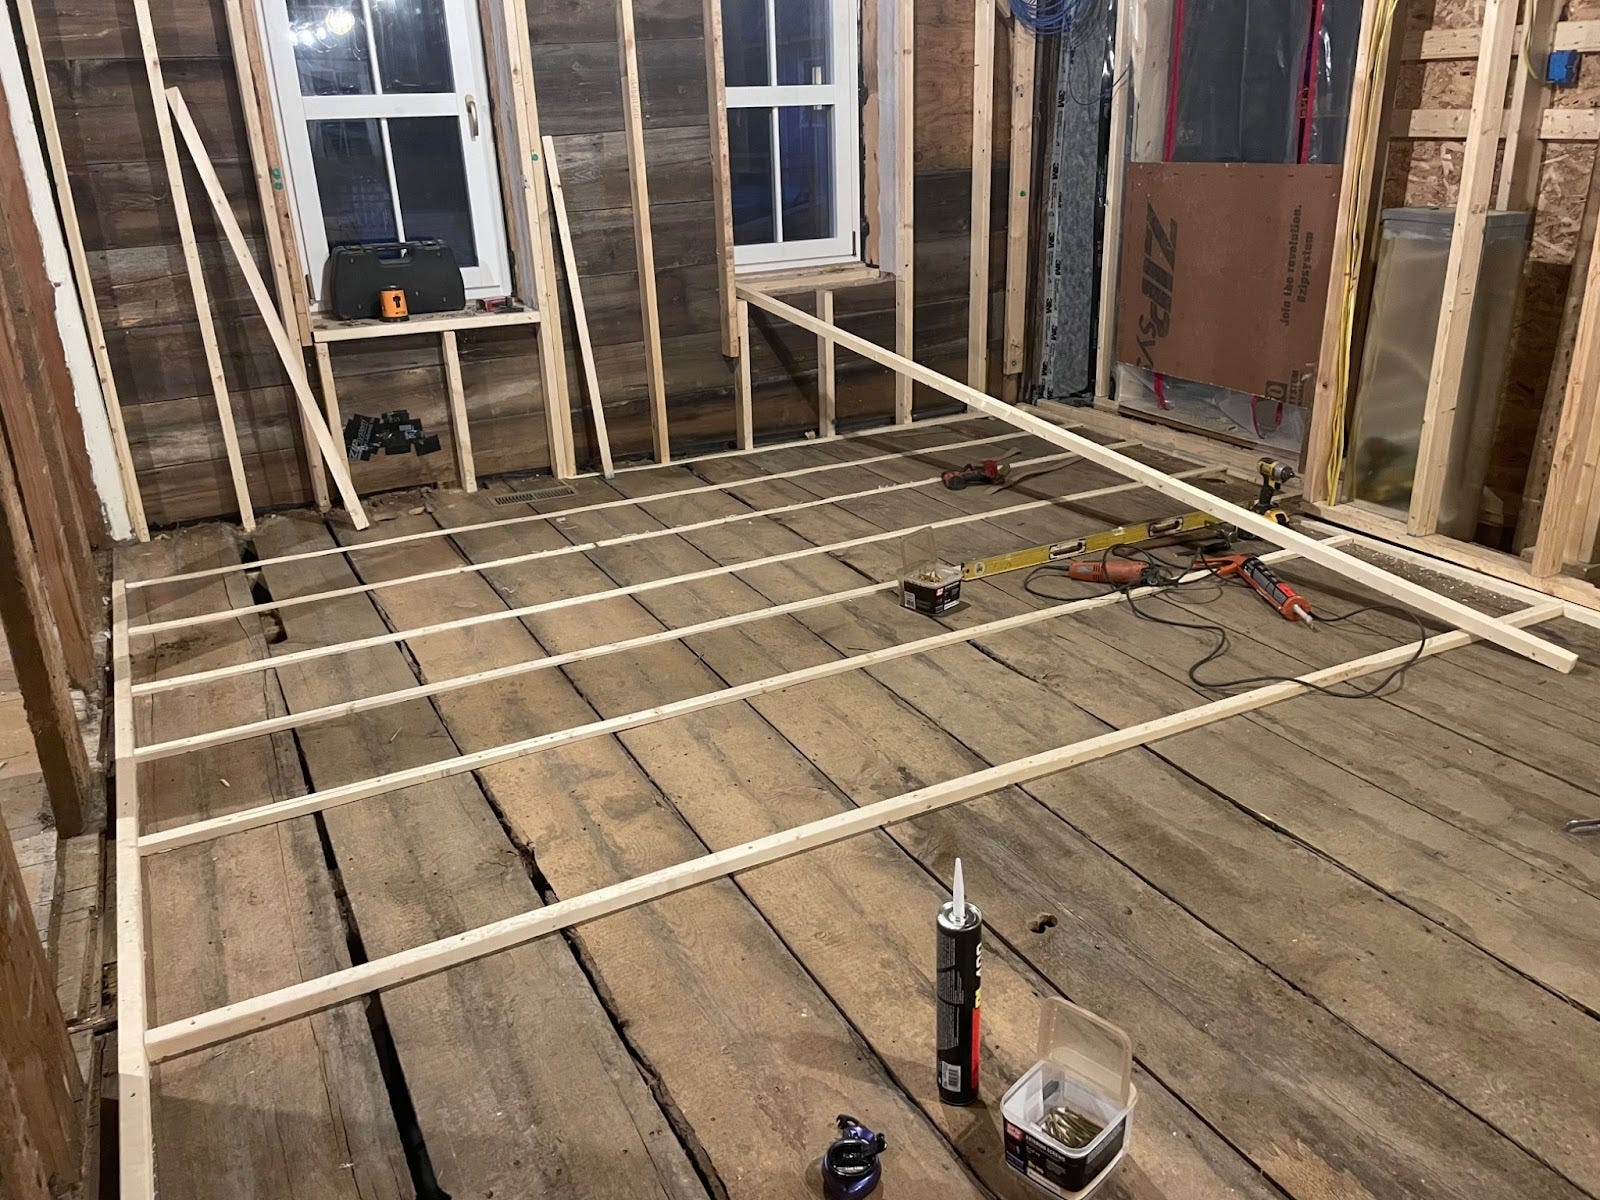
The subfloor leveling begins. In the area that will be the expanded dining room, tapered cut 2X material (“sleepers”) were glued and screwed perpendicular to the less than level original subfloor, creating a plane that is level.
And on the now-level sleepers, new subflooring material is laid down.
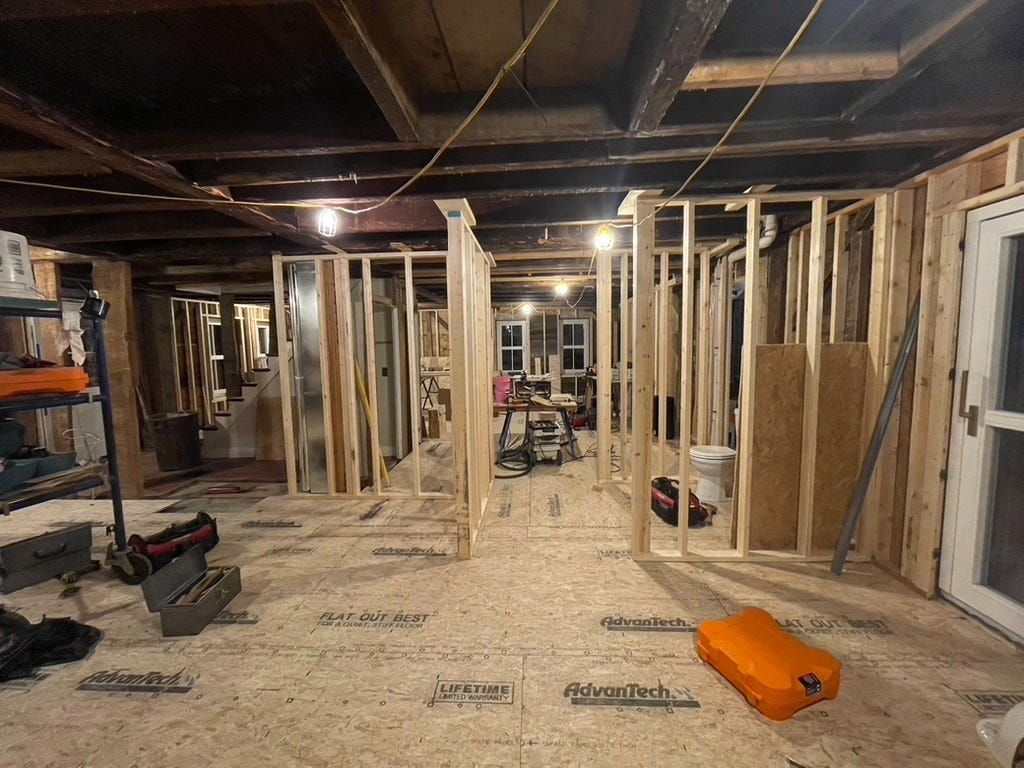
Then framing for new walls. To the right, the new half bath framing takes shape (the give away is the toilet placed in to help get the sizing JUST right).
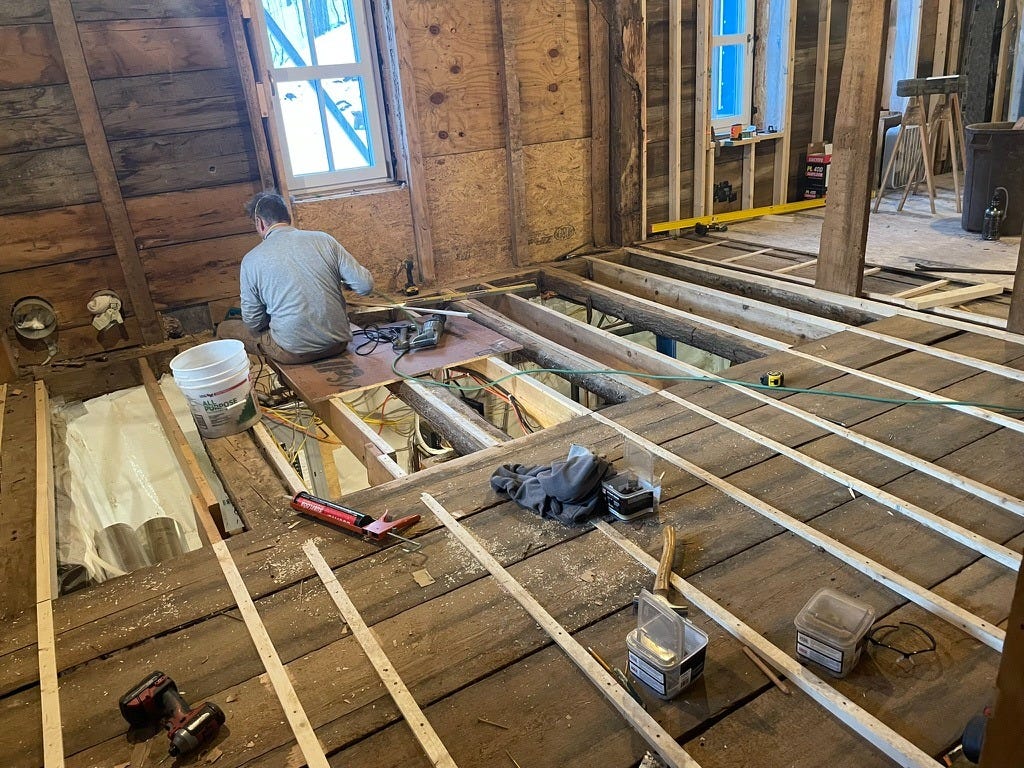
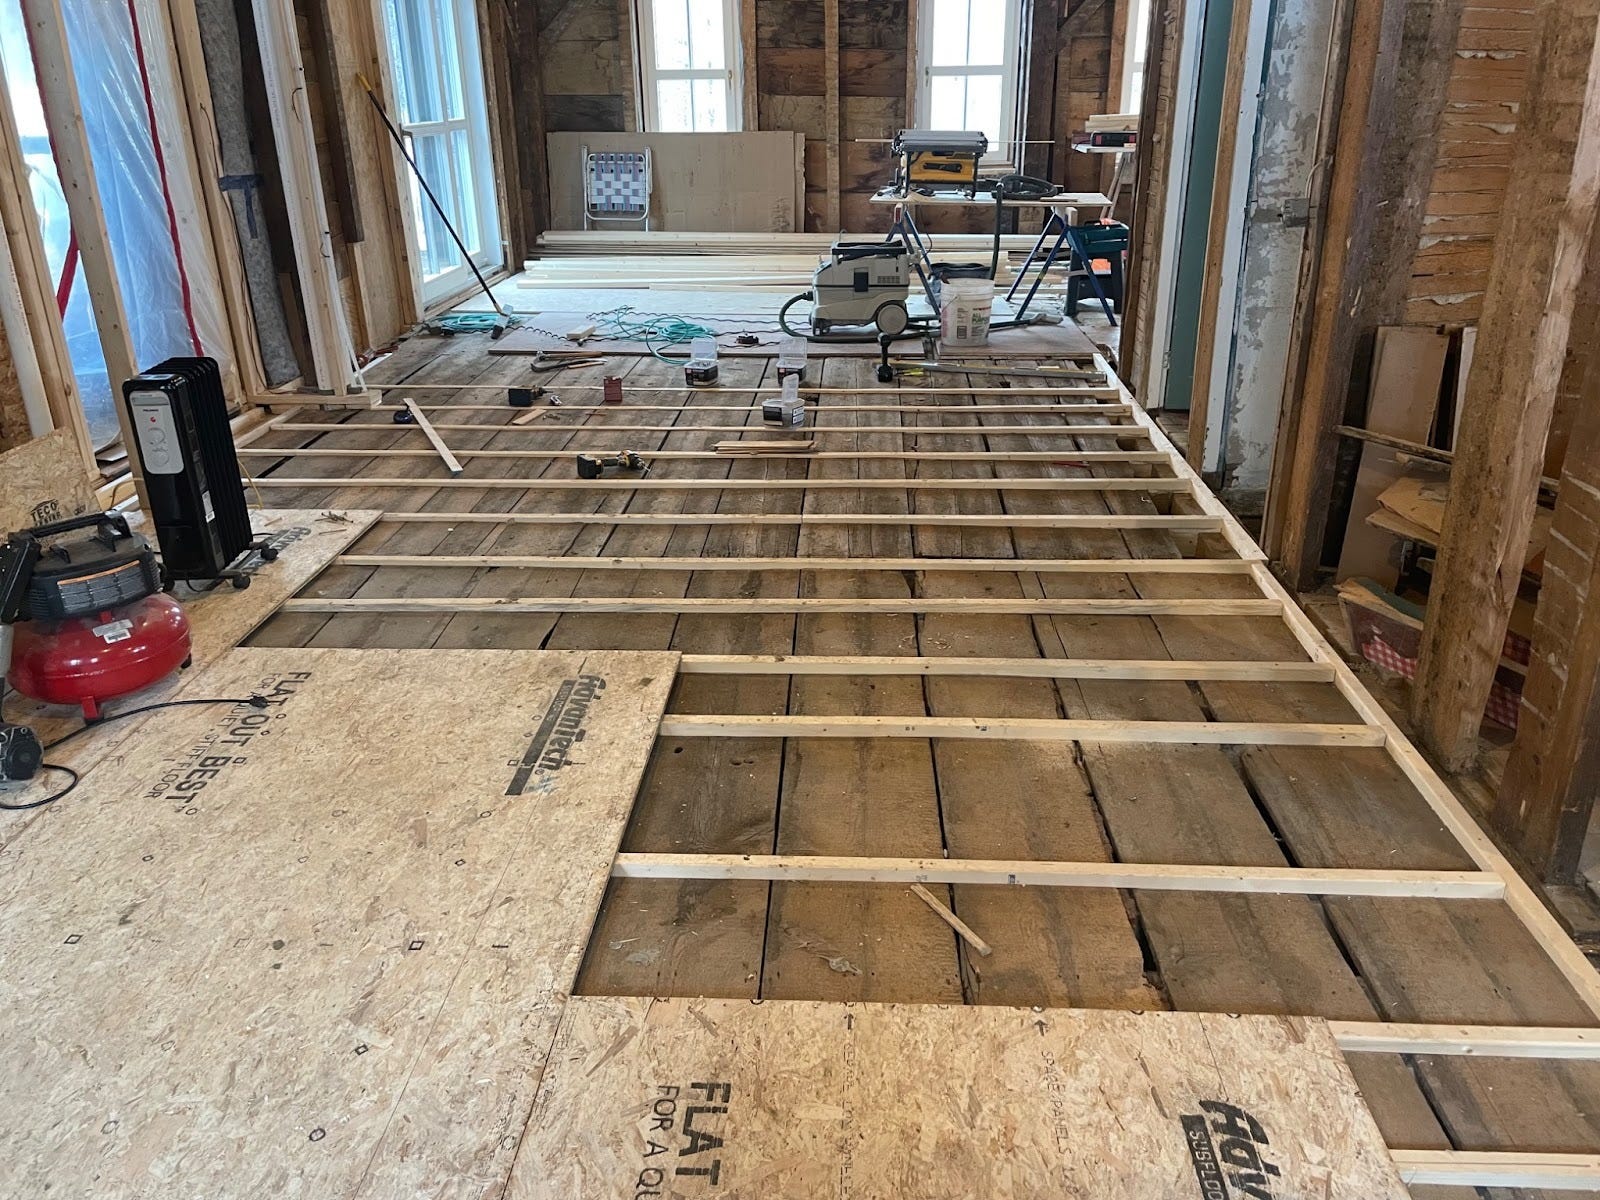
The north side of the den (shown here) was the high point of the first floor–so Garrett and Gary took out the original subflooring to lower the plane, then added back the height they wanted with sleepers on the joists. While they were at it, they added some more joists for good measure.
We discovered some things during demo that revealed some interesting history of the house.
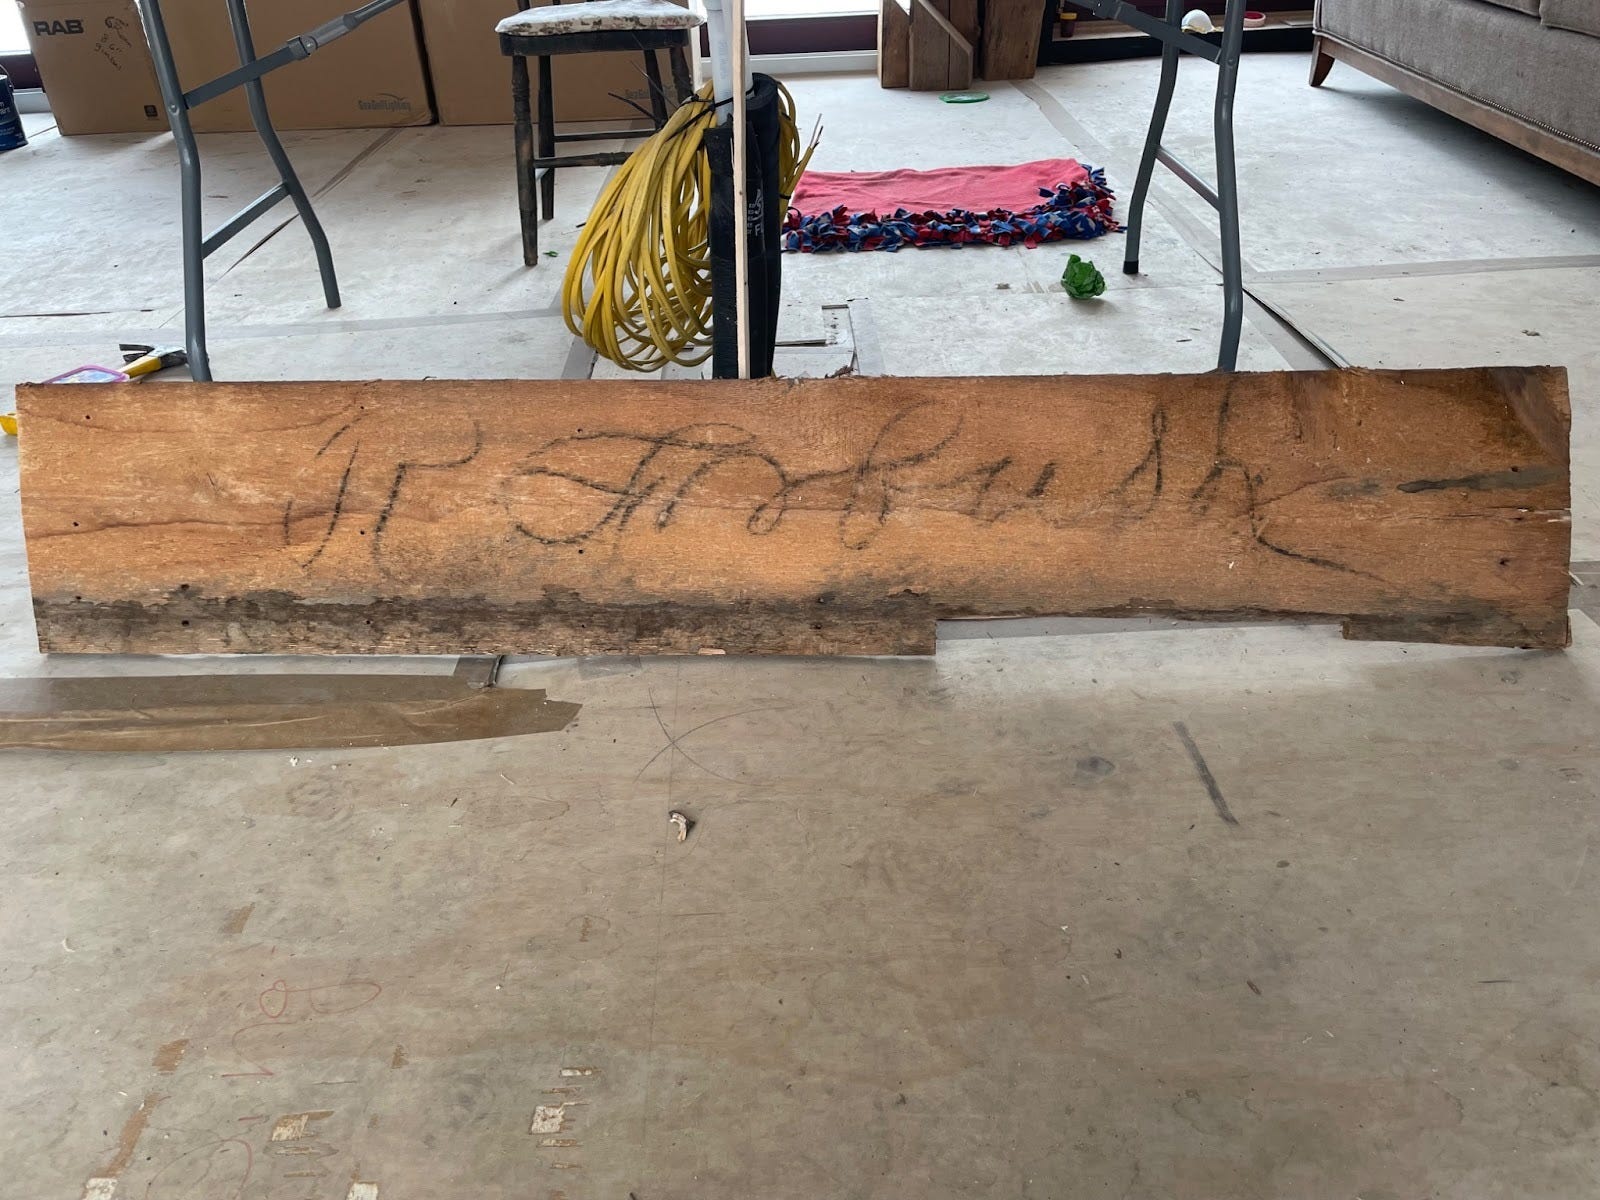
One of the pieces of subfloor had a name written on it–”R. Forbush”. I have written extensively about Rufus Forbush (the 1812 war veteran, who inherited the house from his father, Rufus, who bought the house from Moses Chaplin, who built the original house ). We don’t know which Rufus this was, but my money is on the son, as he did quite a bit of remodeling in the 1830s.
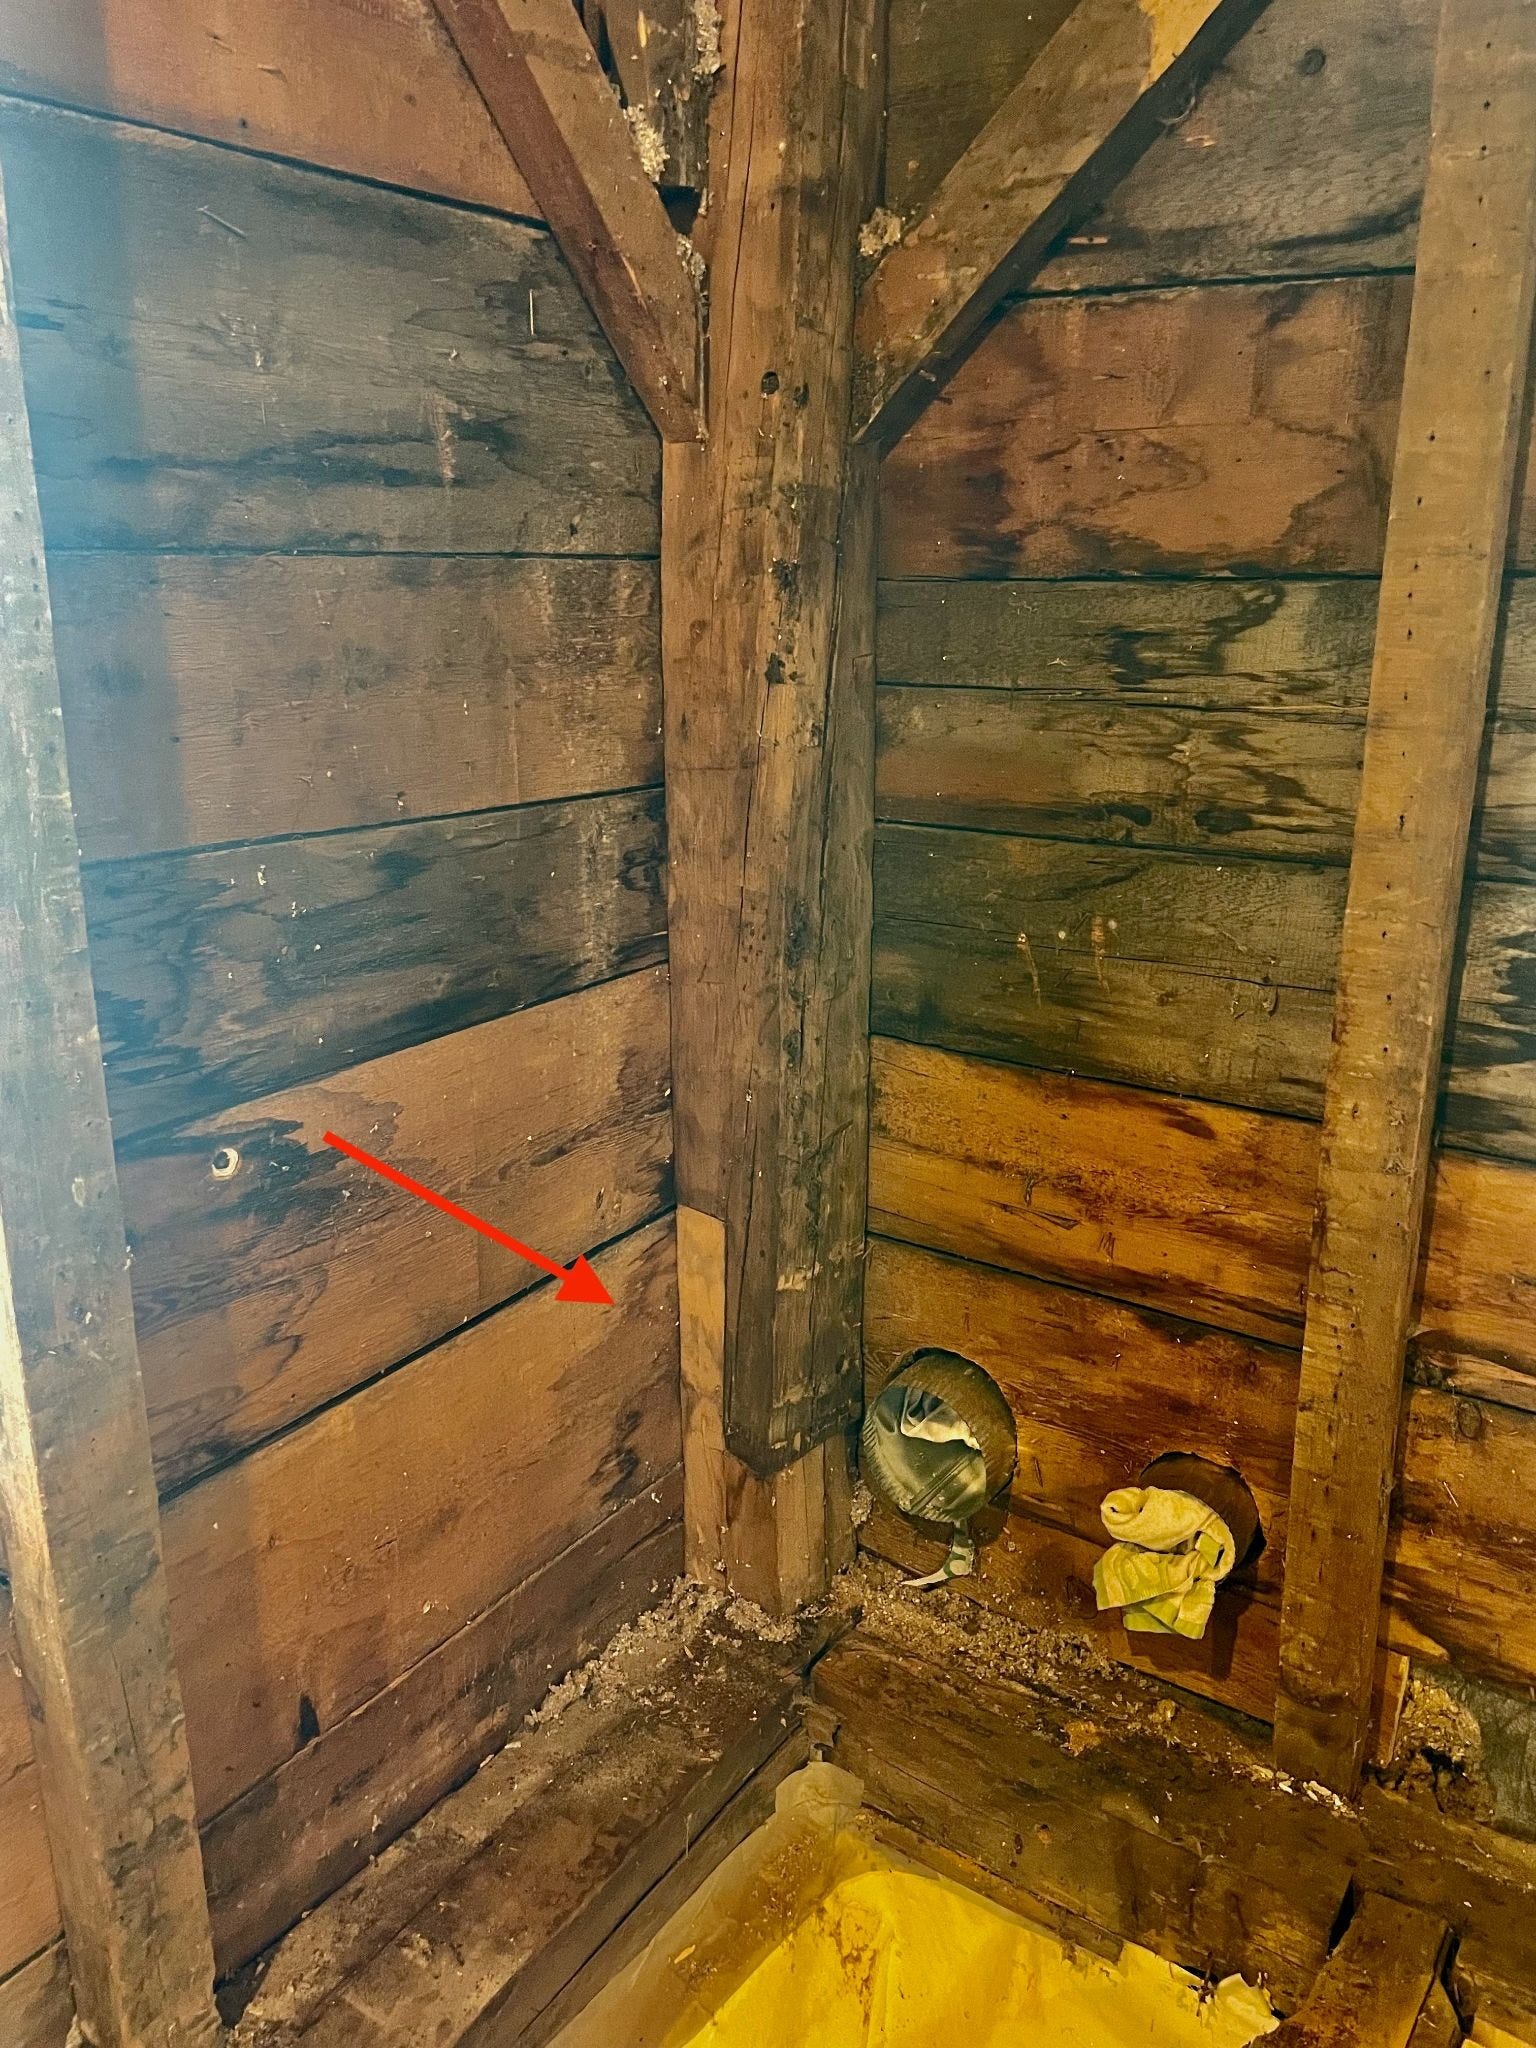
We were surprised to discover that every post from the original timber frame had an added extension at its lower end (as in the corner post above, denoted by the red arrow). We had seen one or two of these earlier on and assumed it had been a repair. The fact that all of the posts had this same “scarf joint” extension suggested that, instead of repair, they had raised the height of the whole first floor by about 14 inches! Two other bits of evidence bear this out: (1) Gary found a reused piece of wood in one of the walls that had tenons on both ends that is exactly the height of what a stud would have been before they raised the height of the first floor, and (2) the studs currently in between the major posts in the exterior walls were all newer looking and a different wood than either the original timber frame or the shorter stud we found. So….that’s wild! I would love to know how they pulled this off.
We also found lots of evidence of re-use of materials, including two of my favorites–stair treads flipped up and over to be reused as risers, and floorboards used as sheathing repair. Would (wood?) that all resources were treated as so precious today!
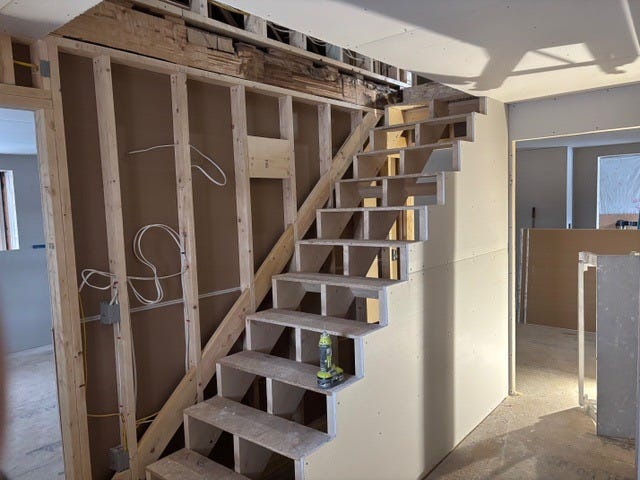
Garrett and Gary also reframed the stairs to the second floor of the original house, taking advantage of some of the space created by demolition to create stairs that are less steep and have a consistent run.
Upstairs had its own transformation. I will discuss more of that in a post about finish work, but in the context of using demo to create space….
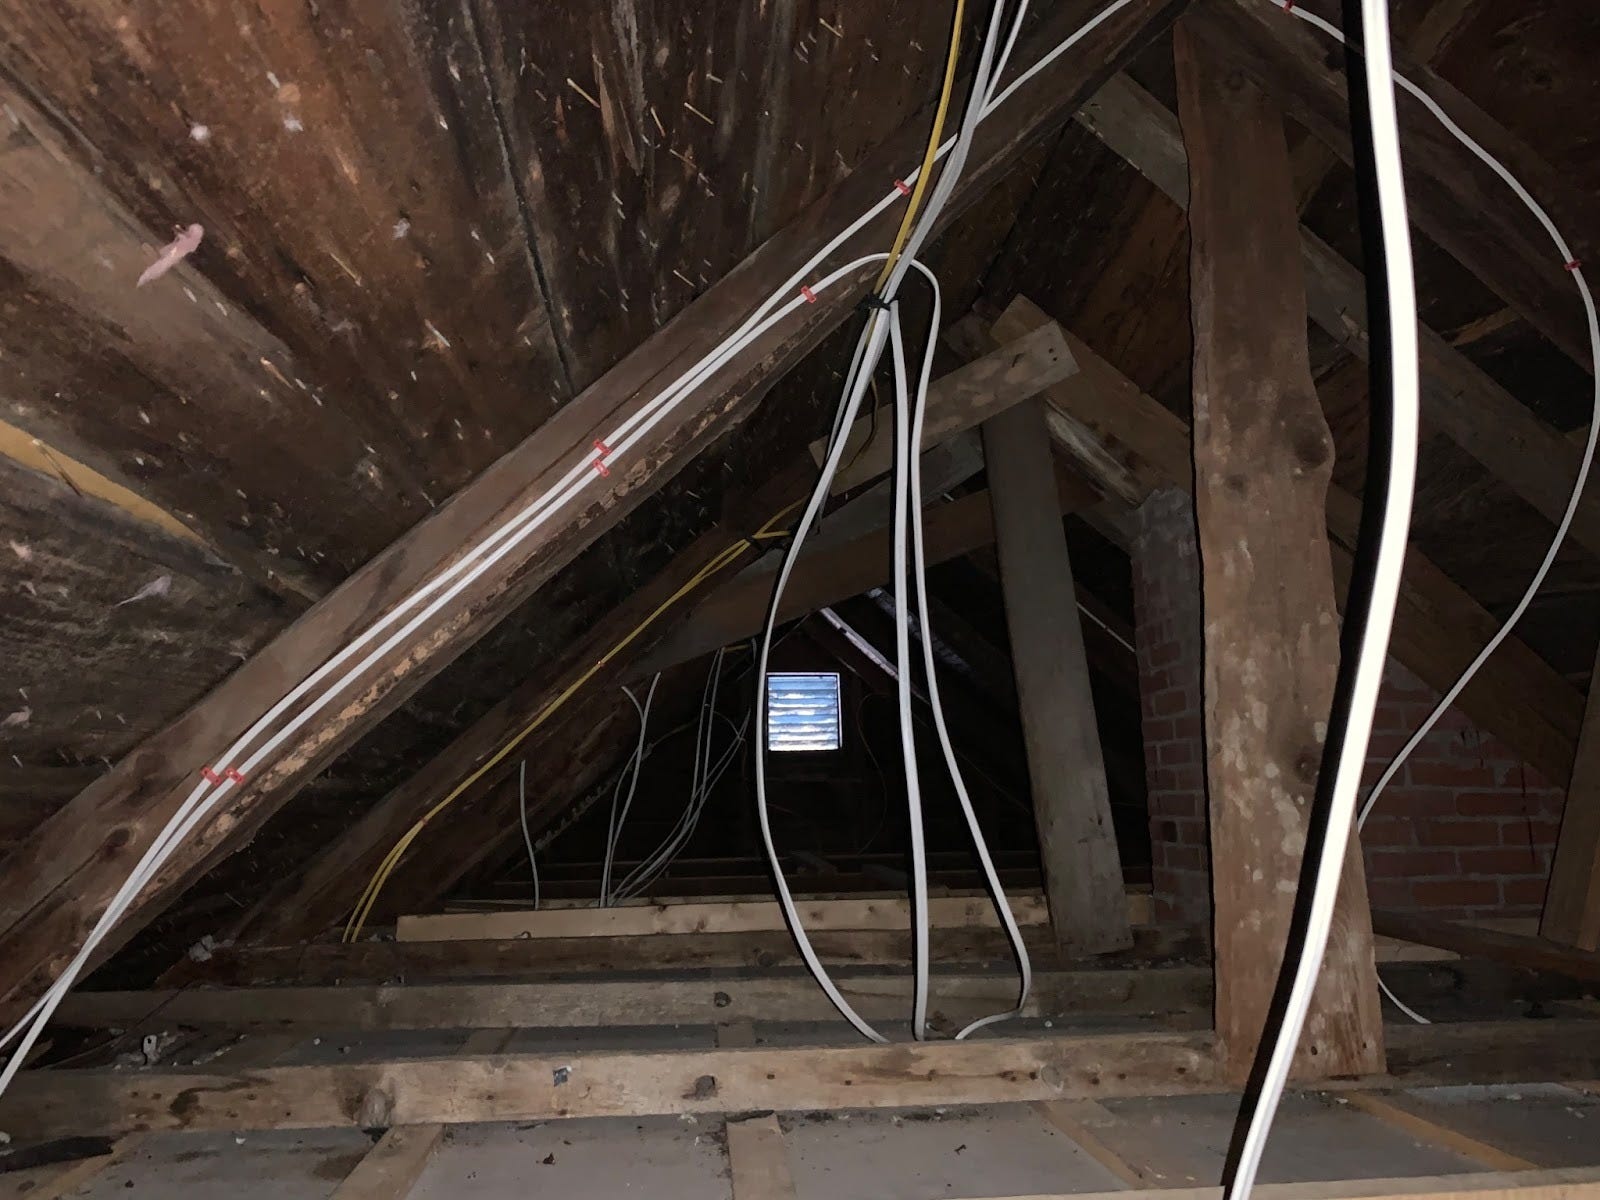
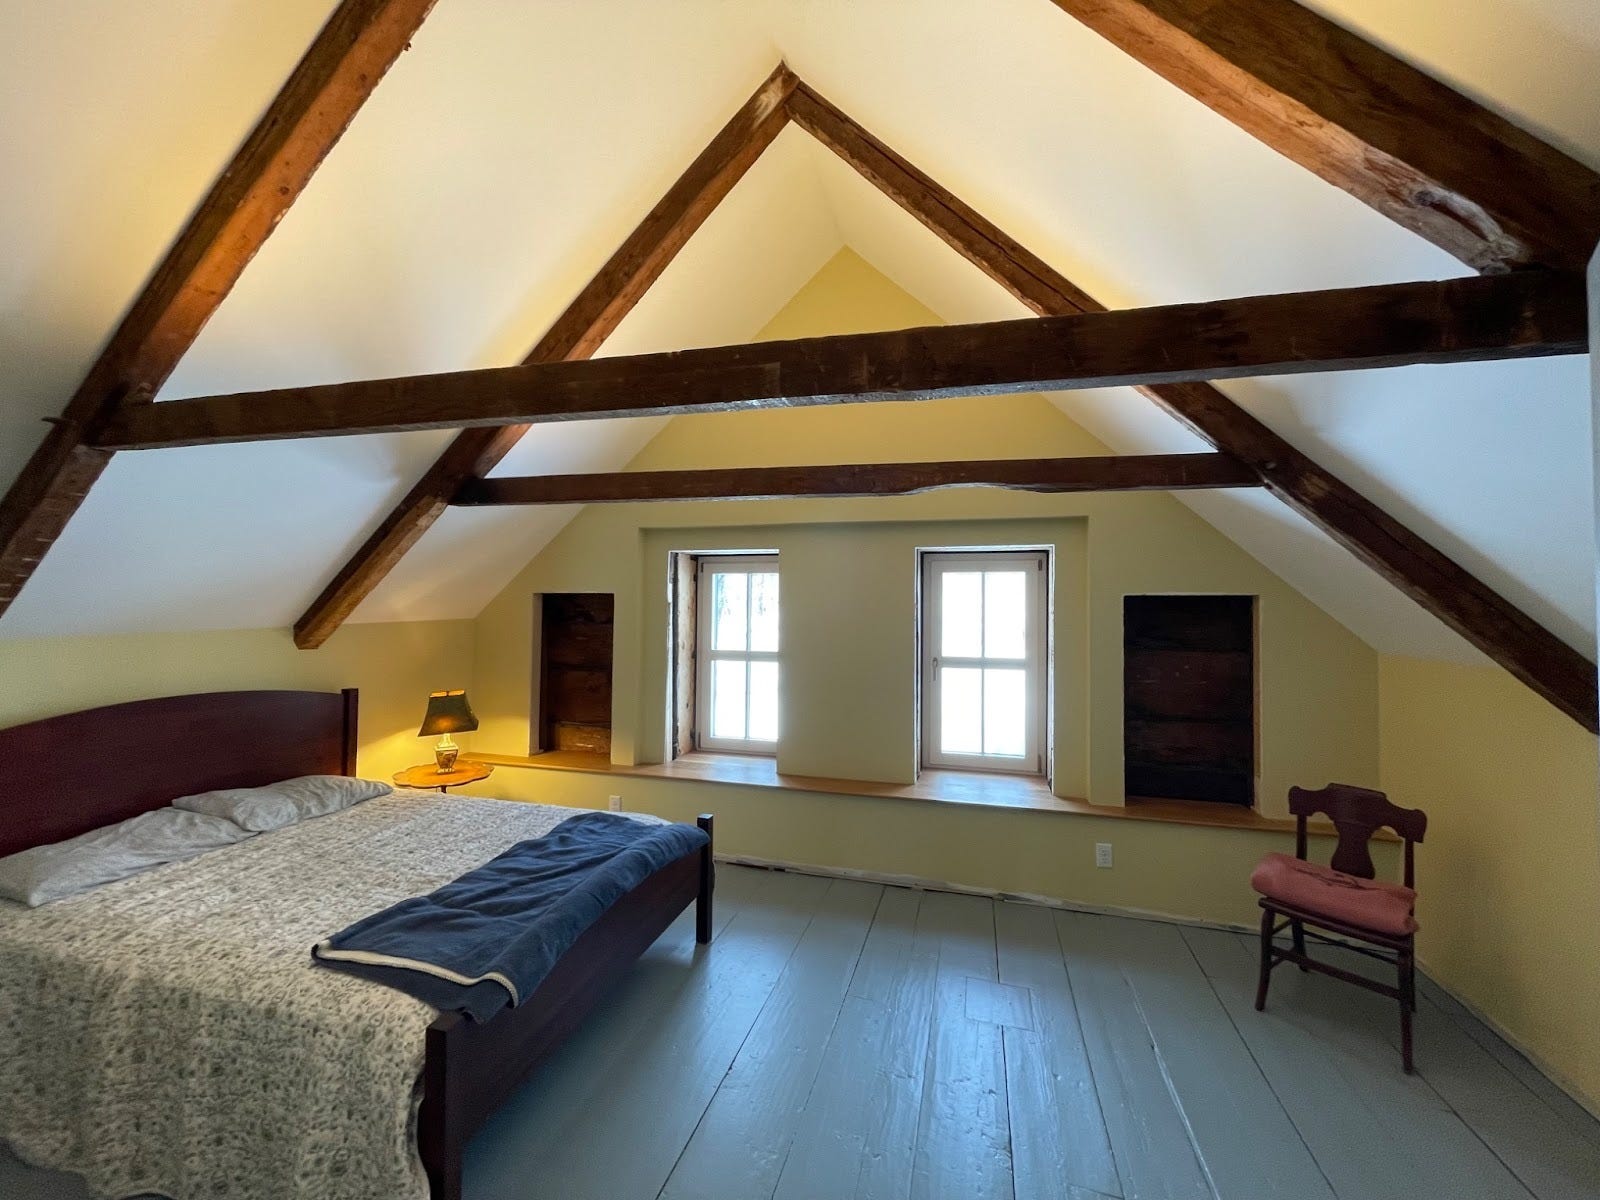
This was the attic space above the north bedroom before any work began on the house.
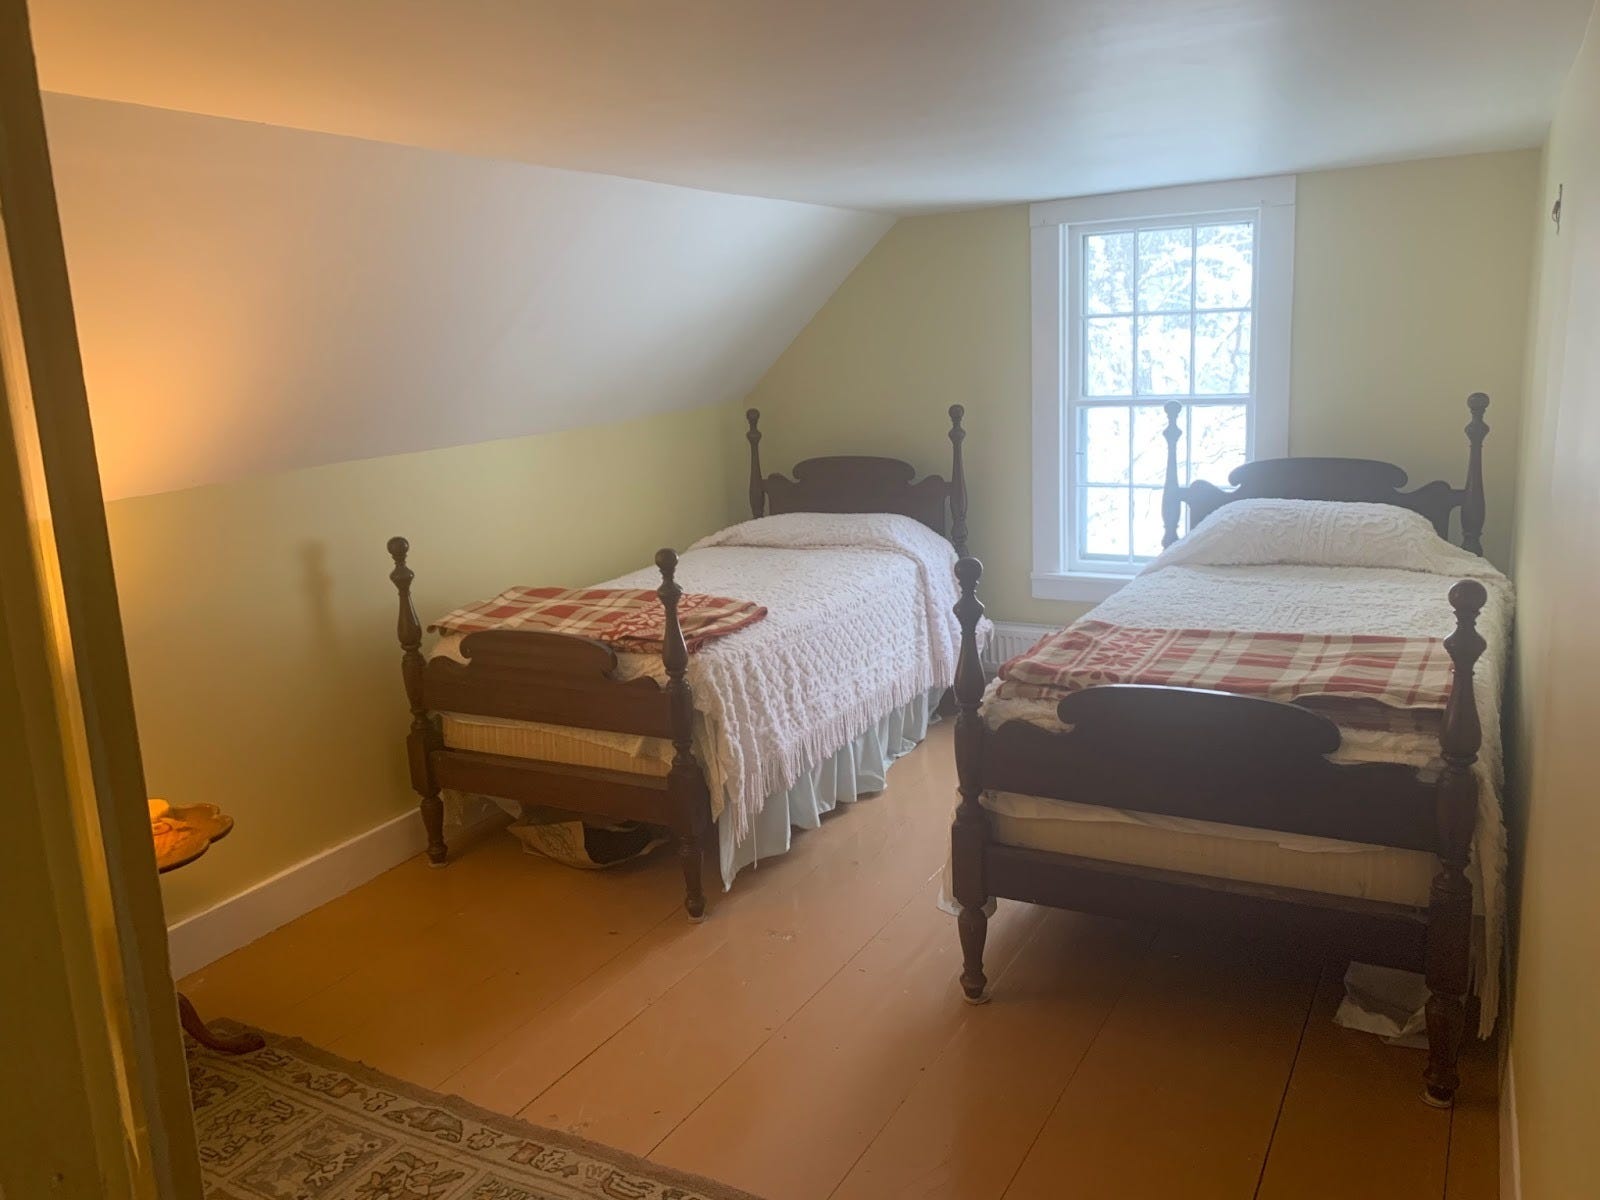
And this was the bedroom below. Cozy. Low ceilings. Modest amount of light. The old bathroom was on the other side of the wall to the right.

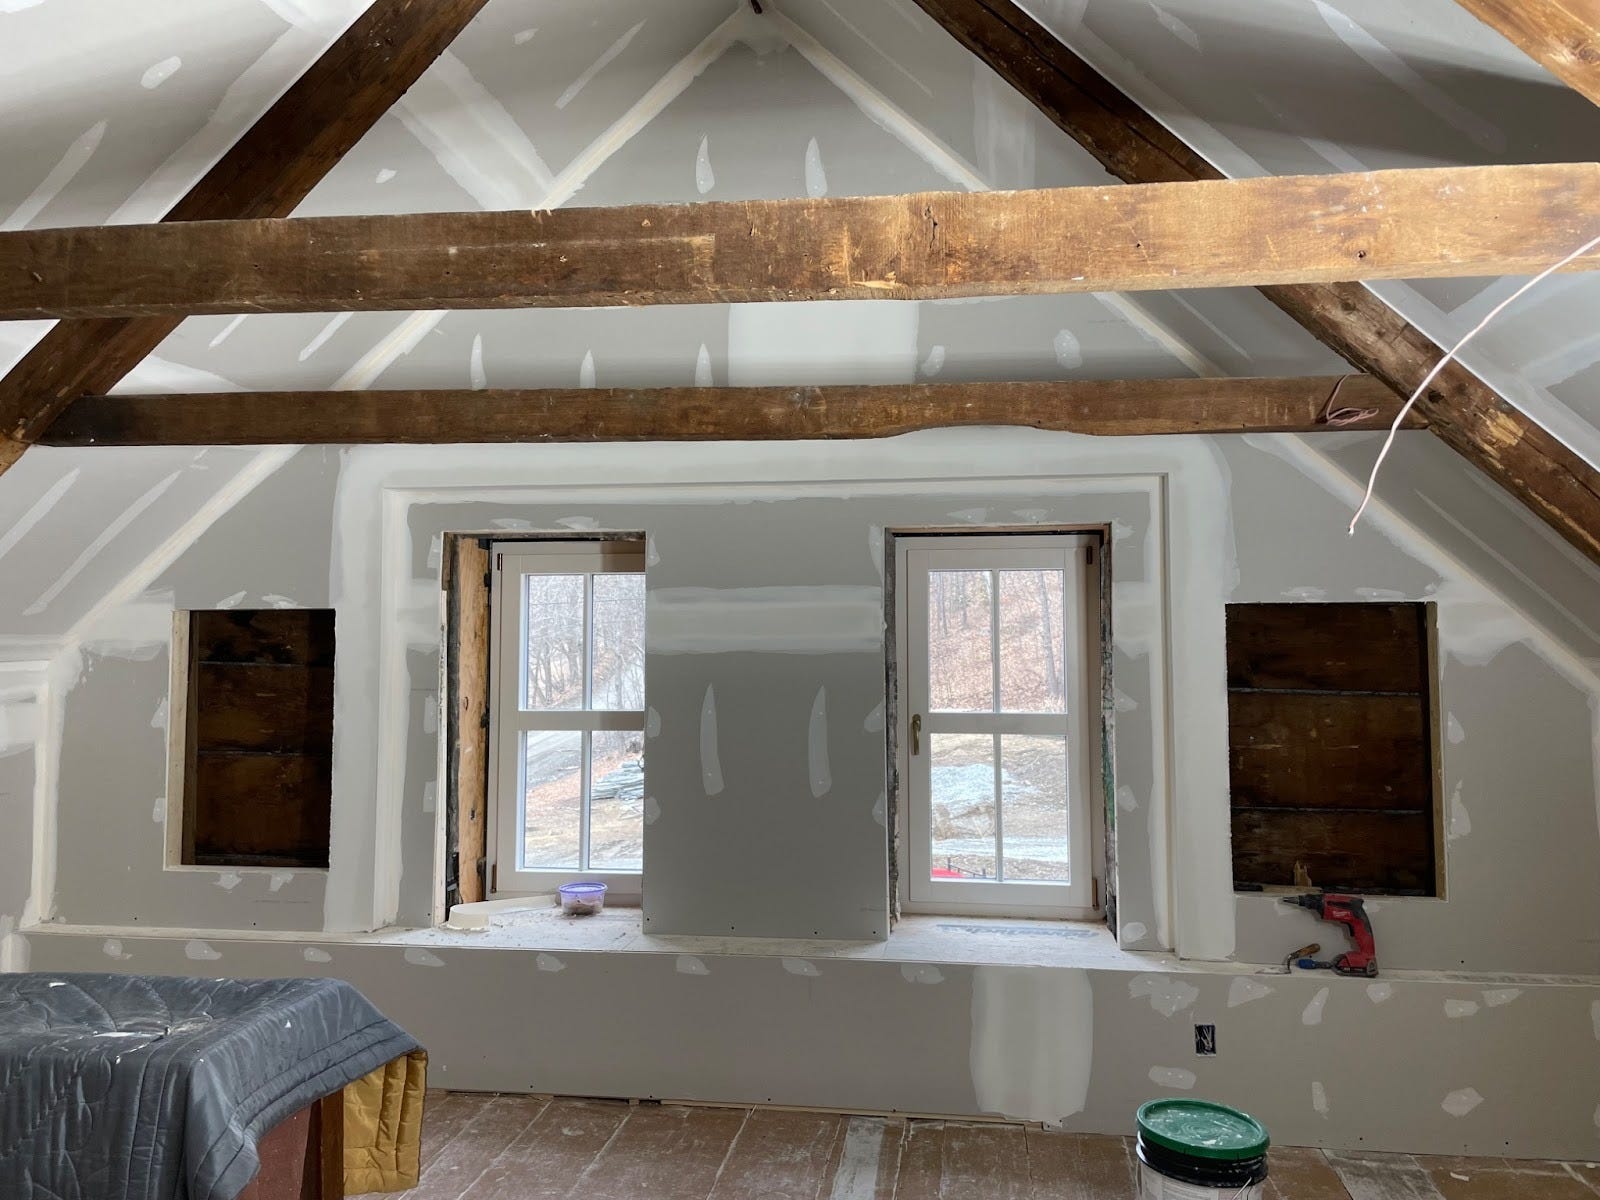
This is the new north bedroom, mid-framing. The attic space from the above picture is now part of the framed room. The mark down the middle of the floor shows where the wall that separated the bedroom and bathroom was before this renovation (a new bathroom was added in at the top of the stairs–details in a separate post). Garrett and Gary built a chase underneath the windows to hide a duct (the bright silver of the duct insulation can be seen in the chase). That duct is the make-up air vent for the kitchen hood. When the kitchen vent hood is turned on, a baffle at the exterior penetration of that duct opens up, allowing air to passively enter to balance the air being expelled by the kitchen hood. That is necessary in a well air-sealed home to prevent negative pressure or backdraft.
With the north wall sheetrocked, the duct is hidden, and a deep window seat begins to take shape.
Same room as above, with the window seat finished, and paint on the walls and ceiling. Not visible (by design) is LED strip lighting installed into a routed out channel in the collar ties that run across the room. This provides dimmable uplighting. The cutouts to left and right of the windows are for bookshelves, which is part of the finish work.
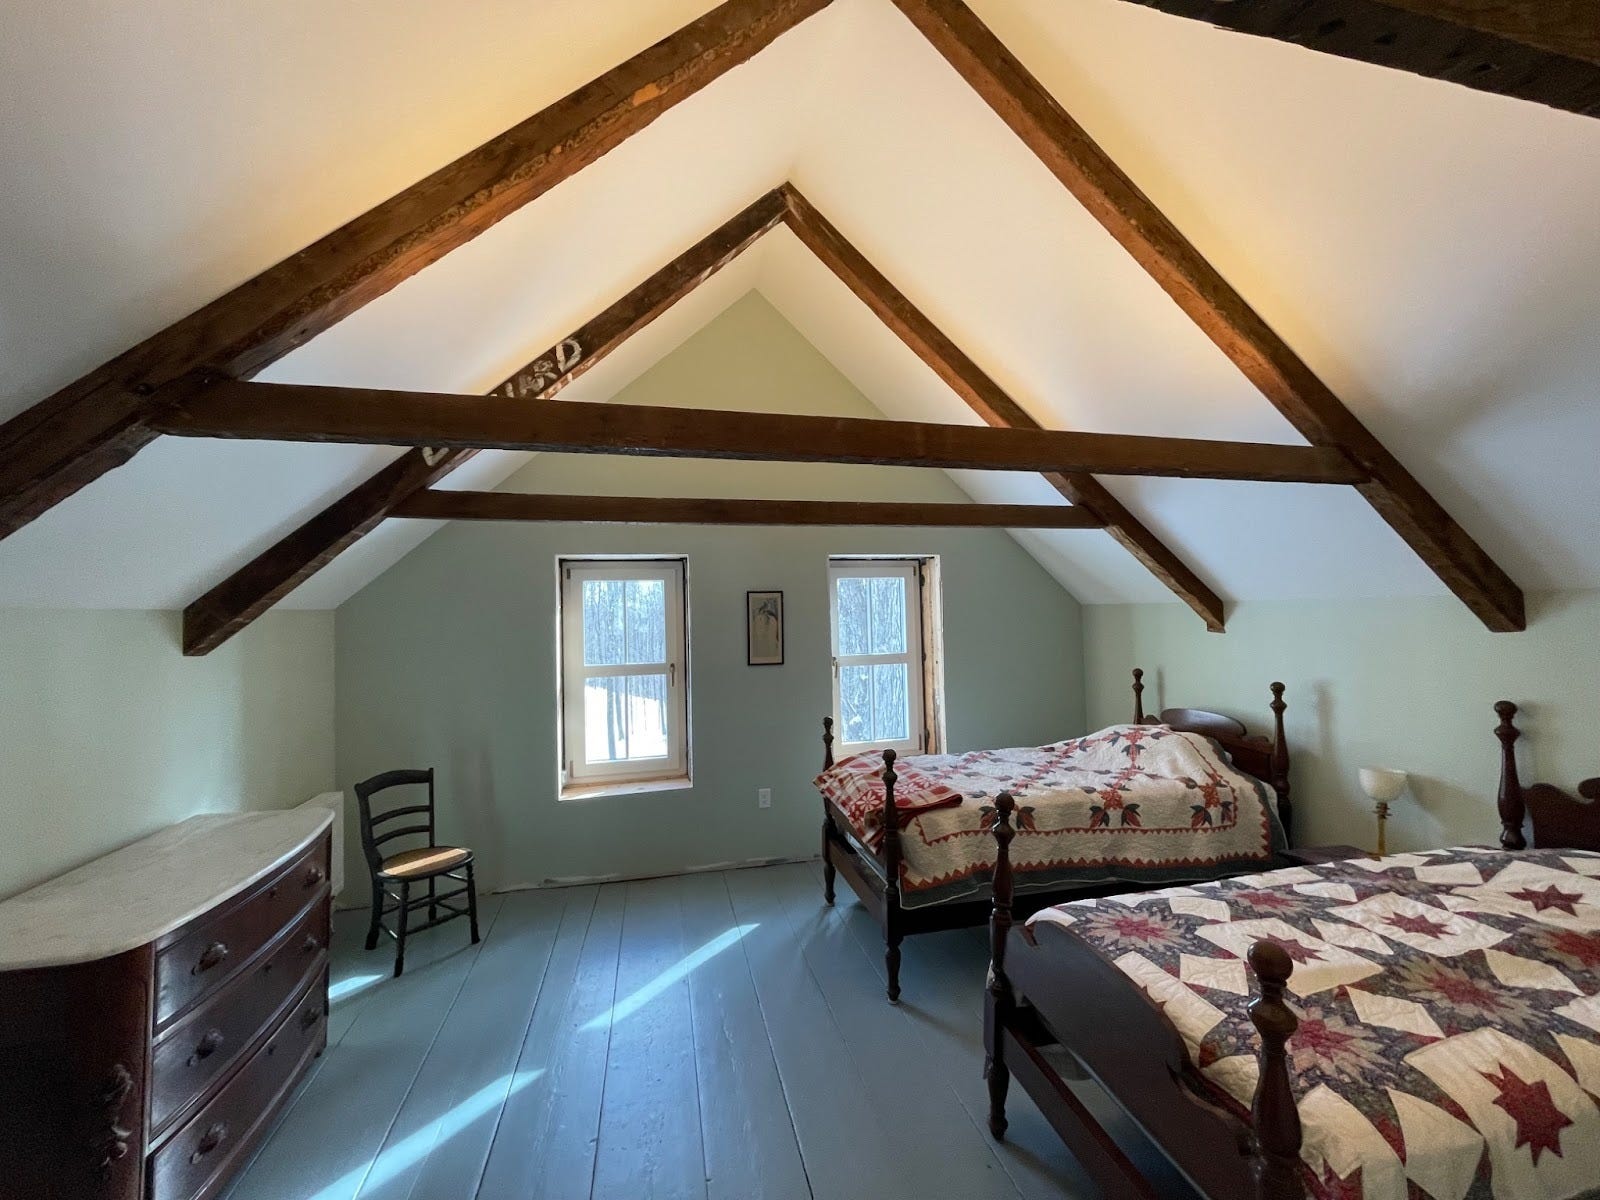
The south bedroom (pictured above) got a similar treatment to the north, with a vaulted ceiling and uplighting. Note the rafter of the original framing with “D. Millard” painted on it (and “1991” on the face). More history on the significance of that name, and the “Copeland 1929” and “M. Forbush” that also adorn the rafters in that room, can be found here and here.
With the basic layout complete, framing sheetrocked (and in many cases painted), the finish work–e.g. trim around the windows and baseboards, and some built-in elements— could begin.
I will cover the interior finish work in another blog–but just one vignette to tie the bow on this one:
While we were excited about gaining an upstairs closet and preventing heat loss by eliminating the chimney, we weren’t interested in losing the aesthetic of the fireplace in the living room (the mantle above was our placeholder).

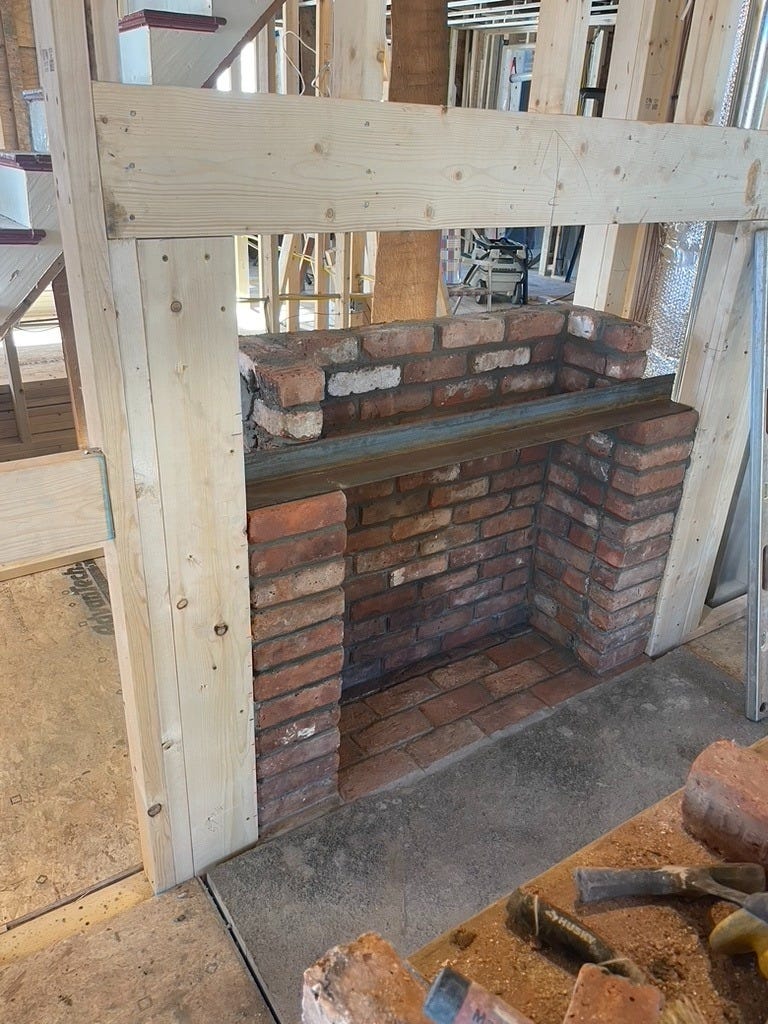
The very talented mason Greg, from JT Dow Services –who has done extensive work throughout the project on a retaining wall, patio, the wood stove chimney exterior, etc.--recreated a fireplace firebox, hearth and lintel to bring back the aesthetic of the fireplace that was removed. Shout out to Jason for finding reclaimed bricks from a warehouse demo to give the feel of an older fireplace.
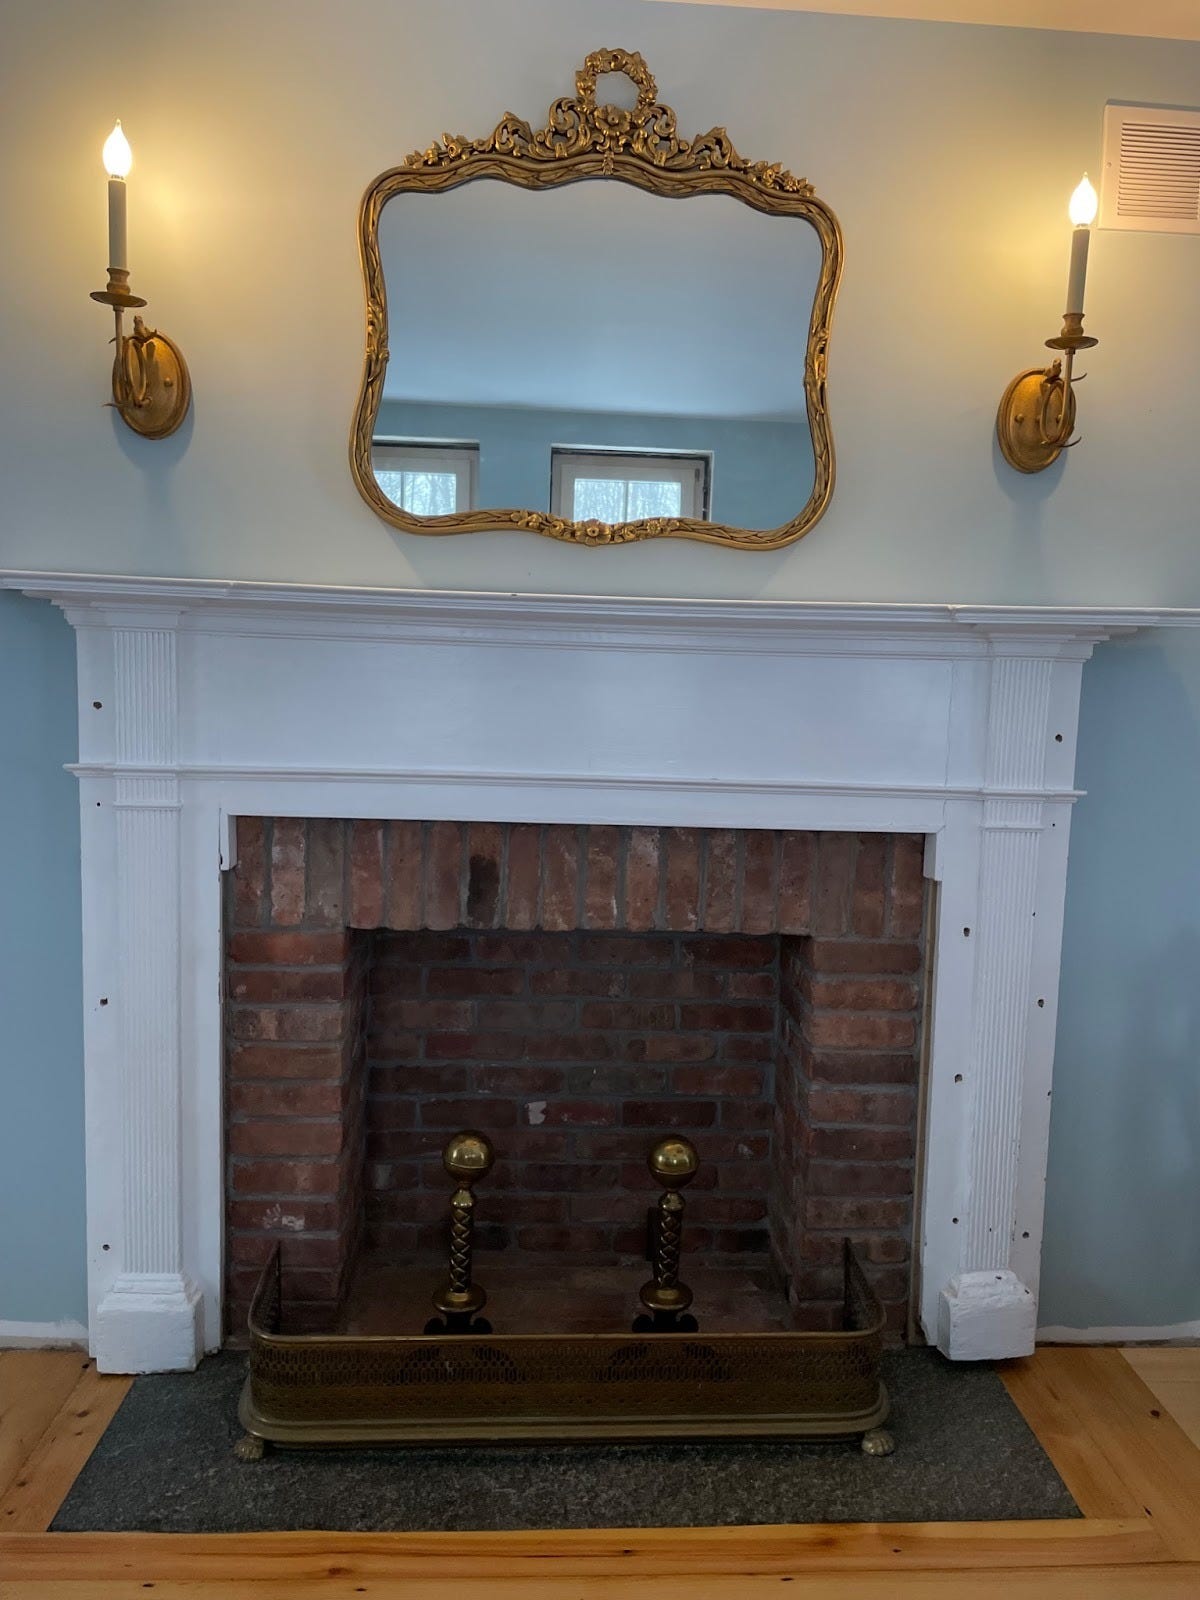
We’re really pleased with the look of the “new” fireplace! The only concern is that someone will try and use it!
Garrett would want any reader to know that the mantle is not complete in the photo above. He will rework the feet on the mantle so they sit flush the newly leveled floor. But this picture makes his original point. With the floor leveled, the mantle leg is now too short on the right when it sits on the floor to the left. Making that adjustment for one finish element isn’t such a big deal.
But if that had to be done with all the baseboard, all the doorways, all the doors….
No.
Just no.
Little Morsel. In the post A Modern Day Alchemist, I featured the craftsmanship of Jay Dumont. When I created the Green Dream Stories site, in collaboration with Jay’s spouse Pip, we intended it to become a space for others to share their path to creating their unique “Green Dream”. Well, I’m delighted to share that Jay and Pip will now be sharing their own Green Dream story on this site! It promises to be a thoughtful tale of what two talented two creatives have been doing to build their own efficient and beautiful home in Moe’s River, Quebec. If you’ve read the post about Jay’s work at our place, you already know it will be a demonstration of skill and thoughtful design! You can find their site here—expect new content soon!
For current subscribers to the Reading, Vermont Green Dream, you are subscribed to Jay and Pip’s story by default. You will have the option to continue to follow along or not as you wish going forward by choosing the appropriate selection in your preferences section. Having seen a little of what Jay and Pip are doing, I suspect you will want to join me in staying connected to their story! :)
This is an awesome read and the fact that you found all those interesting bits of history in the original house.
Having seen the project come together from the start it is truly amazing what you and your entire team have accomplished. You are now on the finish work which means you are getting closer to finishing the project. Congrats to all.
This is all the more fascinating since we toured your green dream house. You are an inspiration!